
Kitchen remodel ideas in 2026 span from $20 LED strips to $20,000 slab door replacements, but the filter that matters is not budget. It is whether you can reverse the change when your lease ends or your taste shifts. The projects that survive are the ones planned around exit cost: a $110 IKEA rail system that patches with $15 of spackle, peel-and-stick tile that holds only if you sand the gloss off first, or a rolling island that trades electrical for the ability to roll it against a wall.
1. Open Shelving With a Backup Plan
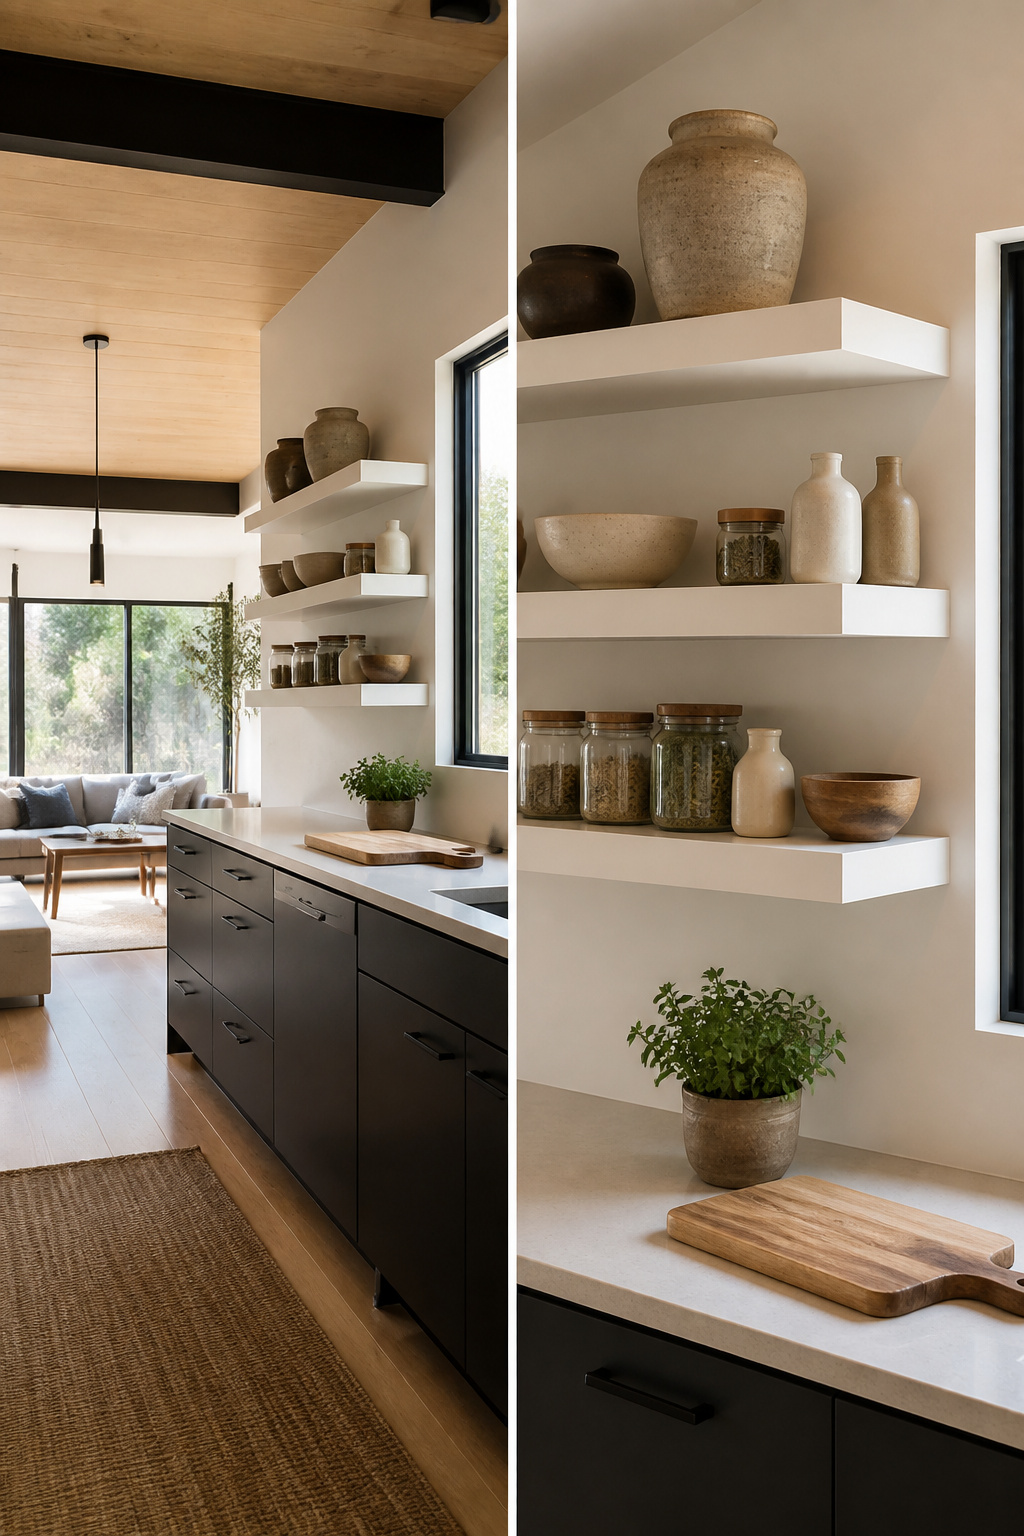
Open shelving reads as airy and modern, but renter installs often collapse on the question nobody asks first: what is behind that drywall. Toggle bolts need half an inch of clearance; a shallow wall cavity or a fire-rated assembly leaves you with a wobble that gets worse once plates go up. Read your lease, too. Some landlords treat shelf brackets as "fixtures" and deduct for holes larger than a finishing nail, which means your weekend project costs more at move-out than it saved upfront.
Slab shelving units sidestep most of this. They stand on the counter or hang on a rail system you patch with spackle, not structural repair. That matters because flat-panel cabinet doors are gaining fast, 69% of NKBA members now report the trend, and slab shelving carries the same clean plane without the cabinet quote. One renter I read about ran an IKEA KUNGSFORS rail system across a six-foot stretch, about $110 for rail, two shelves, and hooks. Move-out took two hours: unscrew, fill holes with joint compound, touch up with landlord-provided paint. Total patching cost, under $15. The look lasted two years; the deposit came back whole.
2. Bold Color on One Surface

Navy reads as black in a dim kitchen, so test it at the hour you actually cook. A single wall in Farrow & Ball’s Hague Blue covered about 65 square feet in a friend’s rental, two coats on a Saturday, and the color only looked intentional because she swapped the existing knobs for brushed brass pulls the same weekend. Without that hardware, it would have read as a patch, not a choice.
Emerald green on cabinet fronts needs more prep than a wall but hits harder. Degloss, prime with a shellac-based blocker, and expect to lose Sunday to second coats and dry time. Peel-and-stick backsplash panels in either color keep you under $150 and let you carry the sample to the hardware store to match the tone of gold exactly; the wrong yellow-gold against a blue base turns cheap fast. Stick to one surface. Two bold colors in a small kitchen fight each other, and this budget does not forgive do-overs.
3. Layered Lighting Without an Electrician
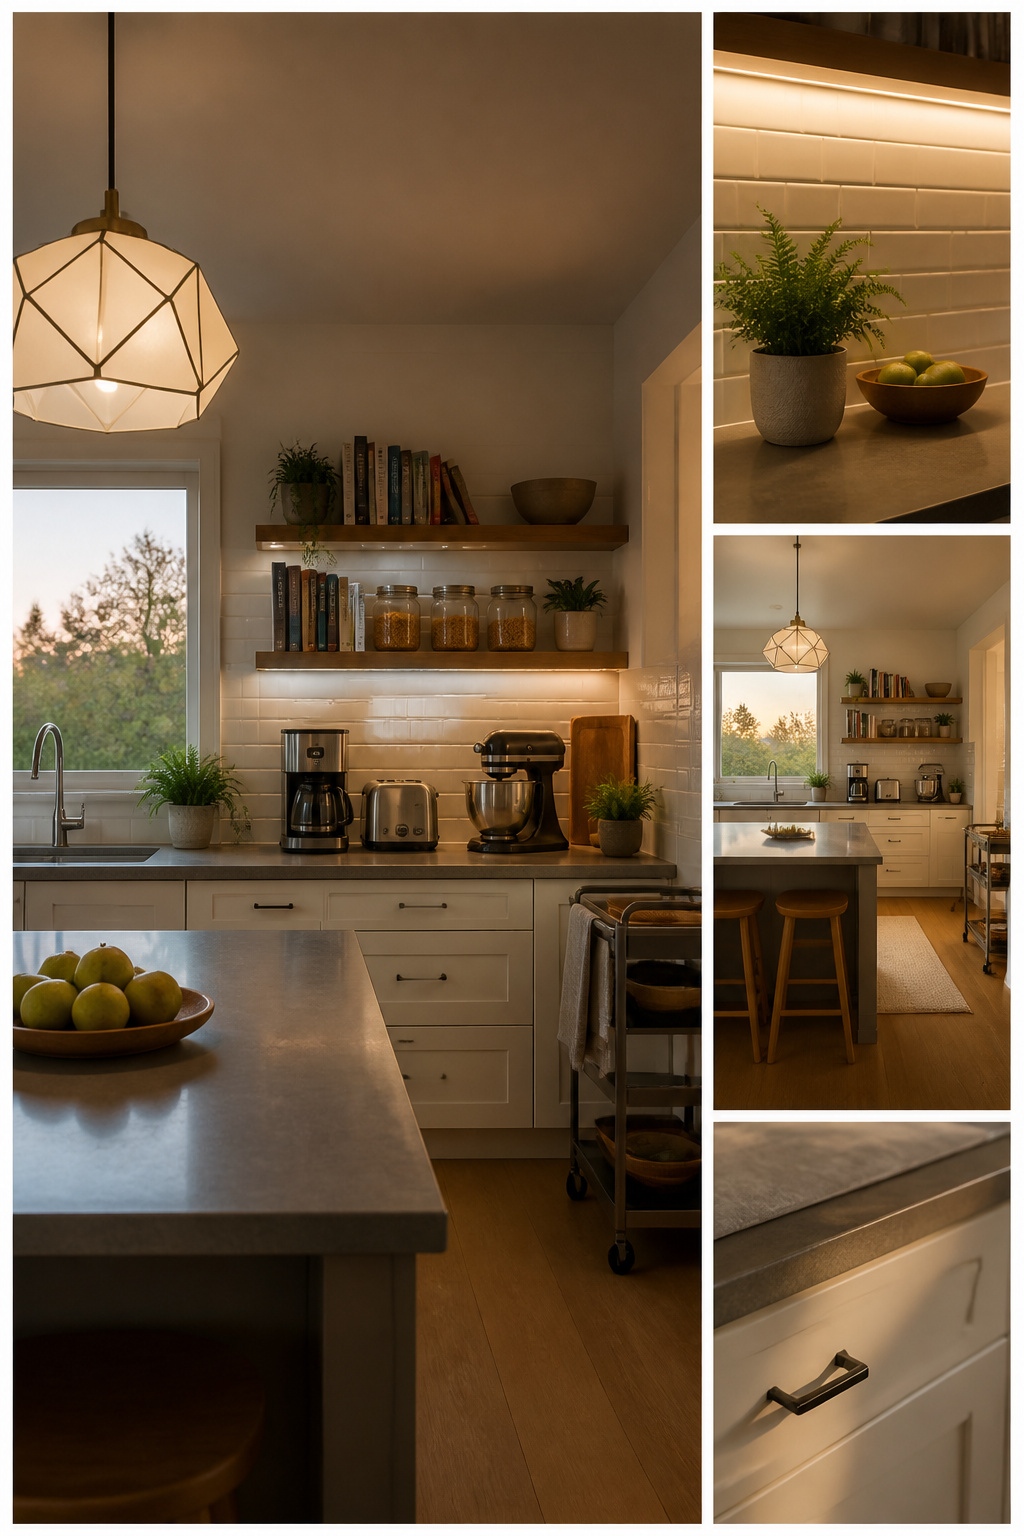
Most kitchens in rentals and starter homes rely on a single overhead fixture that turns the room harsh at 6 a.m. and dim at 6 p.m. Layered lighting fixes this without opening a wall.
Start under the cabinets. Plug-in LED strips run $20–$50 online, stick to the underside with adhesive backing, and plug into any outlet. The 3000K warm-white strips feel like afternoon sun; the 5000K daylight versions turn tomato sauce into an alien chemistry experiment. Stay at 2700K–3000K for anything below eye level. Run the cord behind the backsplash or under the cabinet lip to keep it invisible from the counter.
Inside cabinets, battery puck lights on motion sensors cost about $10 each. They last months on a charge and turn glassware into display. No wiring, no landlord negotiation.
For the ceiling, check whether your existing fixture sits on a junction box. If it does, swap in one statement pendant yourself. Turn the breaker off, match the mounting bracket, and keep the old fixture to reinstall when you leave. The pendant becomes your decorative layer; the strips and pucks handle the actual work.
This matters most in kitchens with small windows. Surveys show 95% of homeowners prioritize natural light, which means the rest of us are cooking in borrowed glow. Artificial layers are not a luxury if you want to dice an onion without guessing where your fingers end.
4. Multi-Functional Spaces That Fold Back
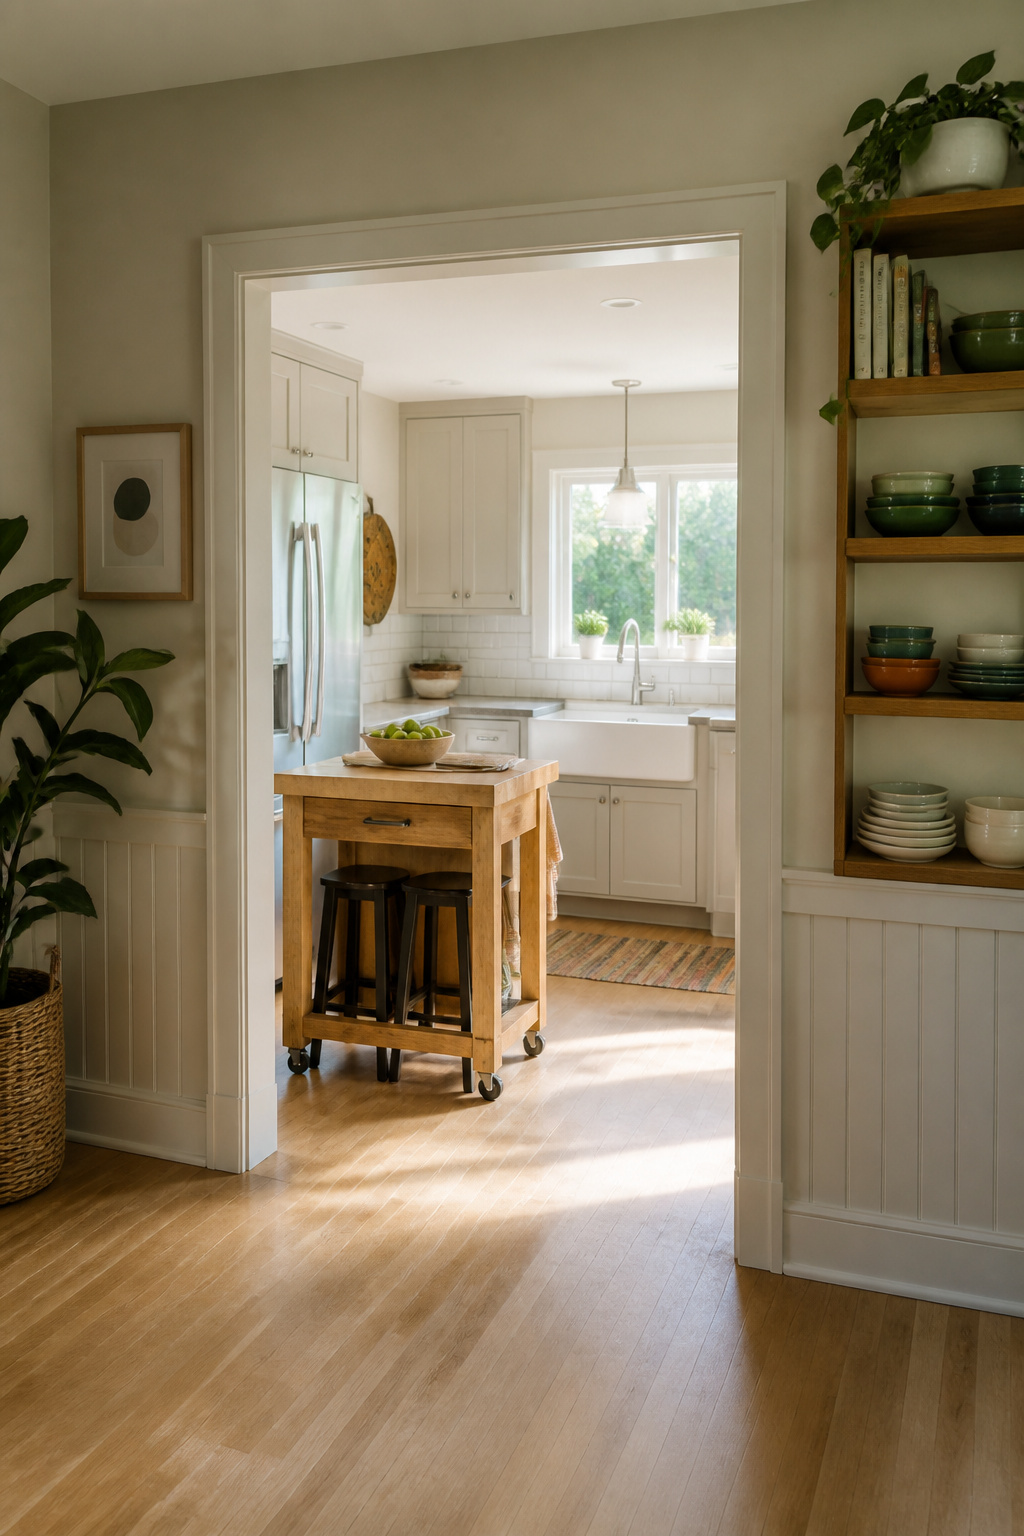
Forty percent of homeowners remodeling this year are choosing islands seven feet or longer, but that length assumes a kitchen with room to spare. In most starter homes, 4 to 5 feet is the dimension that actually fits without blocking cabinet doors or traffic flow.
A rolling island or drop-leaf table gives you the same triple purpose, prep, dining, and laptop space, without the permanent footprint. One project swapped a planned built-in island for a rolling butcher block on casters and gained roughly eight square feet of open floor. The trade was real: the rolling unit had no electrical, so the coffee maker stayed on the counter, and the leaf wobbled slightly when two people leaned on it. For a weekend install and under four hundred dollars, the flexibility was worth the compromise. Tuck it against the wall when you need floor space for a project; roll it center when you are rolling dough or signing paperwork between meals.
5. Natural Elements That Survive Steam
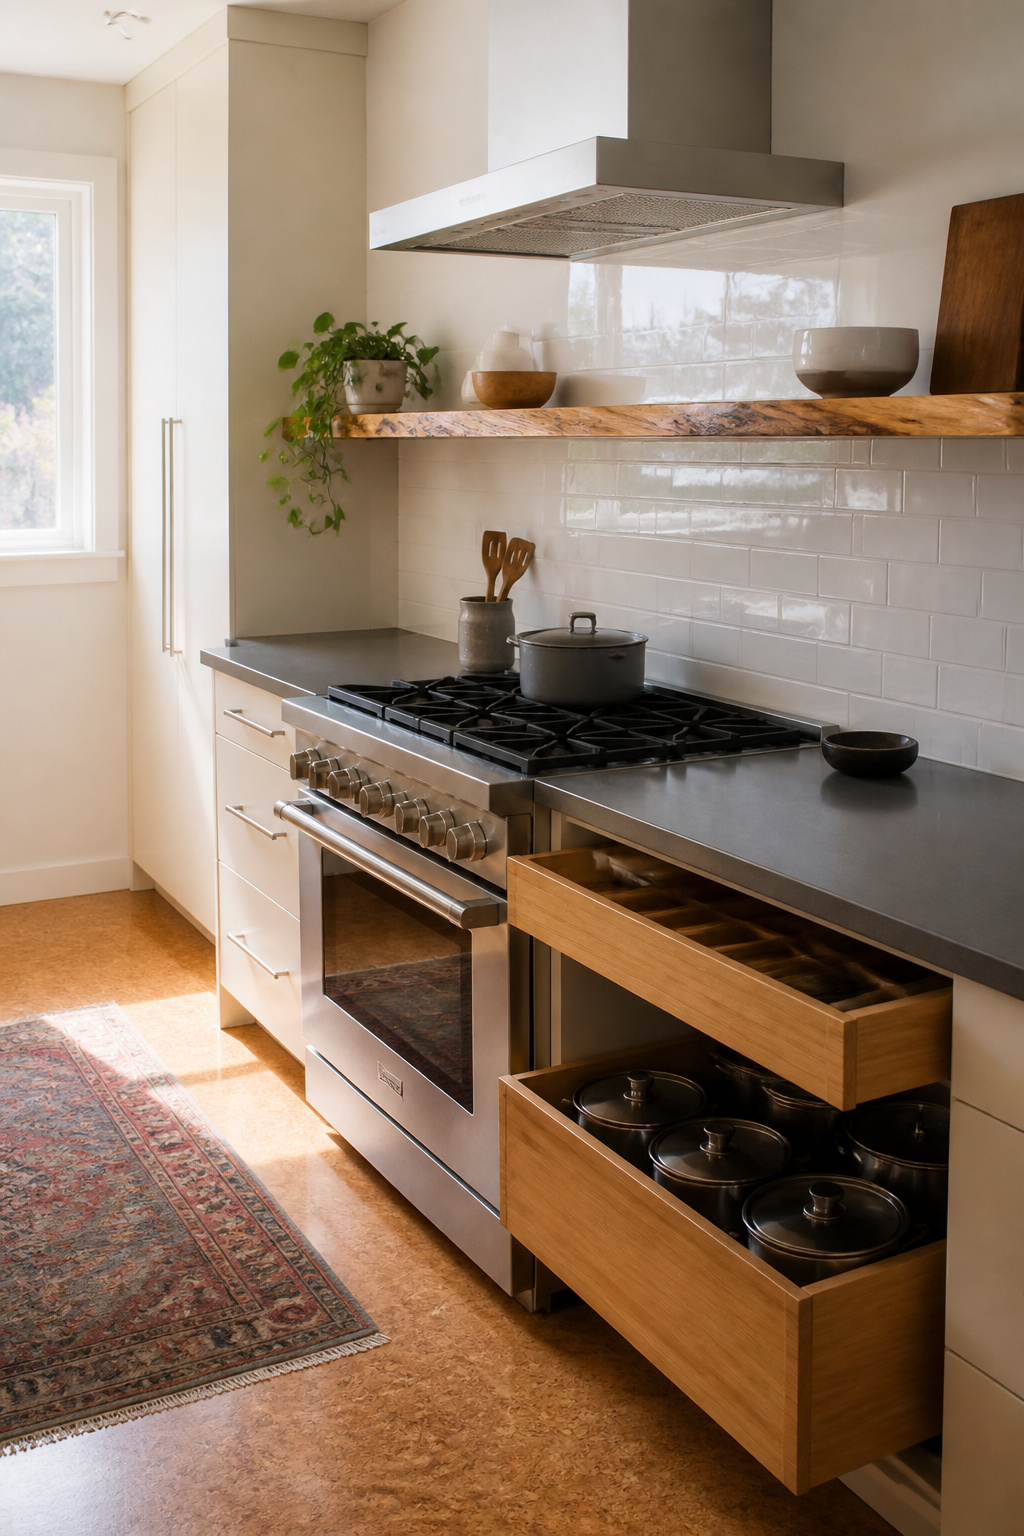
I once watched a homeowner install raw walnut shelving behind her gas range because the grain looked beautiful against white tile. Within eight months the boards had warped and darkened with grease stains she could not scrub out. Marine varnish is the difference between wood that lives in a kitchen and wood that merely visits. A live-edge shelf sealed with three coats holds up to steam from boiling pots and wipes clean with soap and water; expect to pay $8–$12 per square foot for the finished piece, or roughly $40–$60 for a two-foot shelf you install yourself.
Bamboo drawer organizers run $15–$30 and survive the humidity that warps cheap fiberboard in a year. Cork flooring tiles cost $3–$5 per square foot and spring back from dropped pans better than laminate, though you will want to reseal them every two years where the dishwasher vents. The untreated wood that failed behind that range was replaced with a sealed maple ledge cut from a single board. The fix cost $22 and twenty minutes with a drill.
6. Tile Design on a Peel-and-Stick Budget
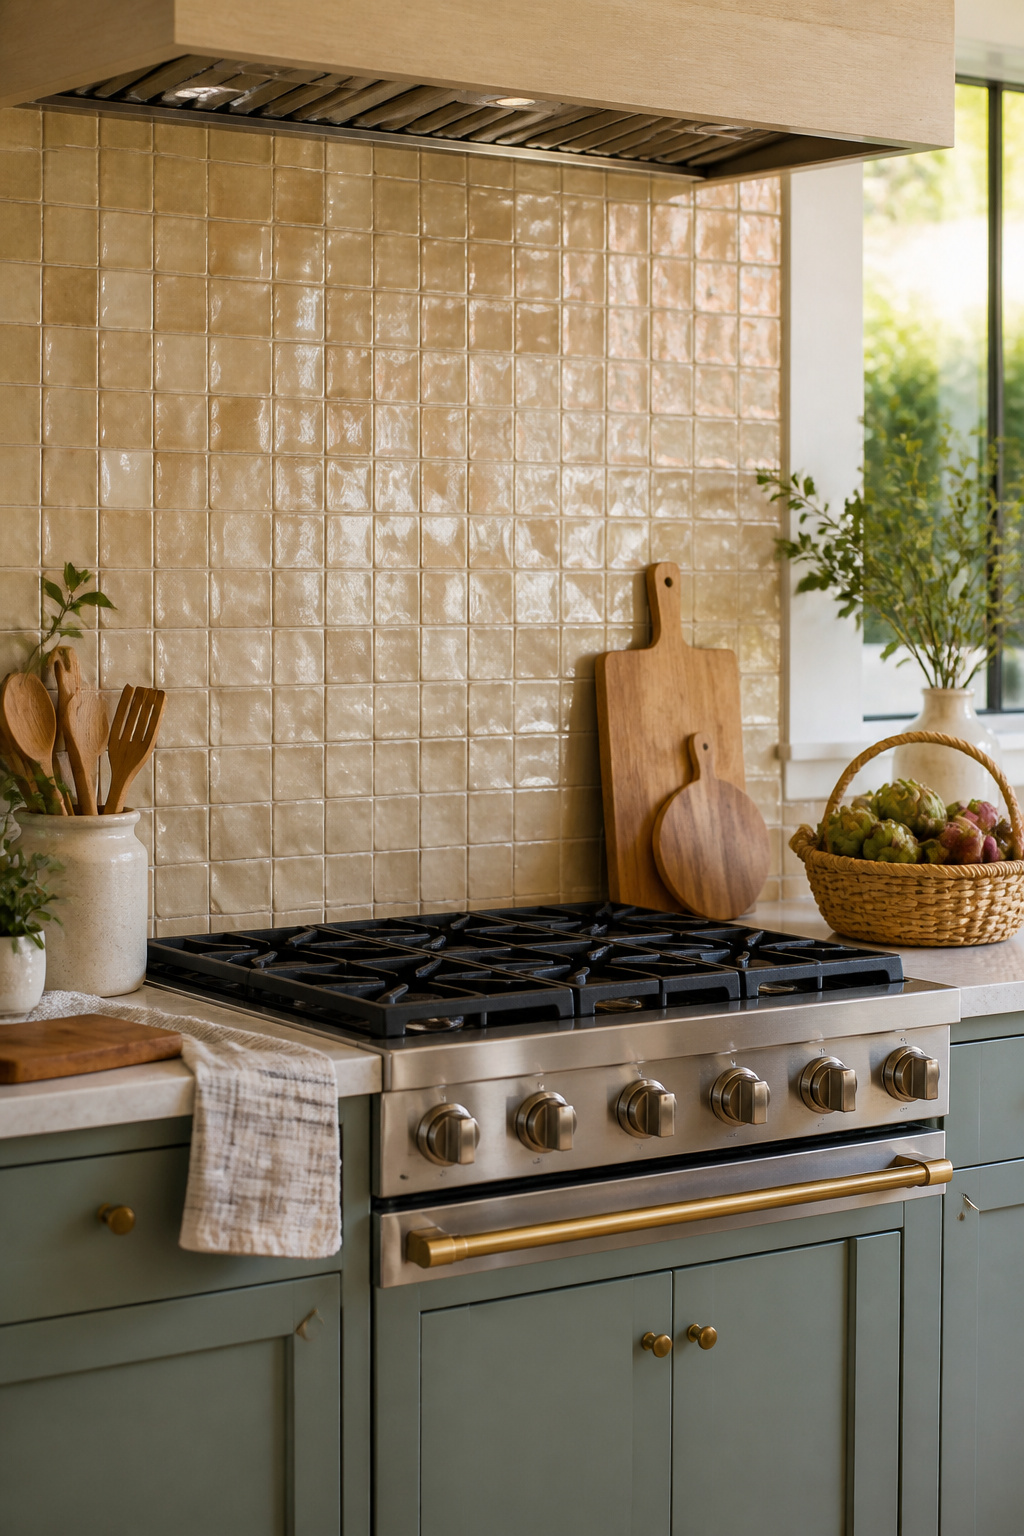
Peel-and-stick tile has come far enough that you can get the dimensional look of handmade zellige or staggered subway patterns without a wet saw or a grout float. The catch is the wall, not the tile. One project that worked covered about 22 square feet of dated 4-inch ceramic behind a stove using panels that mimicked uneven, glazed zellige. Sheets ran roughly $3.50 to $4 each, and the whole backsplash stayed under $90. The finish looked convincingly textured in daylight, not flat like early vinyl attempts.
The one preparation step that kept edges from lifting was taking the old tile down to a matte, scuffed surface. Glossy ceramic or grease film underneath lets the adhesive relax within weeks. A reader who skipped sanding reported every corner curling by week three; the one who spent forty minutes with 120-grit paper and a degreaser had the same panels holding at month eight. Heat from the cooktop cycles the adhesive, so that mechanical bond matters more than the marketing claims.
Painted tile with epoxy enamel is the slower alternative, but it lets you keep existing layout if the grout is sound. Two coats of a catalyzed kit, about $60 for a standard backsplash run, buys you five or six years before wear shows at the sink line. You lose the tactile depth of stick-on panels, but you gain the weekend back; the epoxy needs 72 hours of cure time before you can use the kitchen hard.
7. Engineered Stone Countertop Overlays
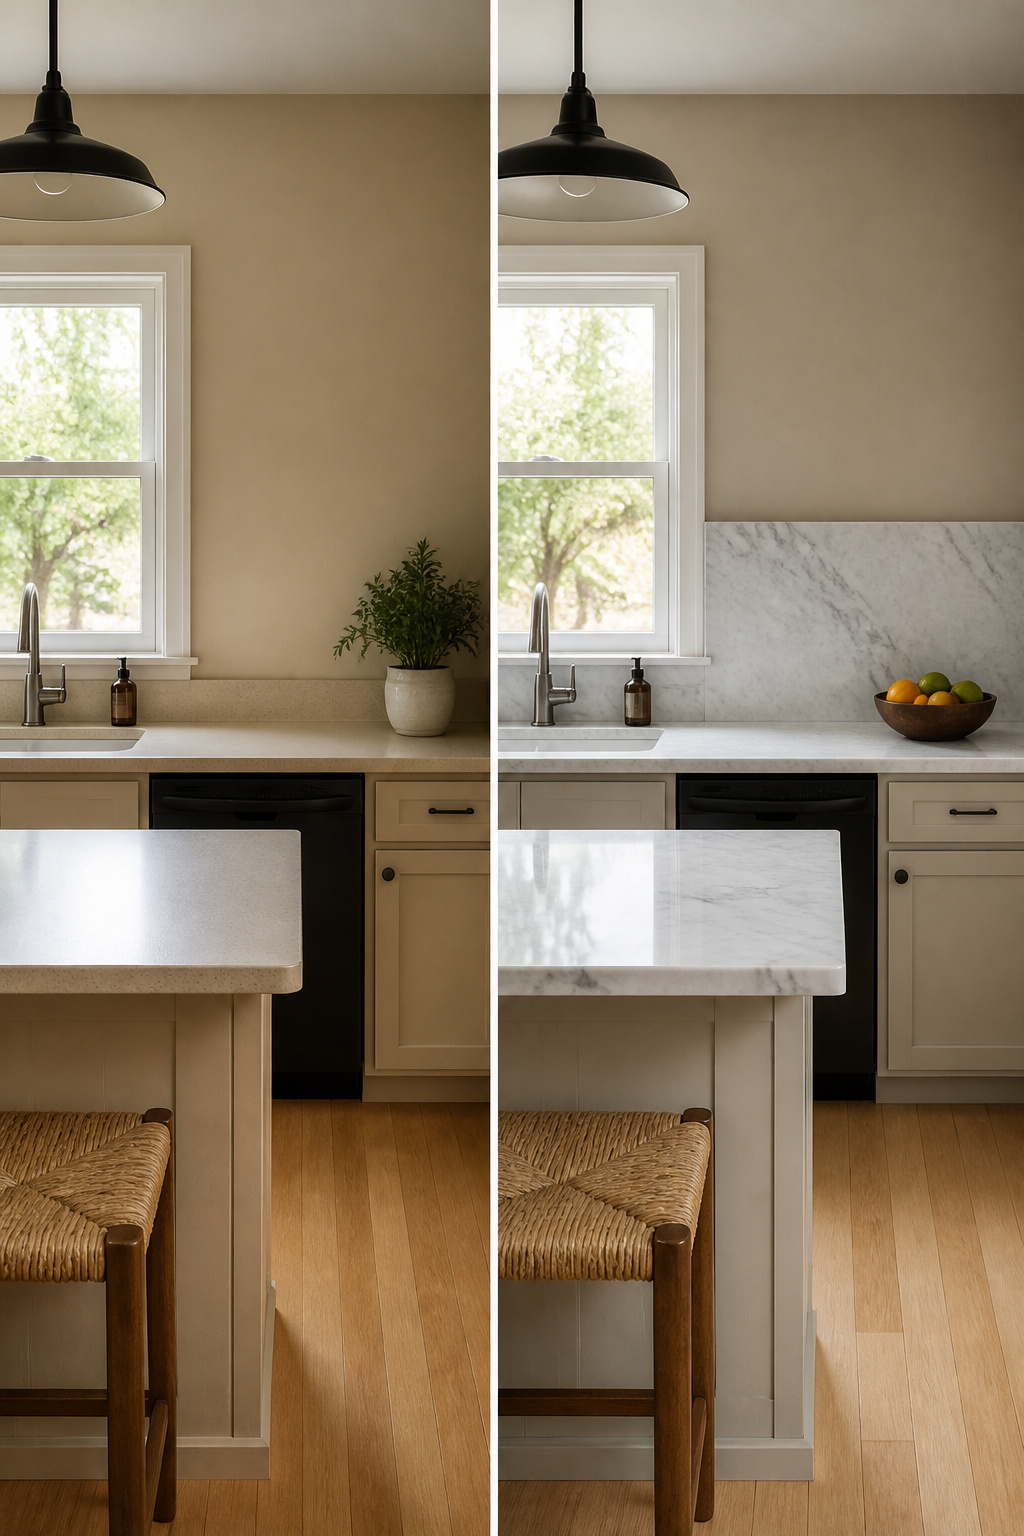
Engineered stone overlays give you quartz’s durability and stain resistance without the slab price that pushes medium kitchen remodels past $45,000. The material handles heat well and needs no sealing, which matters when you are laying it over existing laminate rather than starting fresh.
A refinishing kit such as Daich Coatings’ SpreadStone adds roughly 1/8 inch of thickness to your counter. That small lift means you will likely need to adjust your backsplash height or accept a visible gap where the old counter edge used to sit flush. Most homeowners run the new skim coat up the wall a few inches instead, treating it as an intentional transition rather than a mistake to hide.
The color range is wide enough to mimic marble or stay solid, and the bonded stone finish resists the chipping that cheaper epoxy kits show after a year of knife work. Plan on a full weekend: one day for prep and base coats, another for the stone layer and sealer. Rushing the cure time is where this project fails, since soft counters on Monday morning are harder to fix than laminate ever was.
8. Coffee Station Inside Existing Cabinetry
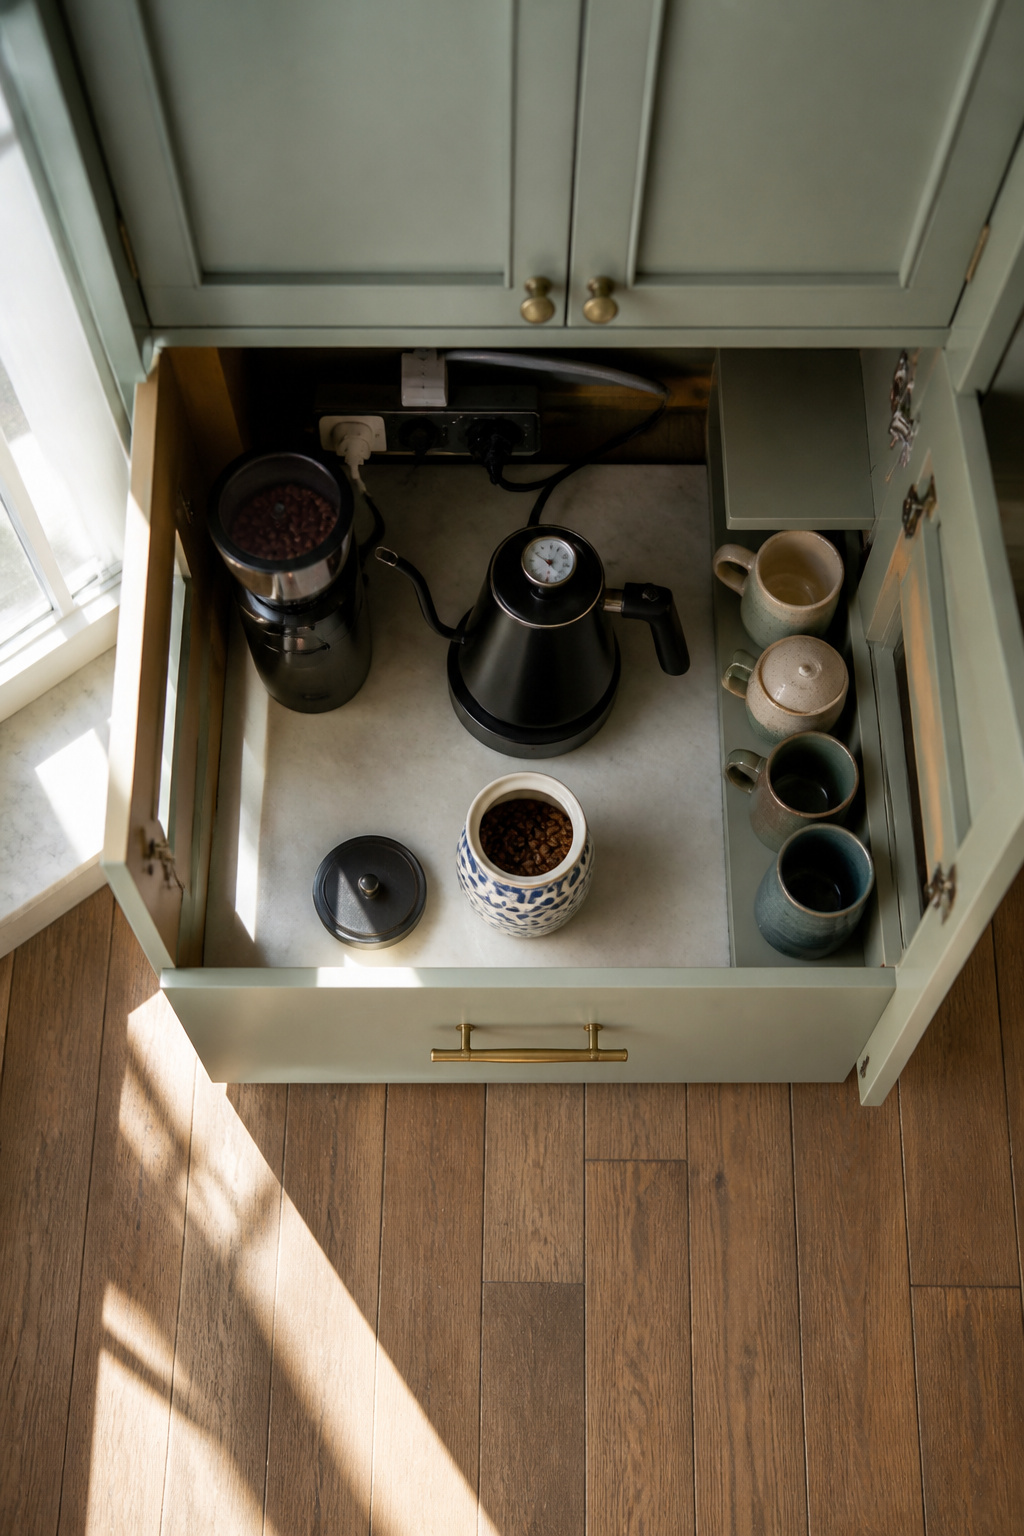
A coffee station works best when it borrows space you already have. Most people start their morning in the kitchen anyway, so the goal is keeping the mess off the counter without carving out a new zone.
One base cabinet, roughly 24 inches wide and deep, holds the whole setup if you pull the shelf. The lower half of a former baking cabinet, the one that held the stand mixer you used twice, is usually enough. What moves out is the bulky stuff: the roasting pan you need three times a year, the bread machine. That gear goes to a high shelf or the garage, and you gain a dedicated morning routine in its place.
The electrical part is where people stall. You do not need an electrician. One existing outlet inside the cabinet runs a small power strip, or you skip the wiring entirely with a battery-operated grinder and a kettle filled at the sink. The cord runs through the back panel if you drill a half-inch hole; most base cabinets have a thin backer that takes it cleanly.
A rolling cart is the fallback when every cabinet is spoken for. Same footprint, no demolition, and it slides back under the counter when the morning rush ends.
9. Butler’s Pantry in 24 Inches

A butler’s pantry does not require a butler or a pantry room. In a starter home or apartment, 24 inches of depth is enough to build one that actually works.
The project that sold me on this used a shallow closet off the kitchen, the kind that held brooms and half-empty paint cans. It was stripped back to studs, lined with three open shelves, and fitted with a narrow butcher-block surface at counter height. The open shelves hold the stand mixer, the bulky Dutch ovens, the bread bin that had colonized the main counter. The butcher block is where the coffee grinder lives now, and where you stage plates when the kitchen is crowded.
The shelving system was a painted pine kit from a hardware store, under $180 for the brackets, boards, and wall cleats. If you rent, skip the cleats and use heavy-duty floating brackets that patch with a dab of spackle later. The mistake to avoid is treating the depth as a limitation rather than a rule: 24 inches means you cannot walk in, but it also means nothing gets lost in the back. Everything you store stays visible, which is the whole point.
10. Statement Range Hood on a False Front
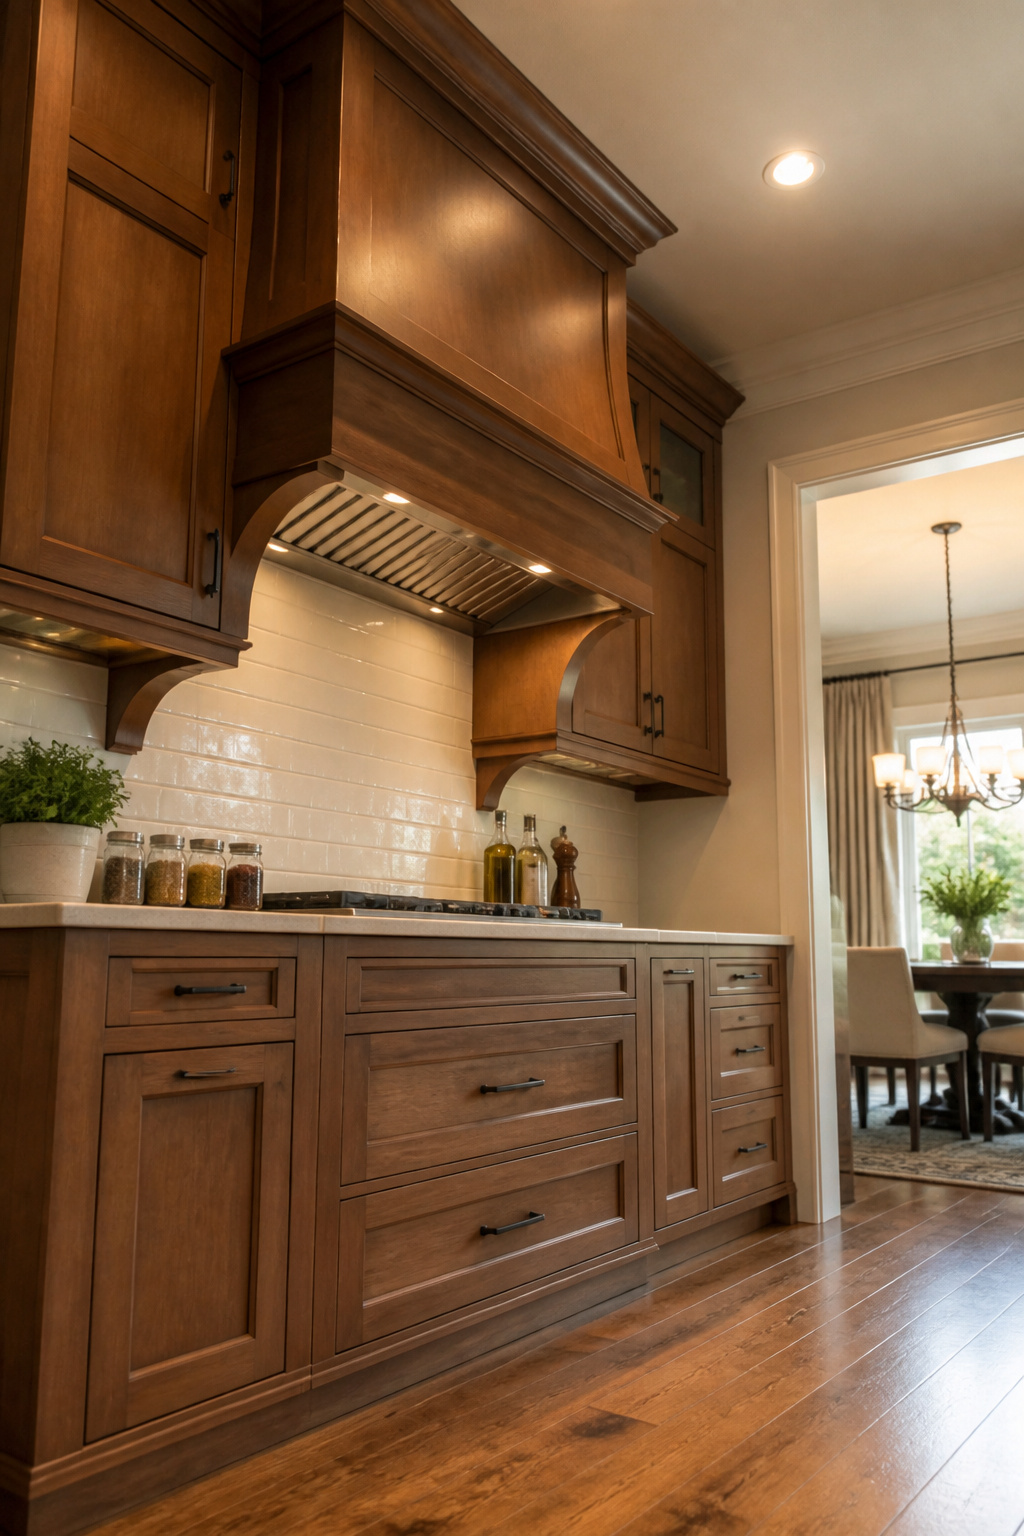
A statement range hood looks like a piece of furniture, not an appliance stuck to the wall. Most kitchens start with an under-cabinet model or a microwave combination, which means the ductwork and electrical are already in place but the visual presence is minimal. Building a false front around the existing unit lets you get that look without tearing out cabinets or reworking venting.
The project that made me read the fine print involved a simple wood box frame, some crown molding, and paint matched to the surrounding cabinets. The builder assumed the clearance listed in the microwave manual was the whole story, but the hood shroud brought combustible material closer to the cooktop than the original design allowed. The wood trim needed six inches of clearance above the burner plane, not the three the microwave itself required, and that almost put the crown molding directly in the heat zone. Checking the combined specs for both the appliance and the overlay material caught it before installation.
Venting was the other near-miss. The original microwave recirculated into the room, and the decorative shroud made that worse by trapping grease-laden air against the new wood. Switching to ducted venting through the cabinet above solved it, but only because there was attic access directly overhead. Without that path, this upgrade would have stayed a fire risk no matter how pretty the trim.
Budget Realities for This List
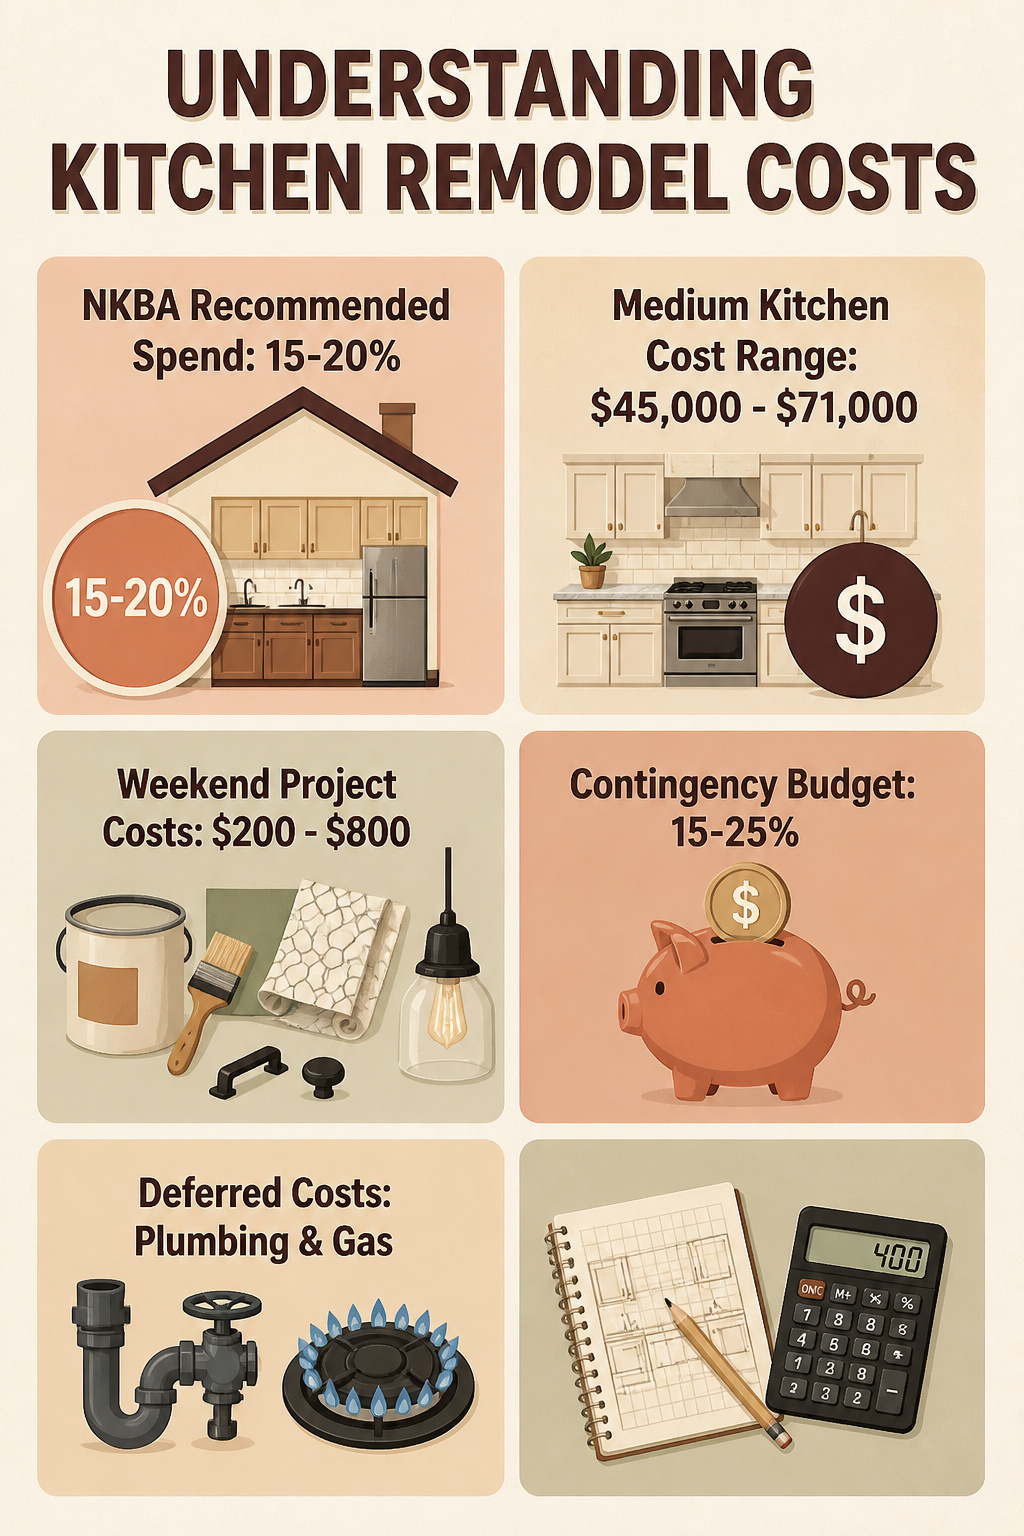
The NKBA recommends spending 15 to 20 percent of your home’s value on a kitchen remodel, which lands most homeowners in the $45,000 to $71,000 range for a medium kitchen. That figure is useful if you are selling in two years and need the equity back. For a weekend project with your own hands, it is the wrong anchor entirely.
The projects on this list ran $200 to $800. Most of that went to materials that wear the work: paint, peel-and-stick tile, contact paper, hardware, a single pendant light. The first cut is whether the change is permanent. If you are renting, money goes to portable or reversible pieces first. If you own, it goes to the element you touch most, usually the countertop or the cabinet front, because those are what you see at 6 a.m. with the coffee going.
Build a 15 to 25 percent contingency even at this level. At $400, that is $60 to $100, and it covers the second can of paint after the first color reads too purple, or the replacement bracket that did not ship with the shelf. What gets deferred is anything requiring a trade: plumbing, gas, dedicated circuits. Those are not weekend work, and a fixed budget should not pretend they are.
Color Schemes That Warm the Room
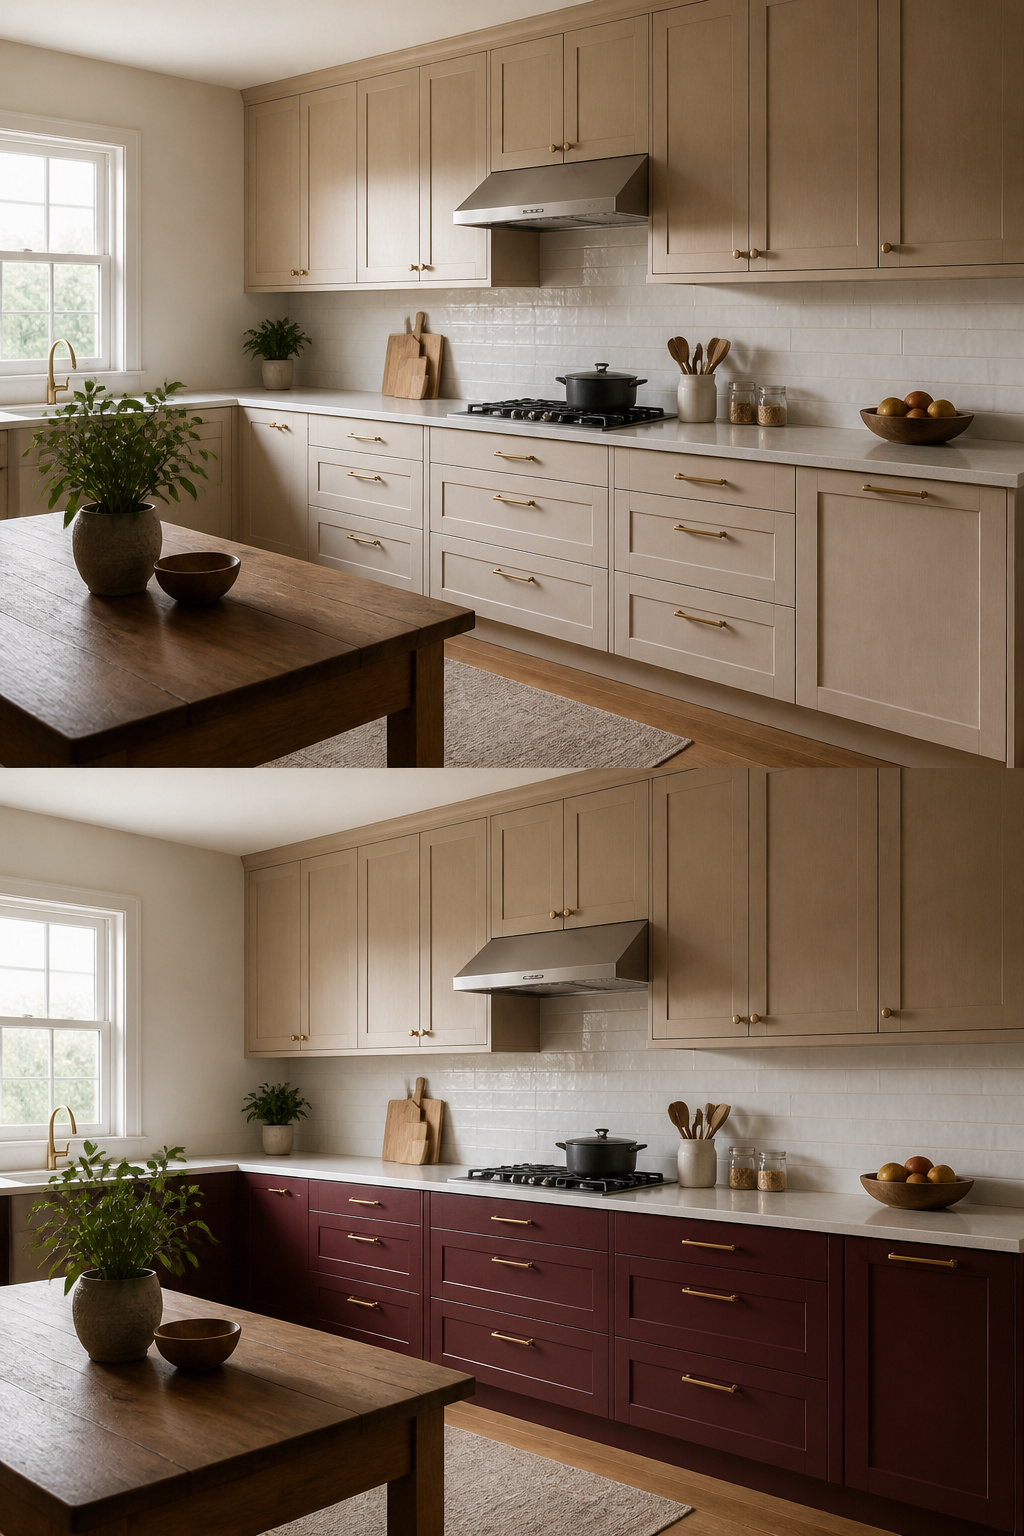
Warm neutrals are the ground almost everyone is painting on now. Putty, mushroom, and stony greige with brown or green undertones are the foundation tones 96% of NKBA professionals point to, not white. That shift matters because it gives you a base that reads as color without shouting, and it leaves room for one bold move somewhere else in the room.
A kitchen that started with mushroom cabinets and added burgundy lower drawers, paired with gold hardware, kept the warmth intact without dimming the space. White tile and countertops supplied the brightness the darker accent needed. Another project bought a bubblegum pink range first, then had to build the rest of the room to balance it. Antique brass, limewash, wood, marble, and emerald quartzite kept it from becoming what the designer called a Barbie Dreamhouse.
The lesson from the second project is the one that costs less: start warm and neutral, then add your jewel tone or bold appliance as the single accent. Reversing that order means every later choice becomes damage control.
Cabinet Styles Worth Keeping or Faking
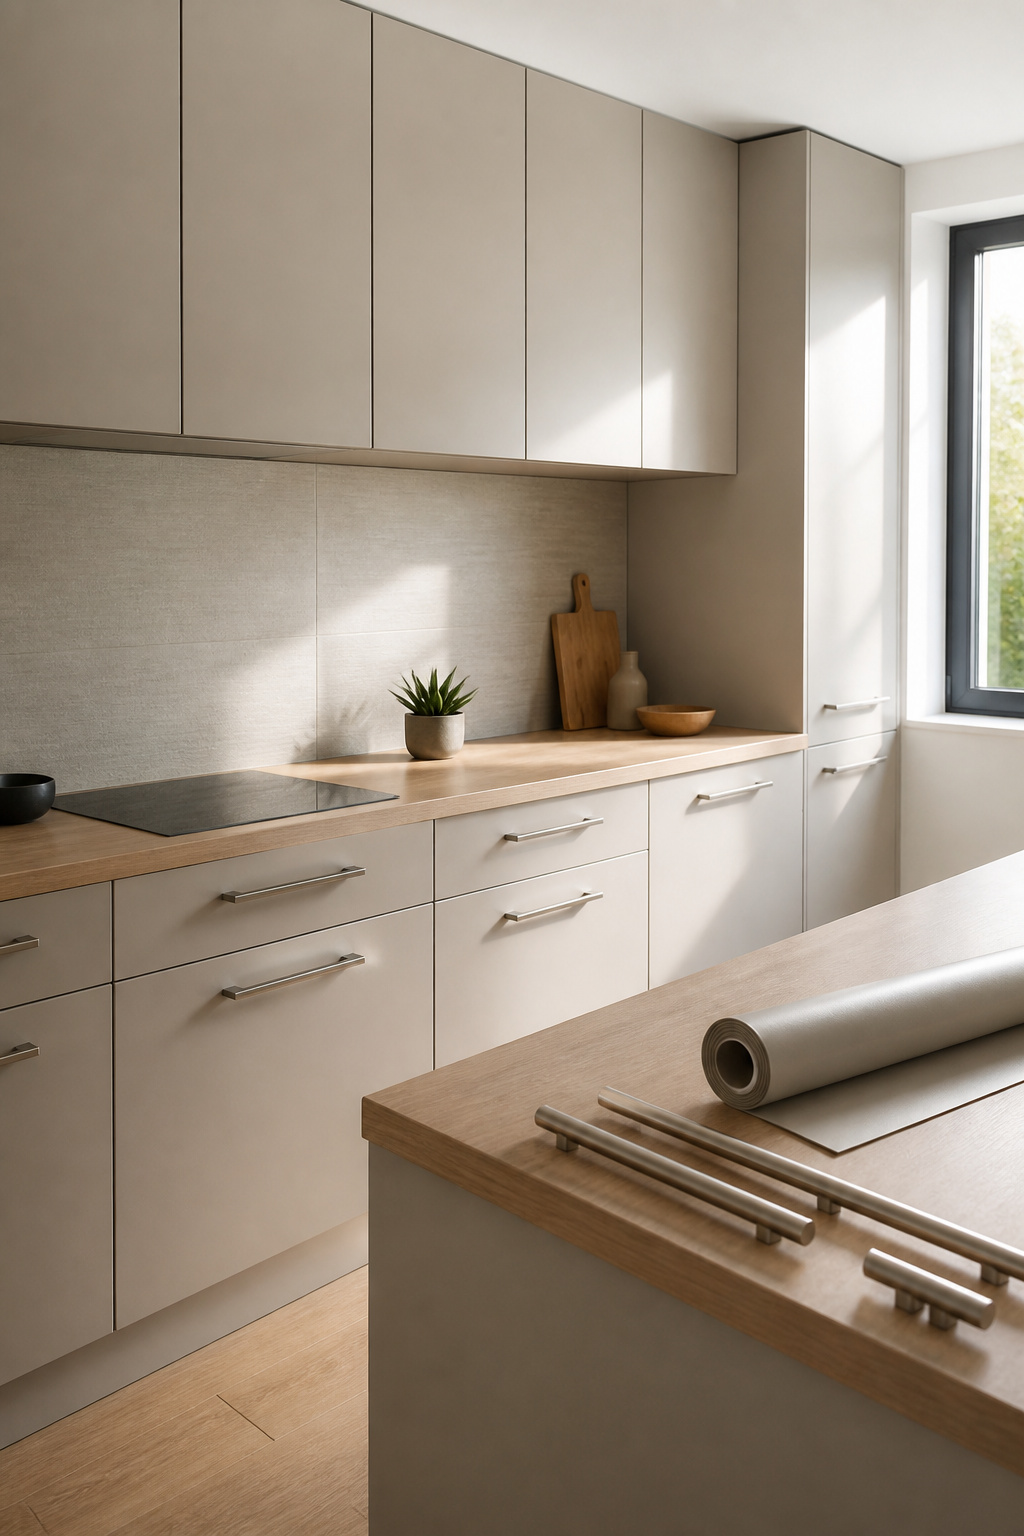
Flat-panel cabinet doors are gaining ground, with 69% of designers reporting them as a rising choice. They read modern, wipe clean without grooves catching grease, and usually cost 10–15% less than routed or raised-panel styles. For renters or anyone not replacing cabinets entirely, the look is still within reach.
The cheapest route is architectural adhesive film. Brands like 3M DI-NOC and Bodaq come in wood grains and matte solids that read factory-finished once applied, and you skip the sanding dust entirely. A full kitchen runs roughly $300–$1,500 depending on square footage. The catch is patience: bubbles and misaligned seams show, so work in small sections and use a sharp blade at corners.
If your existing boxes are sound, replacement flat-panel door fronts swap directly onto them. USA Cabinet Store stocks these; figure around $8,000–$20,000 for a full slab-door kitchen, which breaks to a per-door cost you can scale to however many cabinets you actually have. Pair with bar pulls or integrated edge grips instead of traditional knobs, and the flat-panel read holds even on older boxes.
Layout Flow Without Moving Walls
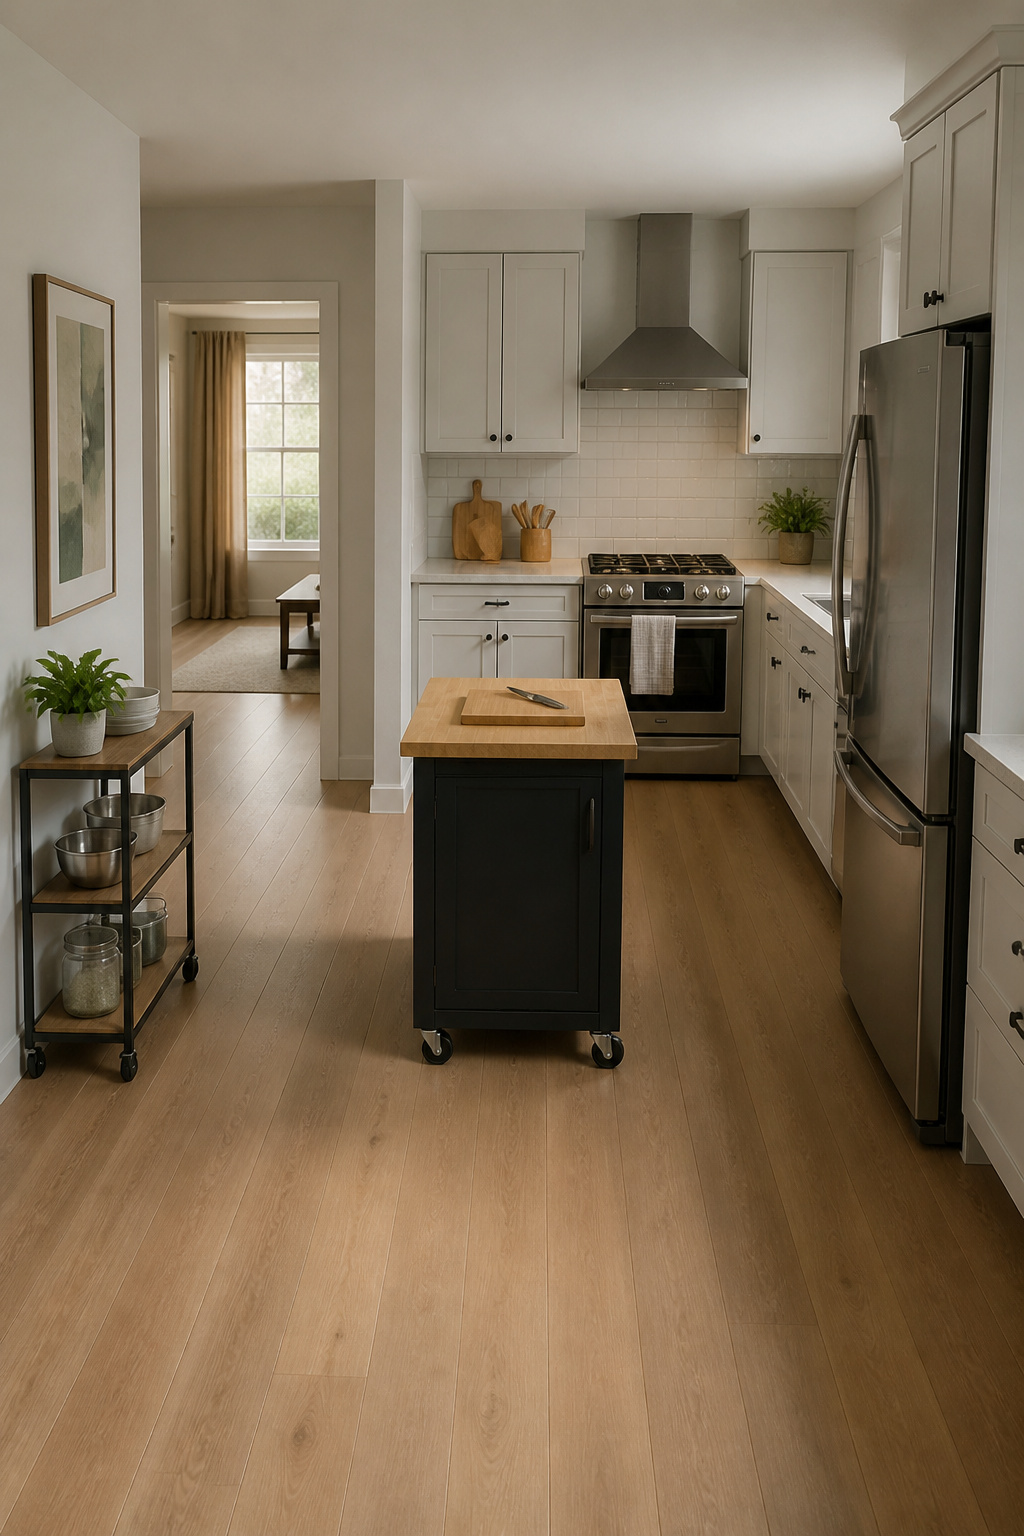
Most kitchens that feel cramped are only a few feet away from working well. The problem is rarely the walls, but the way the triangle between sink, stove, and refrigerator gets crossed by traffic.
In a ten-by-ten rental with a load-bearing wall splitting the cooking zone from a narrow galley, the fix came from treating appliances as movable anchors rather than fixed points. The refrigerator stayed put, but a rolling island, 24 inches by 36 inches, parked in the center gap and became the prep surface. Before the change, only 30 inches of clear floor space sat between counters. After shifting a rolling cart against the wall opposite the stove and pulling the island out only during active cooking, that clear zone widened to 48 inches of workable aisle, enough for two people to pass without colliding at the sink.
Rolling storage costs less than a static island because it skips installation, and it leaves the floor plan reversible for lease terms. The cart that held cutting boards and mixing bowls doubled as a serving station when guests arrived, then rolled back to its wall slot. The real gain was not square footage but the removal of crossed paths: the cook worked inside the triangle, guests moved outside it, and neither stepped around the other.
Smart Storage Most People Skip
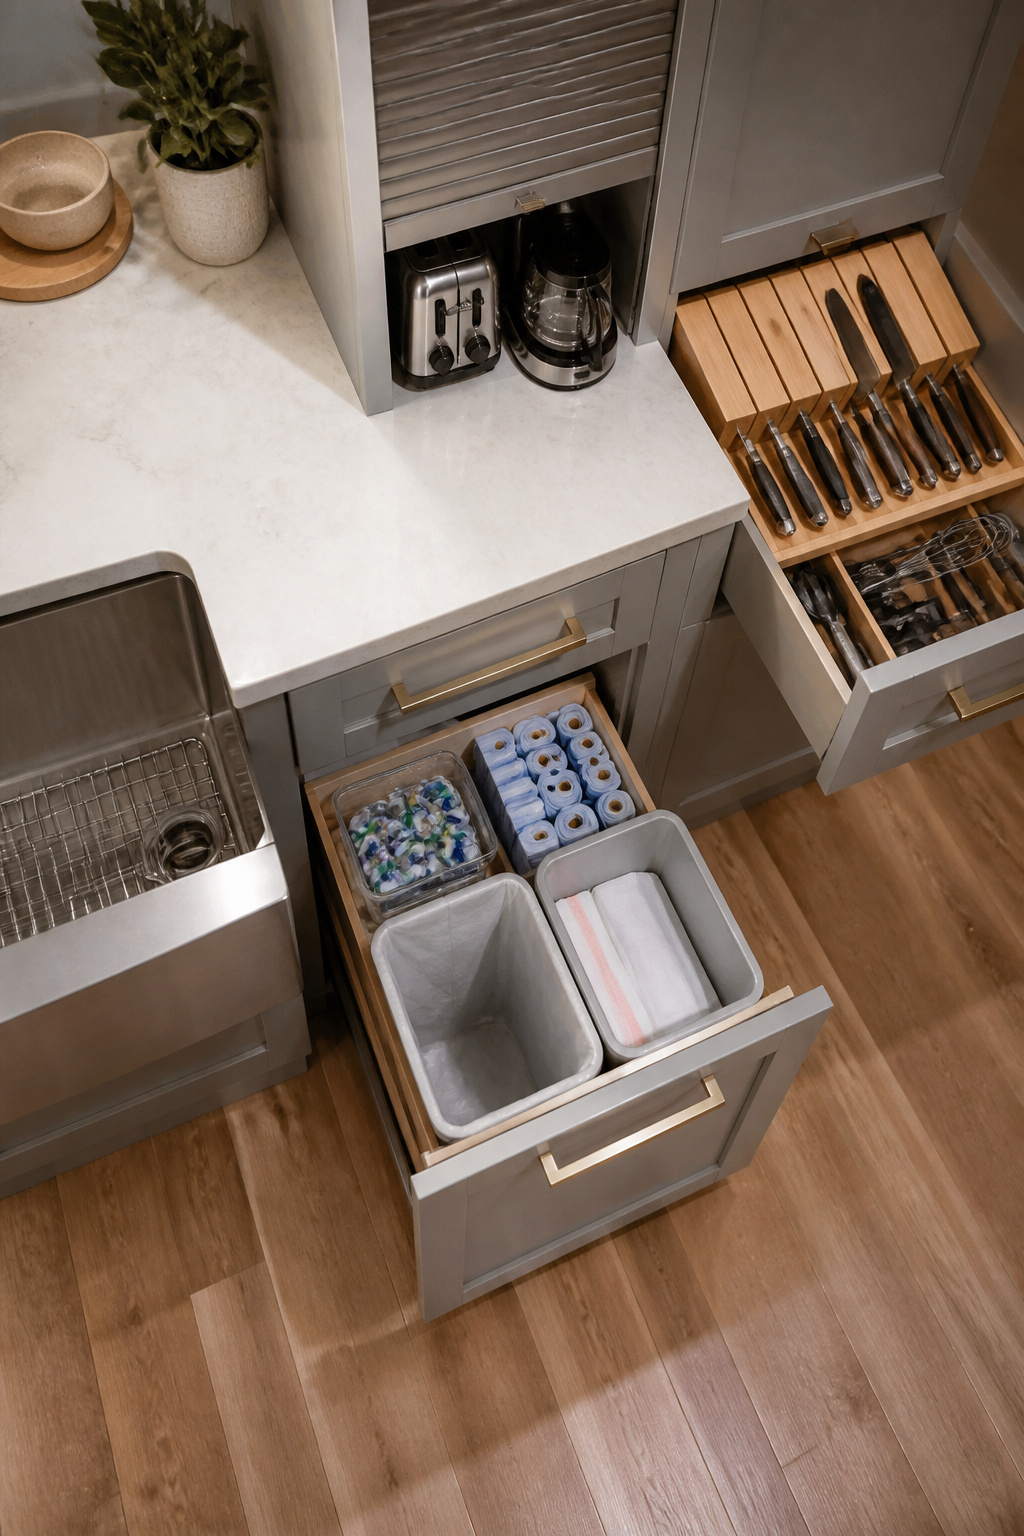
Most kitchen remodel ideas stop at cabinet faces, but the inside is where you live. A pull-out bin under the sink turns the cavern under the plumbing into usable space for dishwasher pods and trash bags. The before was a black hole of spray bottles you forgot you owned; the after is a 14-inch wire basket that rides on side-mounted slides and clears the P-trap by about half an inch. Measure the interior depth after the door frame, not the front opening. That half-inch is the difference between a bin that rolls smooth and one that jams on the hinge.
Appliance garages on the counter hide the toaster and coffee grinder you use daily but do not want to stage. A 24-inch-wide tambour door version sits between standard uppers and swings down when you need it. The one that failed was a 27-inch model for a 26-inch interior cabinet; the side walls were non-negotiable, and trimming it would have voided the hardware warranty.
The drawer organizer that changed the tool situation was a two-tier knife and gadget block, 20 inches wide by 16 deep, that dropped into a formerly mixed-purpose drawer. Before: a sliding pile of spatulas and a knife you reached for carefully. After: the knives stand vertical in a lined slot, the lower tray holds the microplane and can opener you use twice a week, and nothing nests where you cannot see it.
Frequently Asked Questions
What are the latest kitchen remodel ideas and trends for 2026?
The biggest shifts for 2026 include flat-panel slab cabinets, which 69% of NKBA designers now report as rising, and warm neutrals like putty and mushroom replacing stark white. Layered lighting, multi-functional islands or rolling carts, and natural materials that survive steam are also central. Bold accent colors such as navy or emerald green work best on one surface paired with brass or gold hardware, not spread across the room.
How much should I budget for a kitchen remodel?
The NKBA recommends 15 to 20 percent of home value, which typically lands medium kitchens between $45,000 and $71,000. The projects in this article ran $200 to $800, aimed at weekend hands-on work rather than full renovations. Build a 15 to 25 percent contingency even at that level; at $400, that means setting aside $60 to $100 for the second paint can or replacement bracket.
What color schemes are popular for kitchens in 2026?
Warm neutrals dominate, with 96% of NKBA professionals pointing to putty, mushroom, and stony greige with brown or green undertones as the foundation. Accent colors follow, with greens at 86% and blues at 78% among designers. The rule that keeps the room from dimming: start warm and neutral, then add one bold move, a burgundy drawer bank, a navy wall, or a jewel-toned appliance, rather than building backward from the statement piece.