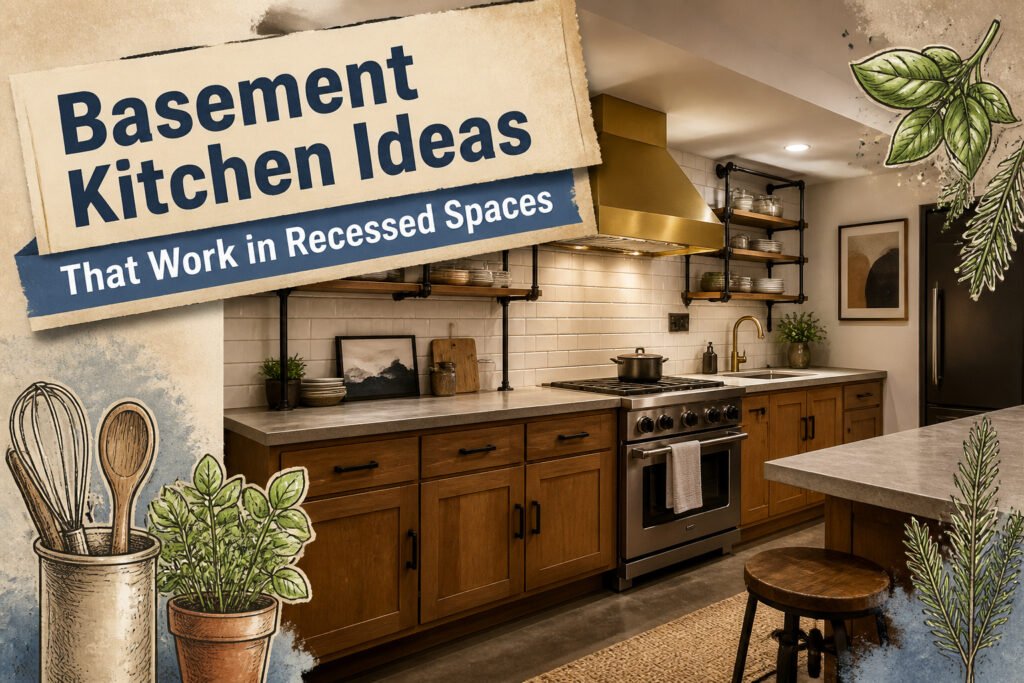
A basement kitchen works only when the infrastructure is solved first. Plumbing rough-in, electrical upgrades, and code-compliant headroom eat most of the budget before a single cabinet gets ordered; the granite countertop is never the deciding factor. That is the condition that reorders every choice below.
A brass range hood catches what little light exists and throws it back across the room, but the CFM rating matters more than the finish because basements trap grease with no windows to crack.
1. Custom Brass Range Hood
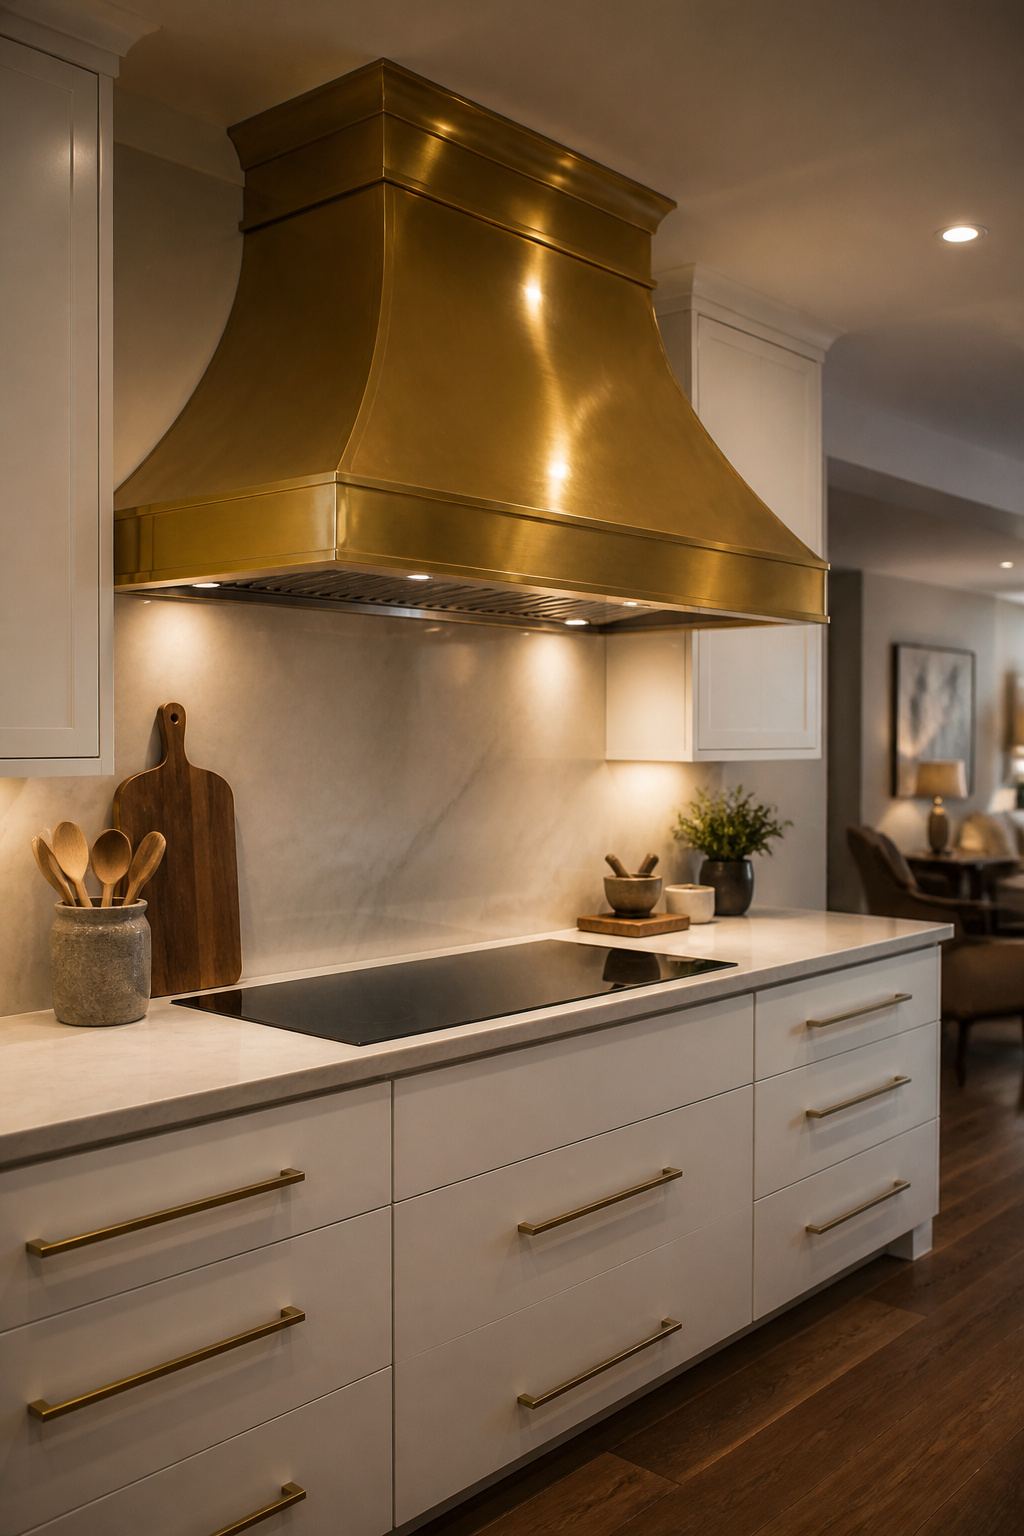
A brass range hood catches what little light a basement kitchen gets and throws it back across the room in a way painted steel never manages. That warm reflection matters when your ceiling is below grade and the window count might be zero. The finish reads as custom even when the surrounding cabinets are stock, which is why it works as a focal point without demanding a full luxury budget.
What does cost more is the metal itself. Brass runs higher than painted steel, and a custom fabricator will charge for both the material and the hand-finishing. Whether that premium is worth it depends on how much visual weight you need over the stove.
Where the money cannot be trimmed is the fan. Basements trap grease and smoke in ways upstairs kitchens do not, especially with no windows to crack for cross-ventilation. The CFM rating matters more than the metal finish here. A brass shell with an underpowered blower still leaves you with lingering odors and a film on every surface. Size the unit to the cooktop, run the ductwork to the exterior if code allows, and treat the hood as art only after it functions as ventilation.
2. Integrated Dining Nook
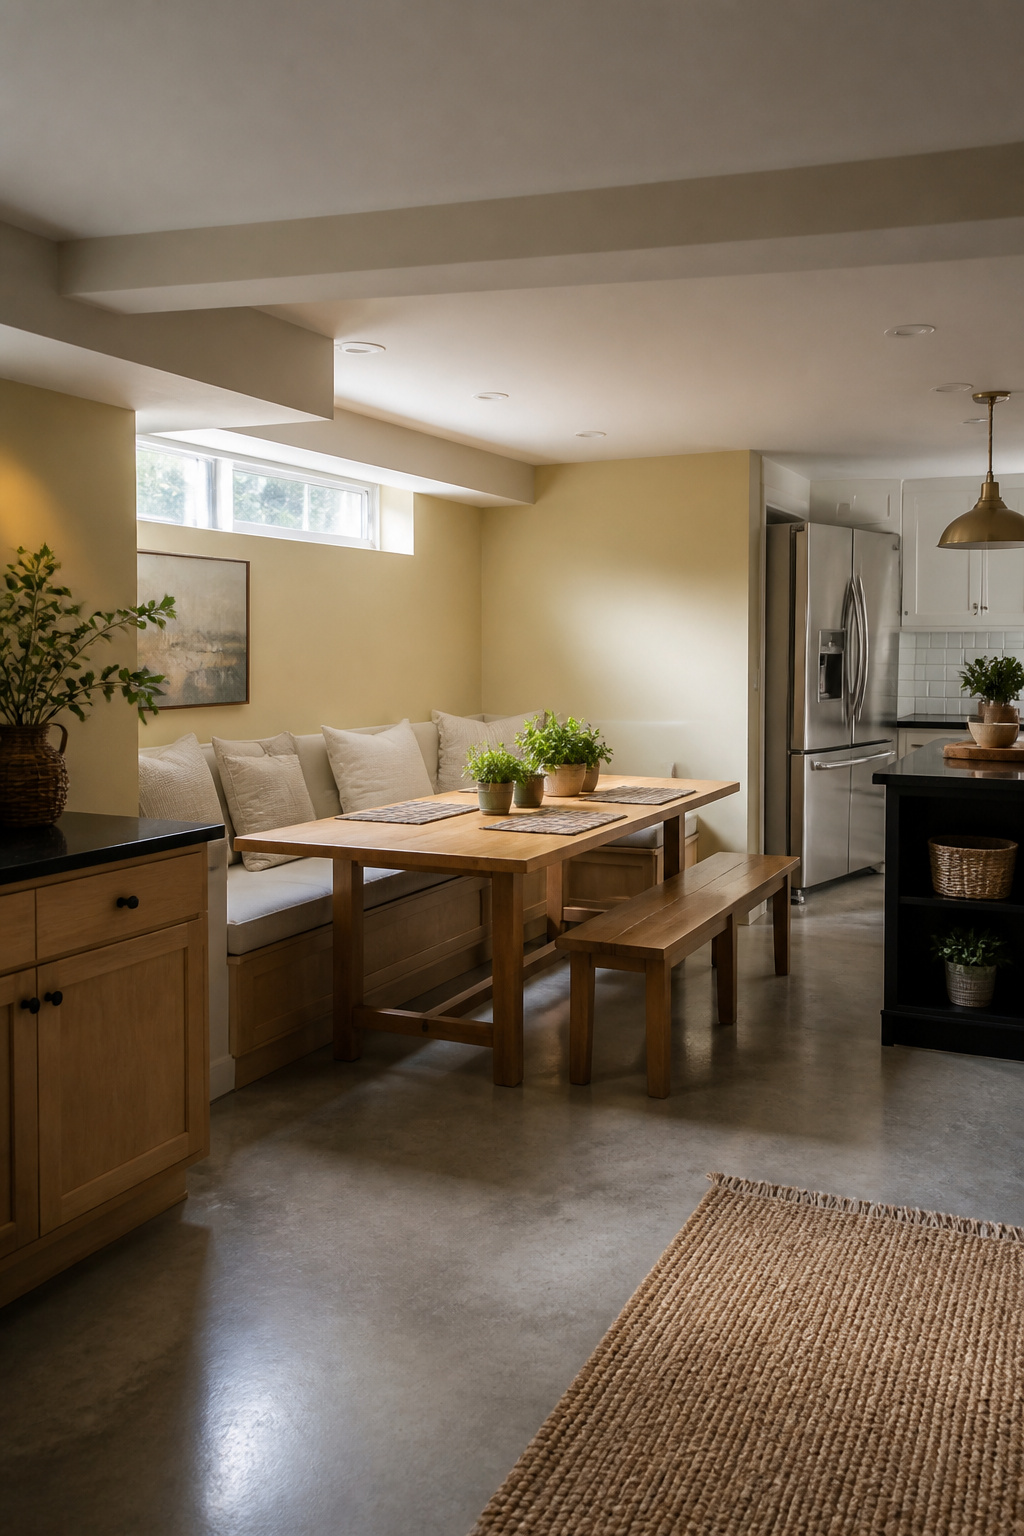
Built-in bench seating along a basement wall gives you back the floor space a freestanding table and chairs would eat up. The standard depth for comfort is 18 inches, which leaves enough room to lean back without crowding the walkway behind you. In a 5×7 foot nook, that depth still leaves two feet of clearance for someone to pass while you are seated.
The mistake that turns these nooks into caves is stopping at the seat. Paint or panel the wall above the bench in a light, warm color, something with enough yellow in it to counteract the gray cast of basement daylight. A matte finish reads softer than eggshell in low light. Keep the bench cushion and back pillows in the same family, not high-contrast, so the eye moves across the whole volume instead of stopping at the dark horizontal line.
Storage underneath works best with lift-top seats rather than drawers. Drawers need clearance you do not have in a 5×7 space, and the hardware adds cost. A piano hinge across the back edge keeps the opening simple and the lid from dropping on fingers. If the wall is concrete, bolt the frame through to the sill plate rather than trusting tapcon screws in the block alone.
3. Floating Cabinets
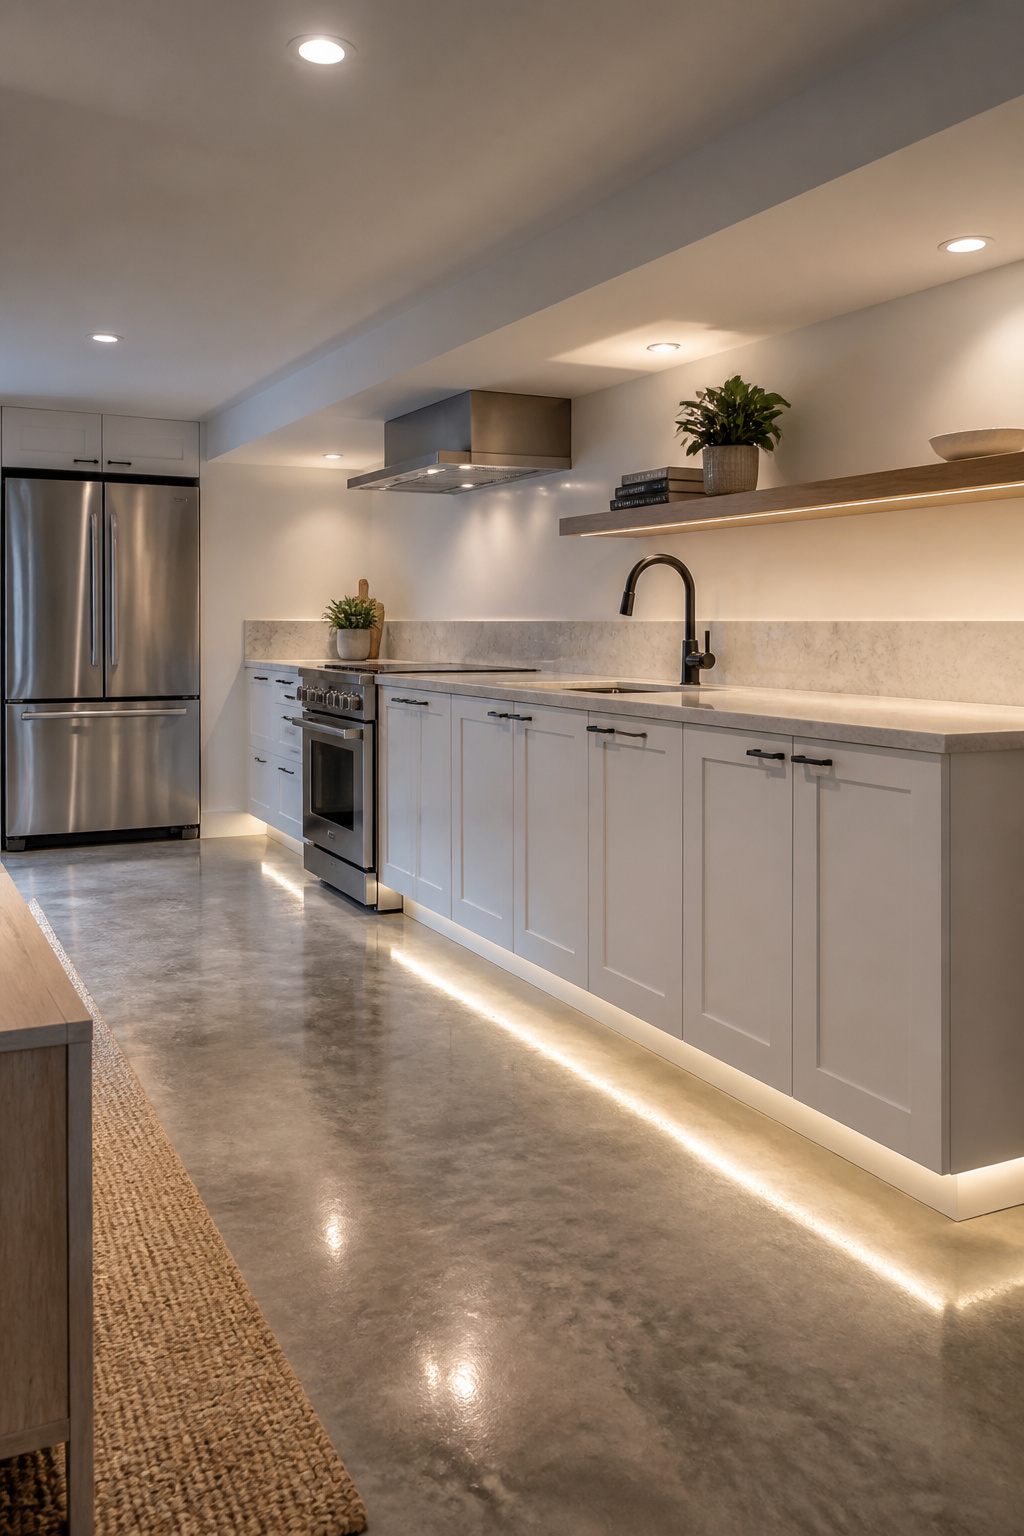
Wall-mounted cabinets with no visible legs buy back visual space in a basement kitchen where every inch of headroom counts. The gap between the cabinet box and the floor draws the eye through, so the room reads larger than it is. The standard 33-inch counter height still applies, and floating units hit that mark without needing the floor to be perfect underneath; the bracket hardware carries the load into wall studs, which matters in older basements where the slab slopes or heaves. Shaker-style cabinetry works especially well here. Its framed panel and minimal ornamentation keep the look clean, and you can paint it to match the walls or leave it in natural wood if you want warmth against concrete surroundings. Add integrated undermount LED strips beneath the wall cabinets. Modern fixtures draw very little power and install onto the cabinet box itself, so you get task light without sacrificing the open feel. Gloss finishes with metal accents push the look modern; traditional wood tones ground it. Either way, the floor stays visible and the ceiling feels higher than it measures.
4. Modern Concrete Counters
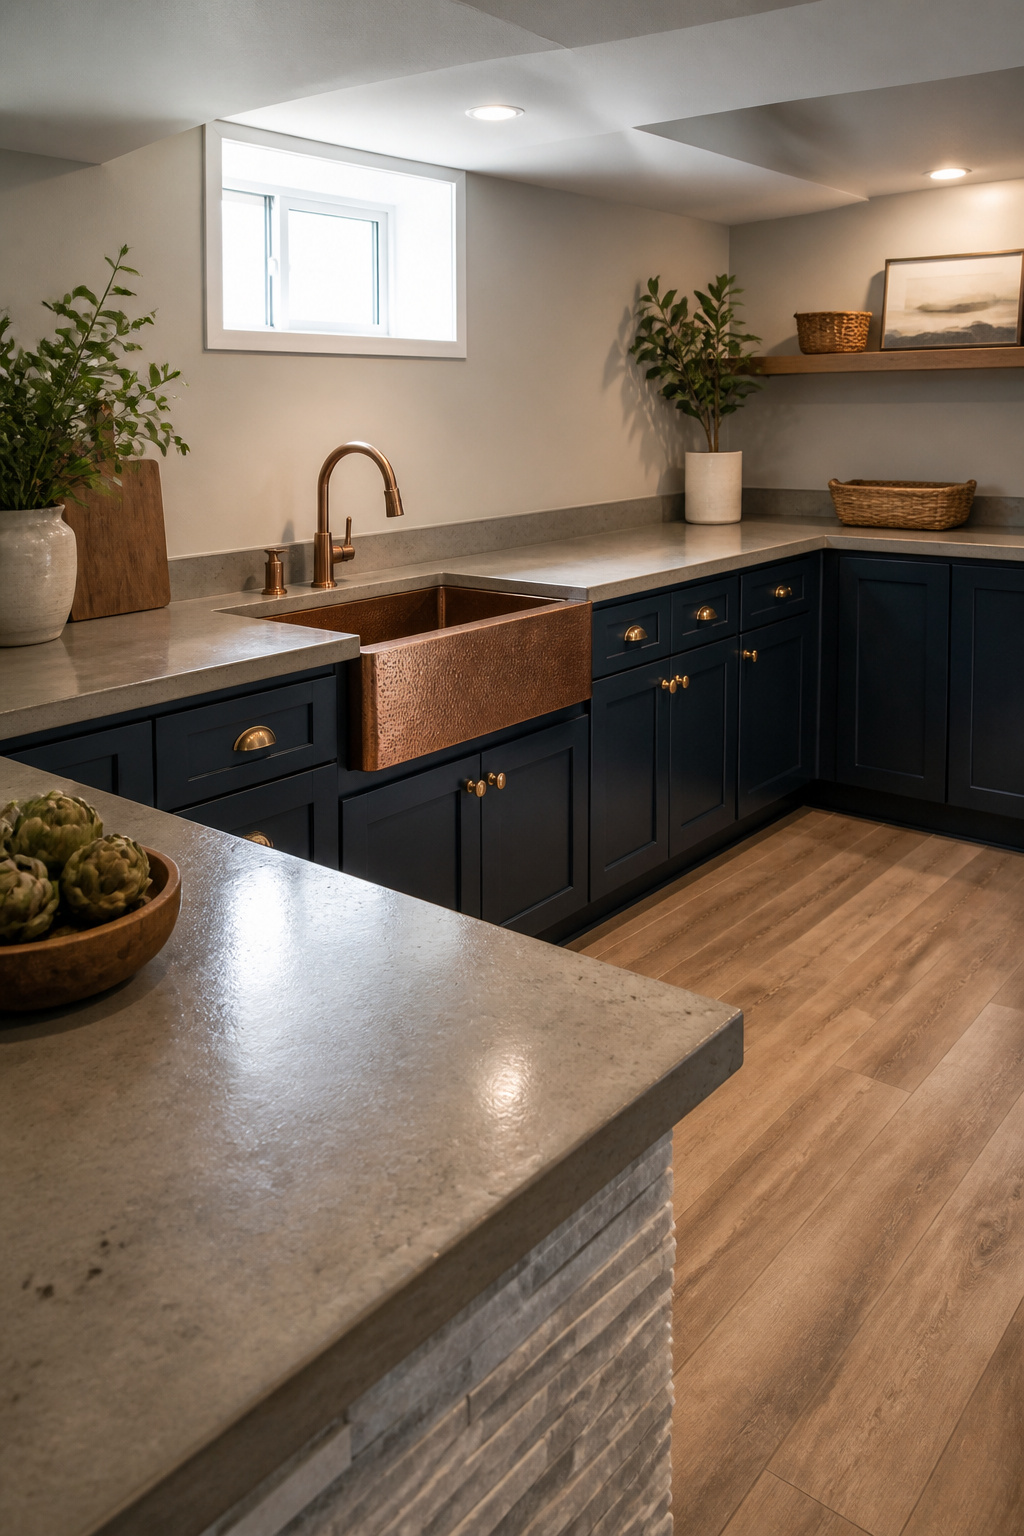
Polished concrete runs $65 to $135 per square foot installed, which puts it at the higher end of basement countertop options but buys you a surface that shrugs off basement humidity. Butcher block warps and rots where moisture lingers; concrete with a proper sealer does not.
The weight is the catch. Standard concrete counters run 18 to 22 pounds per square foot, enough that you should confirm your basement slab can handle the load without reinforcement. Modern precast mixes with glass fiber or polymer additives drop that weight considerably, sometimes to under 10 pounds per square foot, and they still take a hot pot straight from the oven without scorching.
The cold feel is real. Concrete pulls heat from your hands and from a coffee cup faster than laminate or stone. Pair it with a hammered copper fixture for warmth, or run a toe-kick heater beneath the cabinets. The surface itself can be tinted warmer than industrial gray; ask the fabricator for samples in the brown or ochre families rather than adding color after the fact.
5. Open Shelving
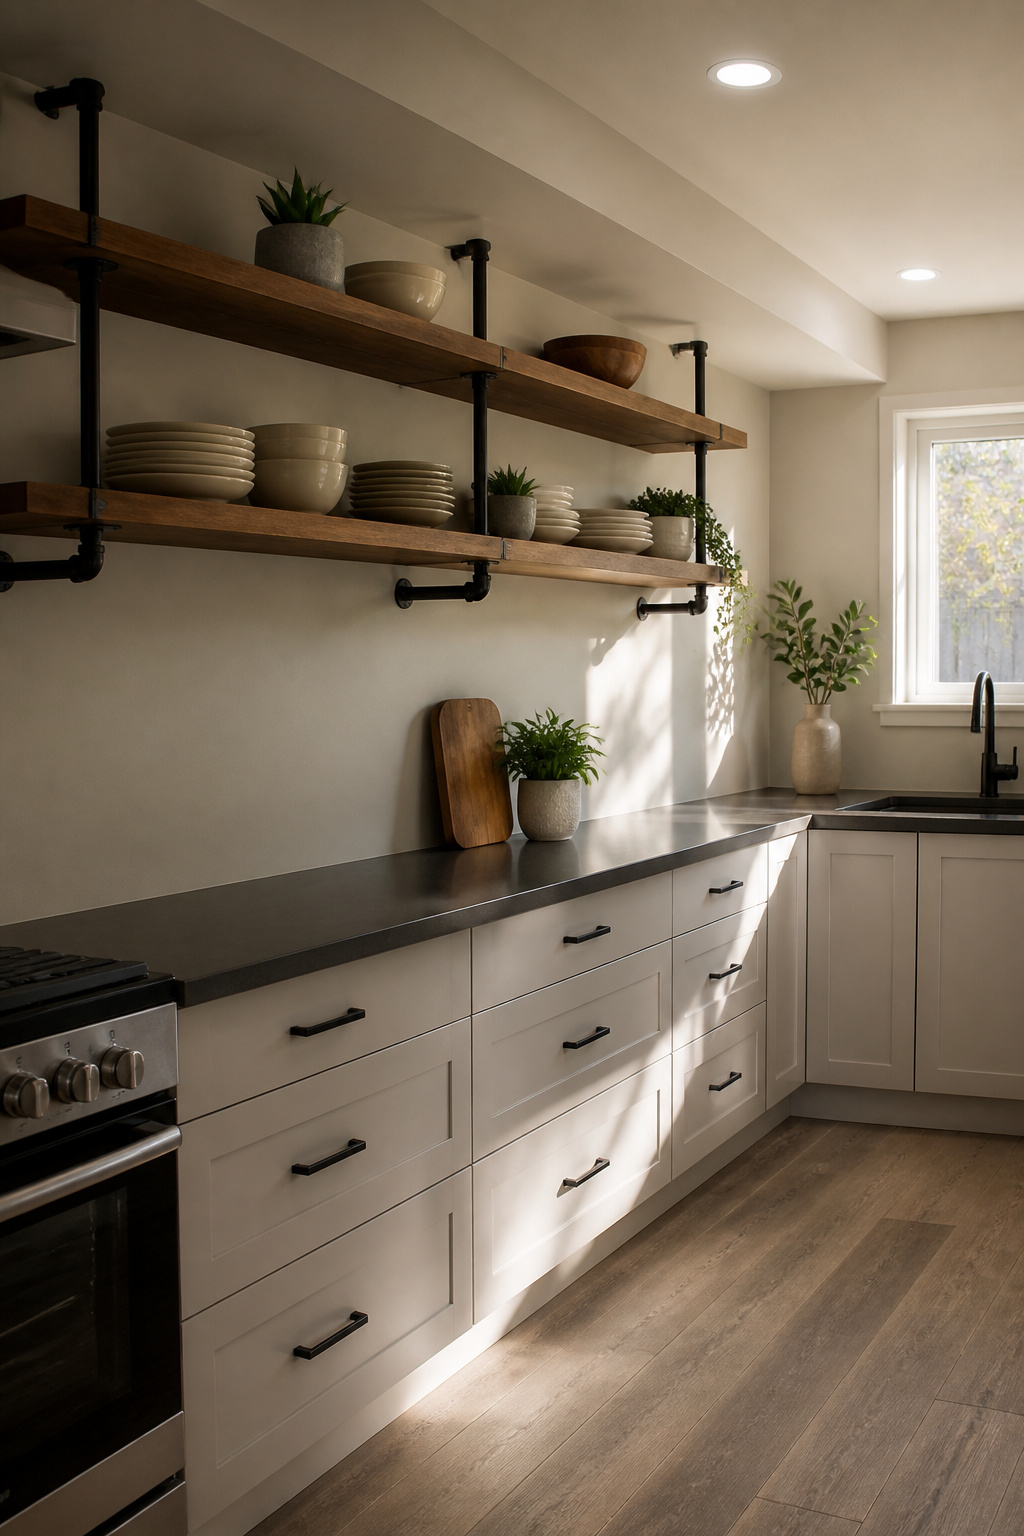
Wall-mounted shelves in place of upper cabinets buy back headroom you cannot afford to lose in a basement ceiling. The standard 12-inch depth handles a full dinner plate without swallowing the aisle, and skipping the cabinet box leaves the wall plane open for whatever layout you are working with: galley, L, or single run.
Basement air systems move more dust than upstairs HVAC, so open shelving is not a free pass to display every mug you own. What reads as curated in a kitchen catalog turns into a wiping chore down here. The real payoff is forced editing. You keep the four plates you actually use, the two pans that do most of the work, and the rest goes to storage elsewhere or out the door.
Pipe brackets in black iron with wood shelves lean industrial; light ash or gray-stained wood keeps the line cleaner if that mood does not fit. Live-edge or mesquite adds weight, so know your wall blocking before you commit. Floating shelves in a pale tone warm the space without closing it in, and they pair with lower cabinets or drawers for the larger stuff you do not want to look at.
6. Custom Bar and Seating
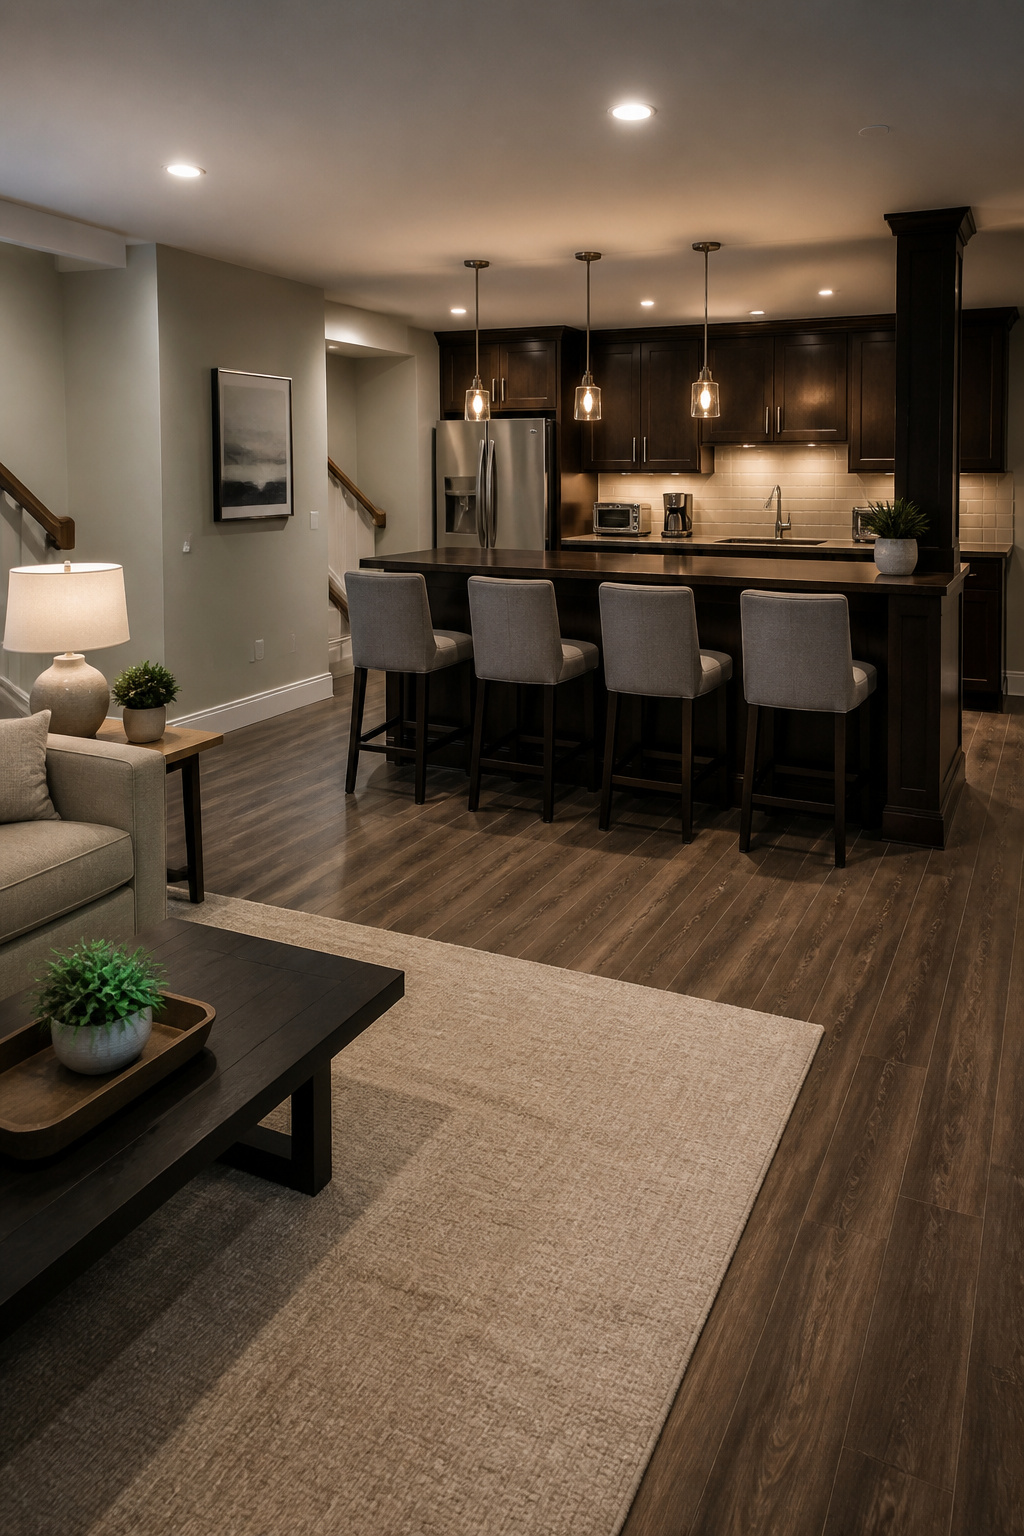
A bar-height counter gives you seating without eating the floor space a full table demands, and in a basement kitchen that trade is usually worth it. The standard bar height is 42 inches, with stools to match; 36-inch counter height works if you already own counter stools or want a slightly lower sight line across the room. Either way, plan for at least 12 inches of knee overhang on the seated side, anything less and adults end up perched at the edge.
An L-shaped layout is where this setup shines. Run the counter along one leg for the work zone, sink and small appliances included, then wrap the second leg with the overhang facing out into the room. That corner becomes storage, the outer edge becomes seating for four or more, and the kitchen area defines itself without a wall. Pendant lights over the bar side keep the work triangle intact while giving the seated space its own light.
7. Under-Stair Storage
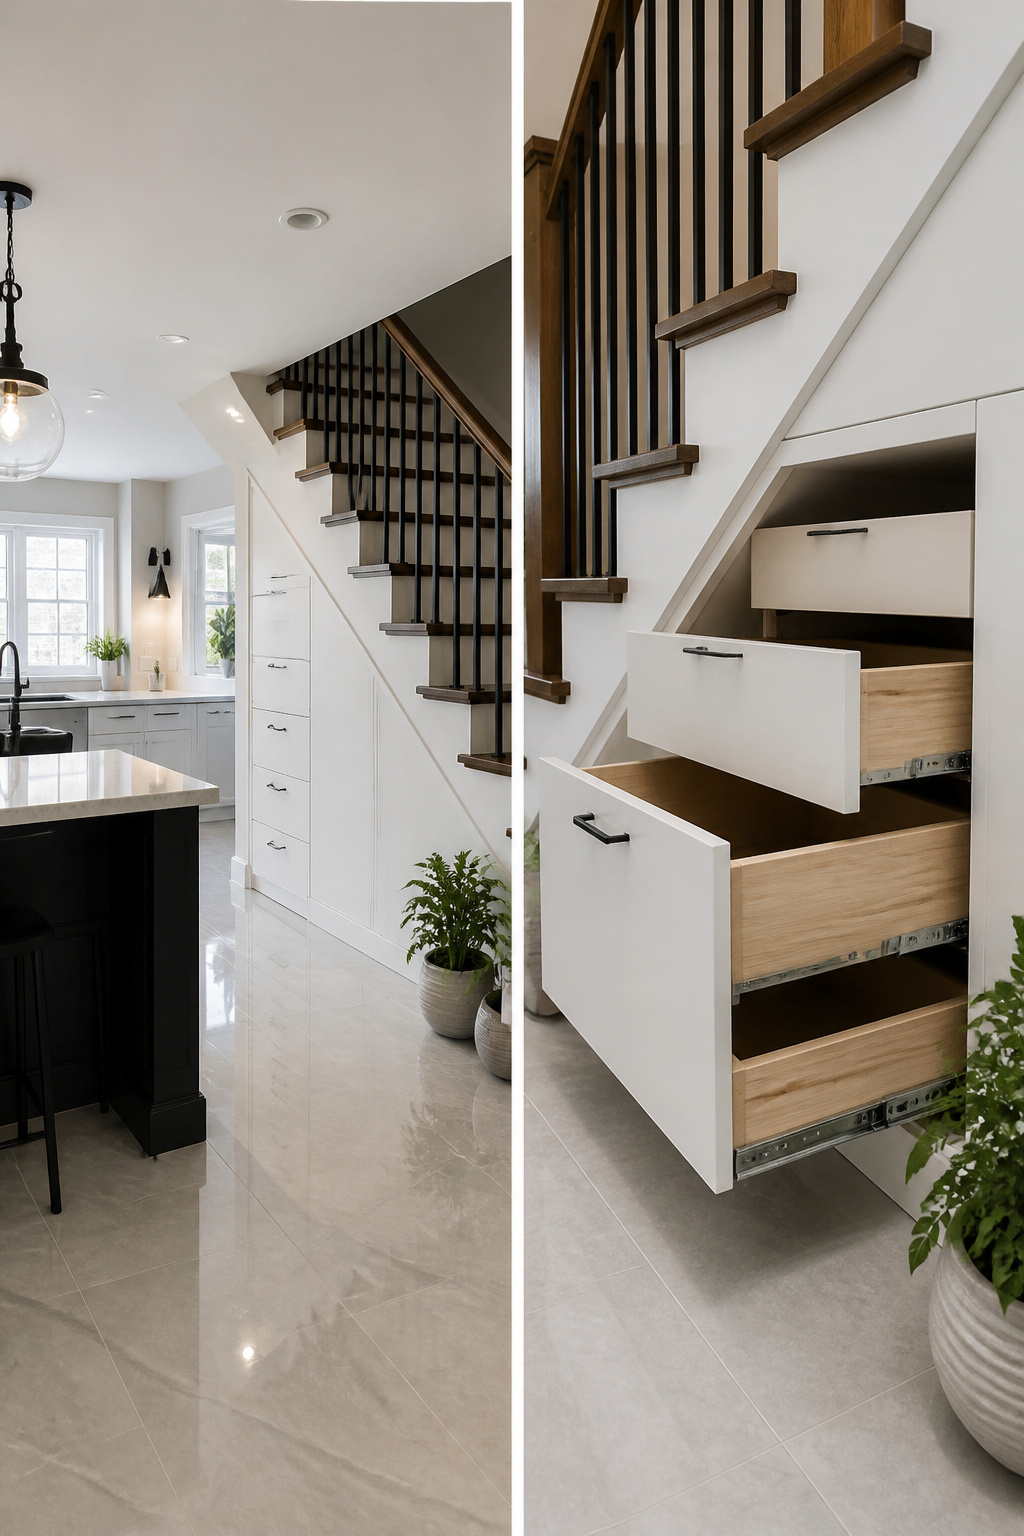
The triangular cavity beneath basement stairs tapers from full height at the front to nothing at the back, which makes standard shelving a poor fit. You either lose the deep wedge entirely, or you install shelves so shallow they barely hold a cereal box. Pull-out drawers solve this by bringing the contents to you instead of sending you crawling backward into the narrowing space. A drawer on full-extension slides reaches the full depth of the stair run, and because the box itself is built at the angle, nothing gets trapped in the dead corner.
Shelves are the cheaper route, but only the front few feet stay genuinely usable unless you step into a full pantry build with a sloped ceiling that follows the stair stringer. That approach works if you are committing the whole cavity to dry goods, though you will need flush doors or cabinet panels that match the surrounding kitchen so the slope does not read as an afterthought.
The real advantage here is that no other kitchen in the house has this geometry to exploit. Main-floor stairs usually carry traffic noise and sight lines that make storage awkward; basement stairs are already tucked, already separate. A mini-fridge, a small sink, or a bank of pull-out drawers for appliances turns a void into square footage you are not paying to create, only to fit out.
8. Glass Wall Wine Cellar
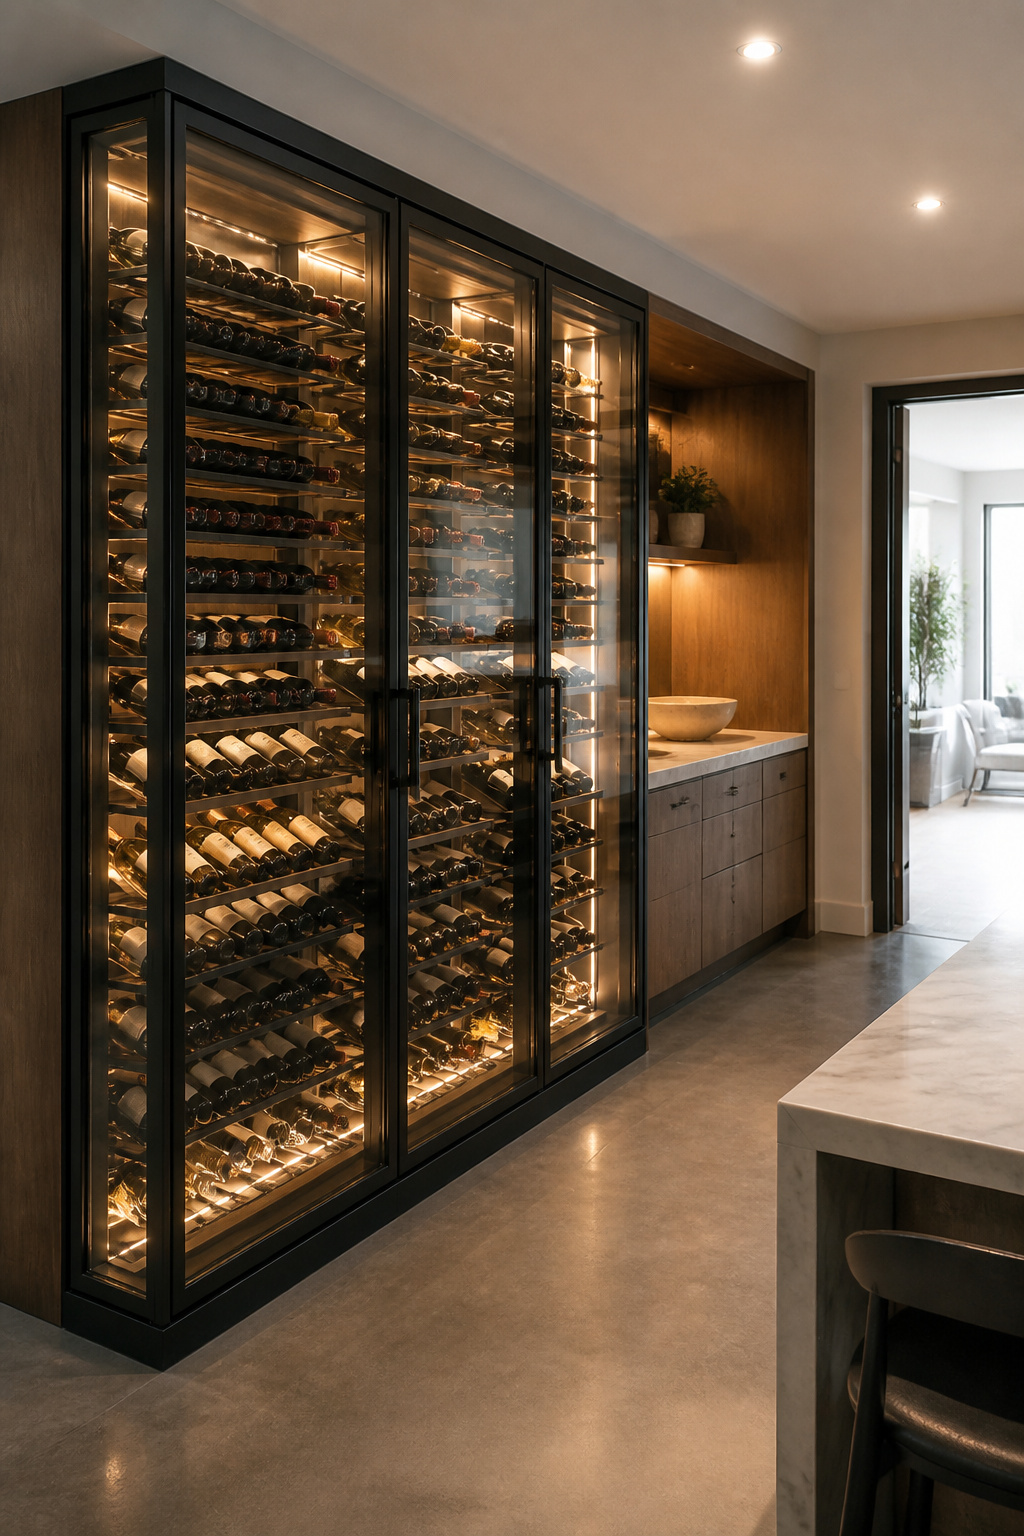
A glass-front wine cellar turns dead basement wall space into the room’s best feature. The cooling unit hums more than you expect in the basement quiet, so budget for acoustic insulation or place it behind a closed mechanical panel rather than leaving it exposed. A small temperature-controlled unit runs $2,000 to $5,000, which is steep for a basement kitchen, but it lands differently here than it would upstairs. Buyers already discount basement square footage; a climate-controlled cellar with visible bottles reads as deliberate luxury in a space they were prepared to undervalue. You get the same effect from a wine fridge at a fraction of the cost, though the glass wall is what photographs well and what people remember after a showing. If you are renting or planning to sell within five years, skip the built-in and look for a dual-zone cabinet you can take with you.
9. Functional Dining Table Island
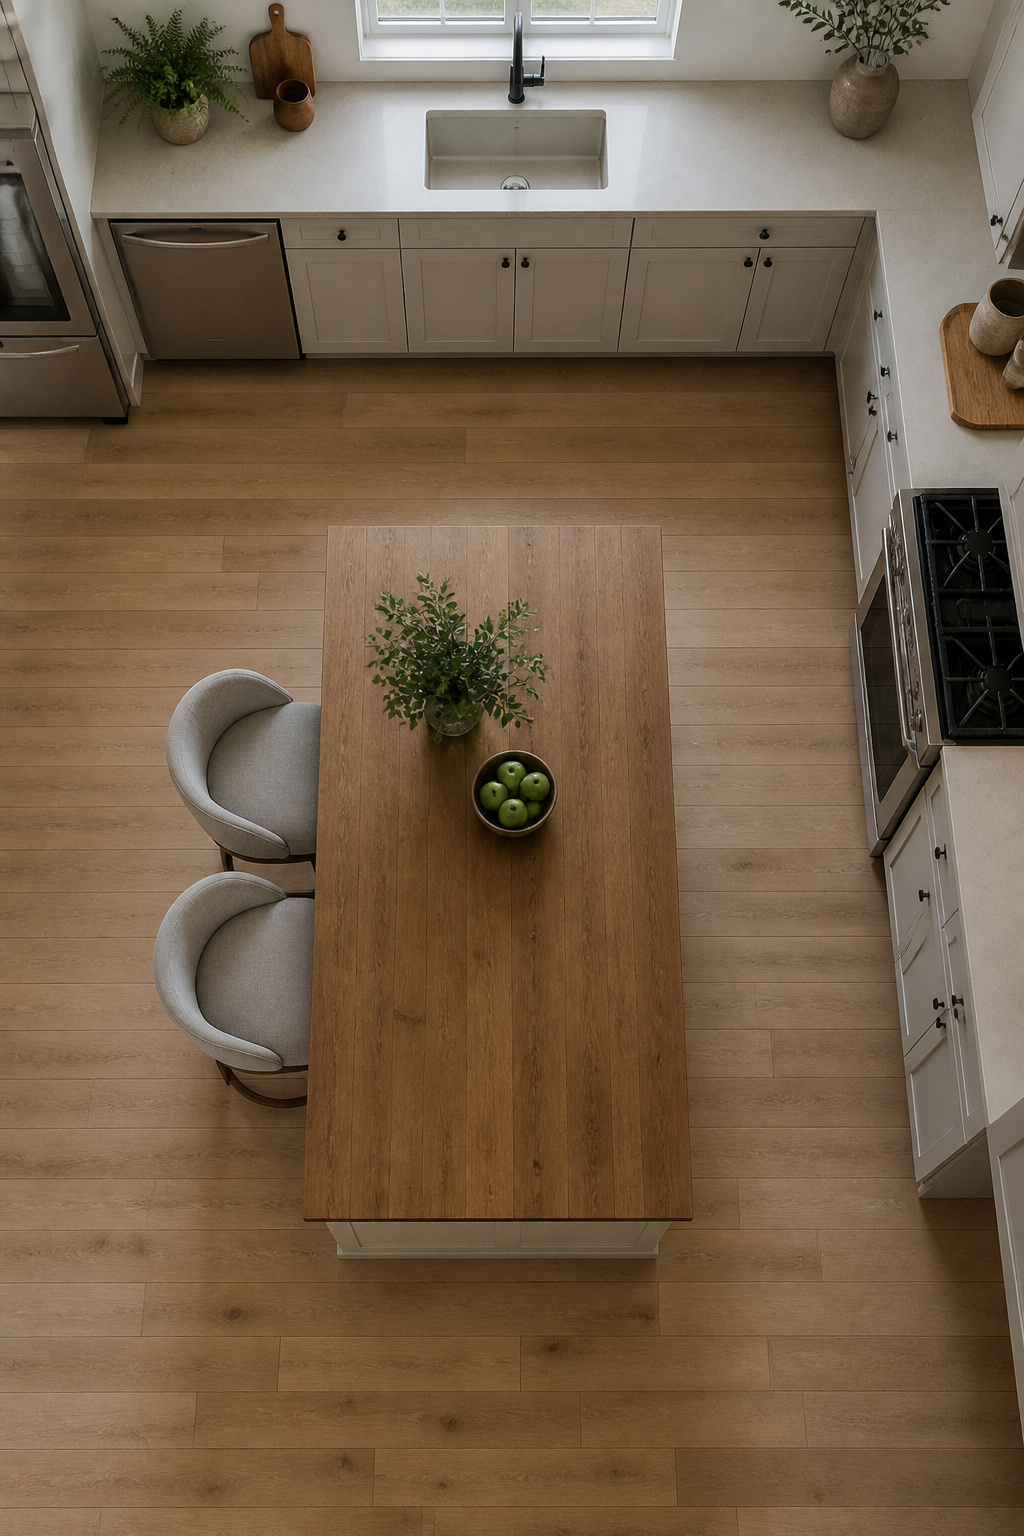
A kitchen island built for eating, not just chopping vegetables, buys back floor space you do not have in a basement kitchen under 150 square feet. The minimum workable width is 36 inches, which lets two people set places across from each other without knocking knees. That sounds generous until you remember the overhang: you need at least 12 inches of clear leg room on the seated side, and 15 inches is better if the stools have backs.
The counter itself can be standard depth, 24 to 25 inches, but the base cabinet stops short. The cantilevered top carries the eating surface. Without this overhang, you end up perching at bar height with your thighs trapped against the cabinet box, which gets old by the second meal.
In a kitchen this small, the island replaces the table entirely. You lose the ritual of a separate dining zone, but you gain the square footage a table would eat. What you give up is elbow room for more than two; three stools means one person sits at the corner, and that corner wears out fast. For a household of two, or for kids who do not stay seated anyway, the trade is usually worth it. For four adults eating together every night, the island starts to feel like a compromise you notice.
10. Customized Ceilings
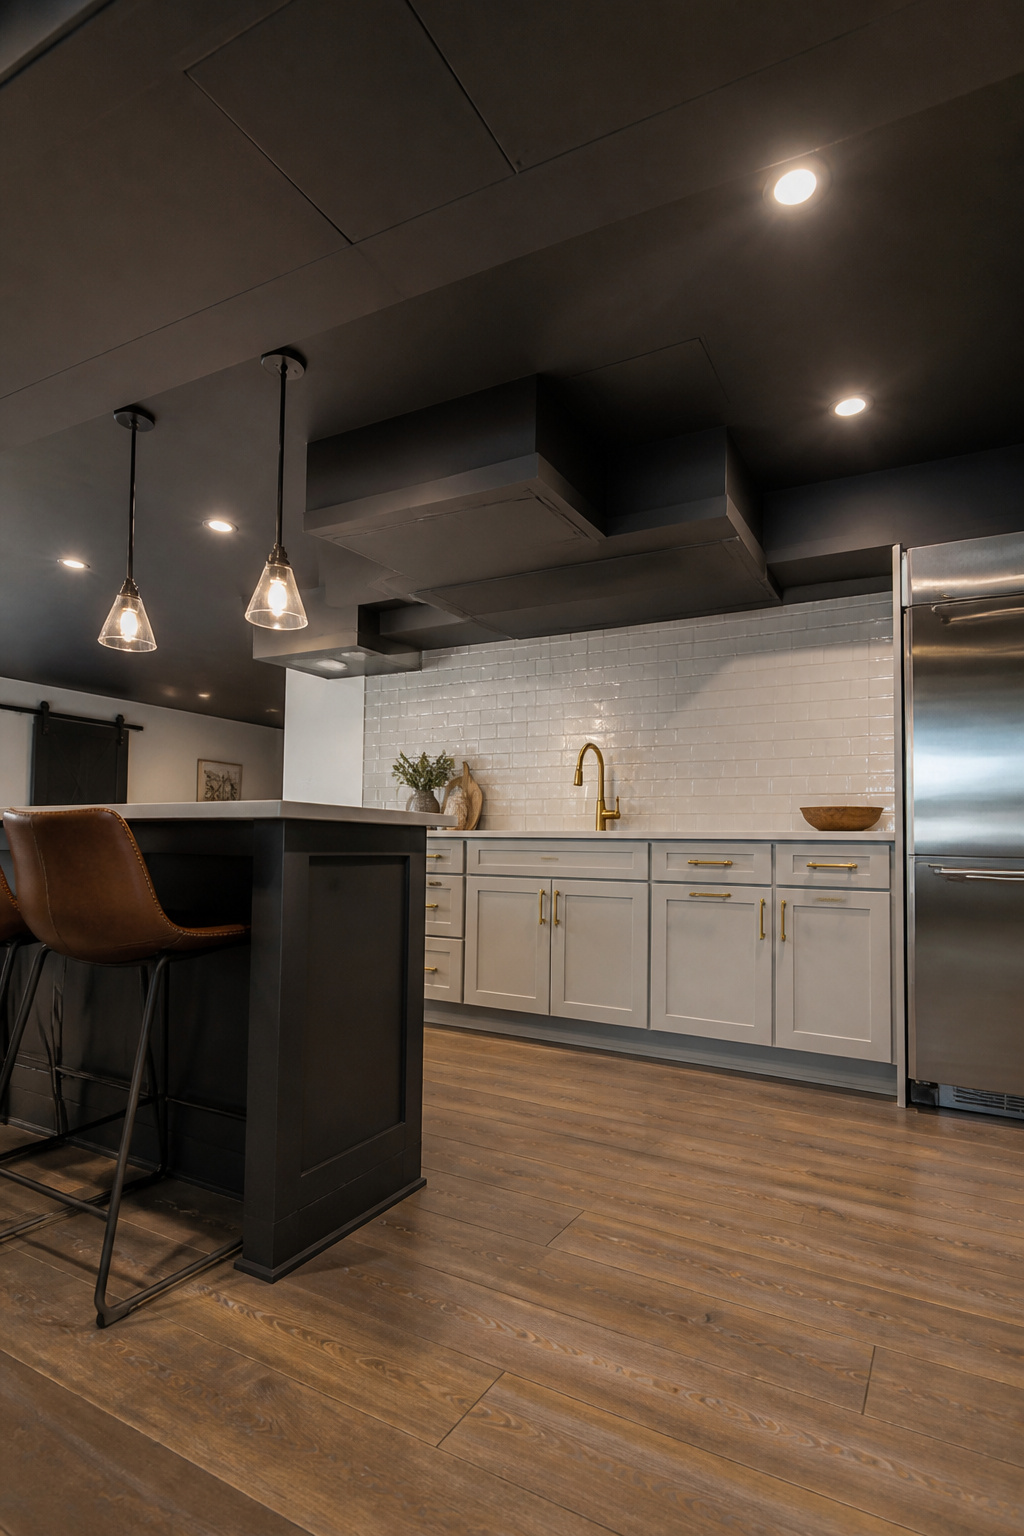
The ceiling is where basement kitchens live or die visually, because every duct, pipe, and beam that got buried upstairs is now staring at you.
Most basements need a finished ceiling height of at least 7 feet to meet code, and that measurement is taken from the finished floor to the lowest protruding obstruction. Paint the whole assembly, joists and all, a single matte color and the eye quits counting each separate layer. Dark charcoal reads taller than white in these spaces; white makes the bumps announce themselves.
If you are dropping a ceiling for a cleaner plane, build in a few access panels at every shutoff valve and junction box you can locate before the drywall goes up. You will not remember where they are in two years, and cutting a hole later ruins the whole effect.
Paneled systems that snap into a grid handle moisture cycles better than drywall in most below-grade spaces, and they let you lift out a single tile when the water heater leaks. The trade is visible seams. Painted joists hide nothing but cost the least and eat no headroom, which matters when you are already close to that 7-foot line.
11. Beverage Station With Sink and Ice Maker
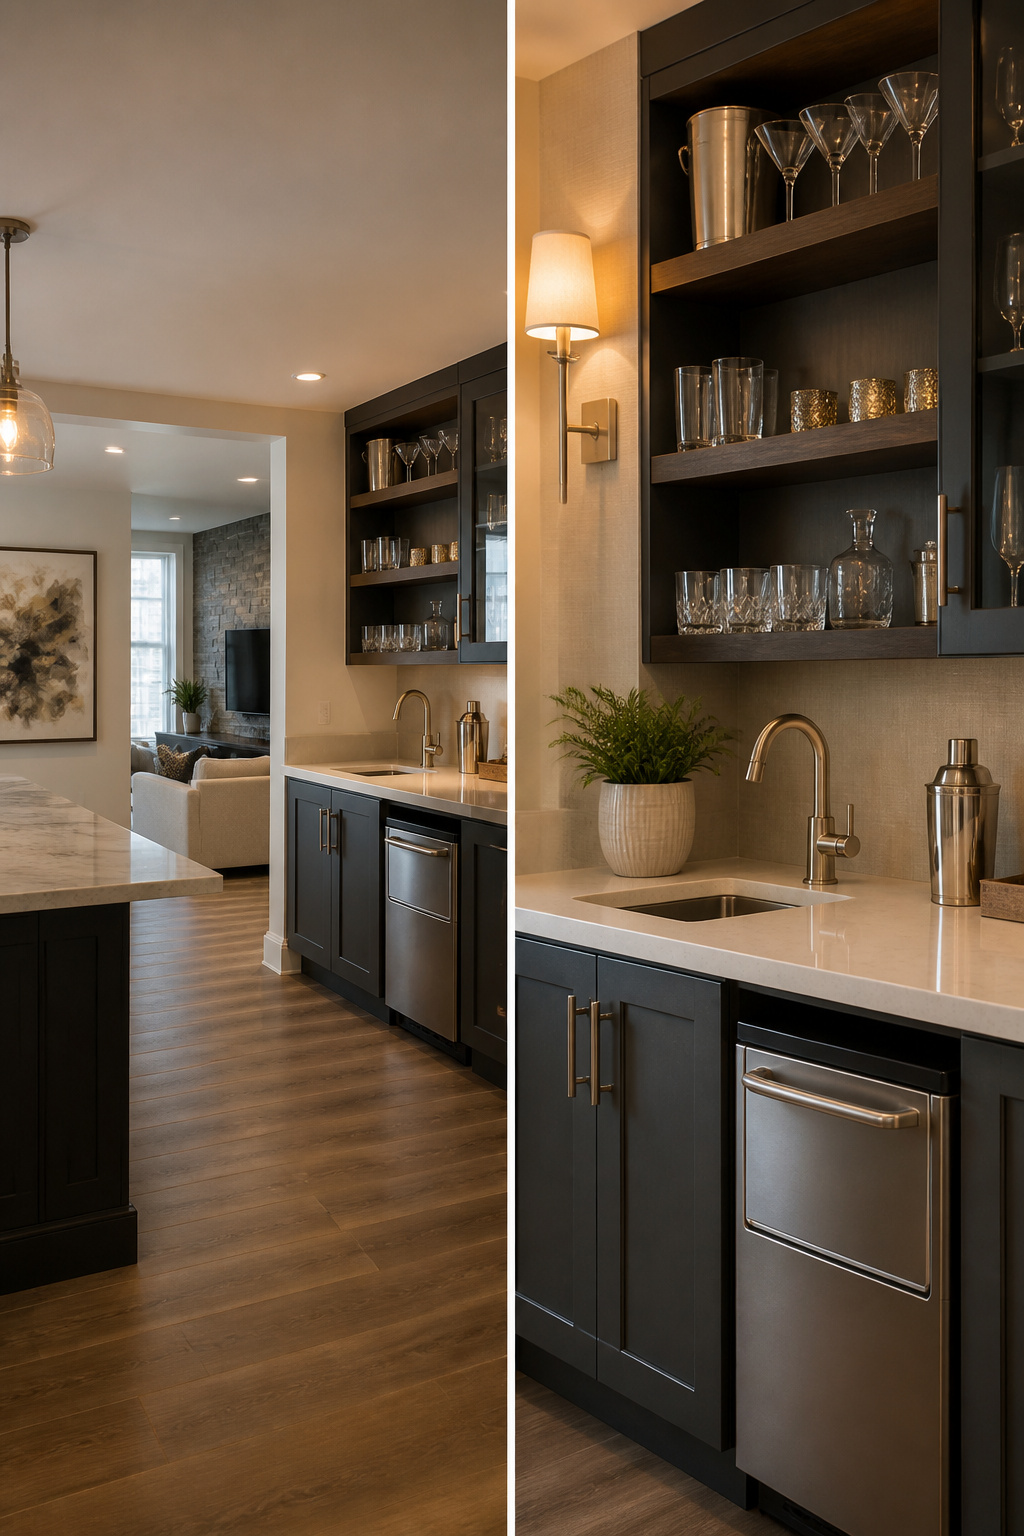
A dedicated drink station keeps traffic out of the main kitchen path during parties and lets guests refill without crossing through your prep zone. The catch is plumbing. Basements below the sewer line need a pump-up system to move drain water upward, which adds several hundred to a thousand dollars to the install depending on how far your main drain sits. Gravity drains are cheaper if your layout allows them, so map your drain line before you lock in the counter location.
The appliance itself runs $400–$800 for a decent undercounter ice maker, and you will want a secondary sink beside it for dumping melt and rinsing glasses. That second sink is what separates a useful station from a counter-hogging appliance garage. Skip the ice maker if your basement kitchen is under eight feet of counter run. In tighter spaces, a compact fridge and a coffee setup do the same job without eating the work surface you need for actual cooking.
12. Luxury Touchless Faucets
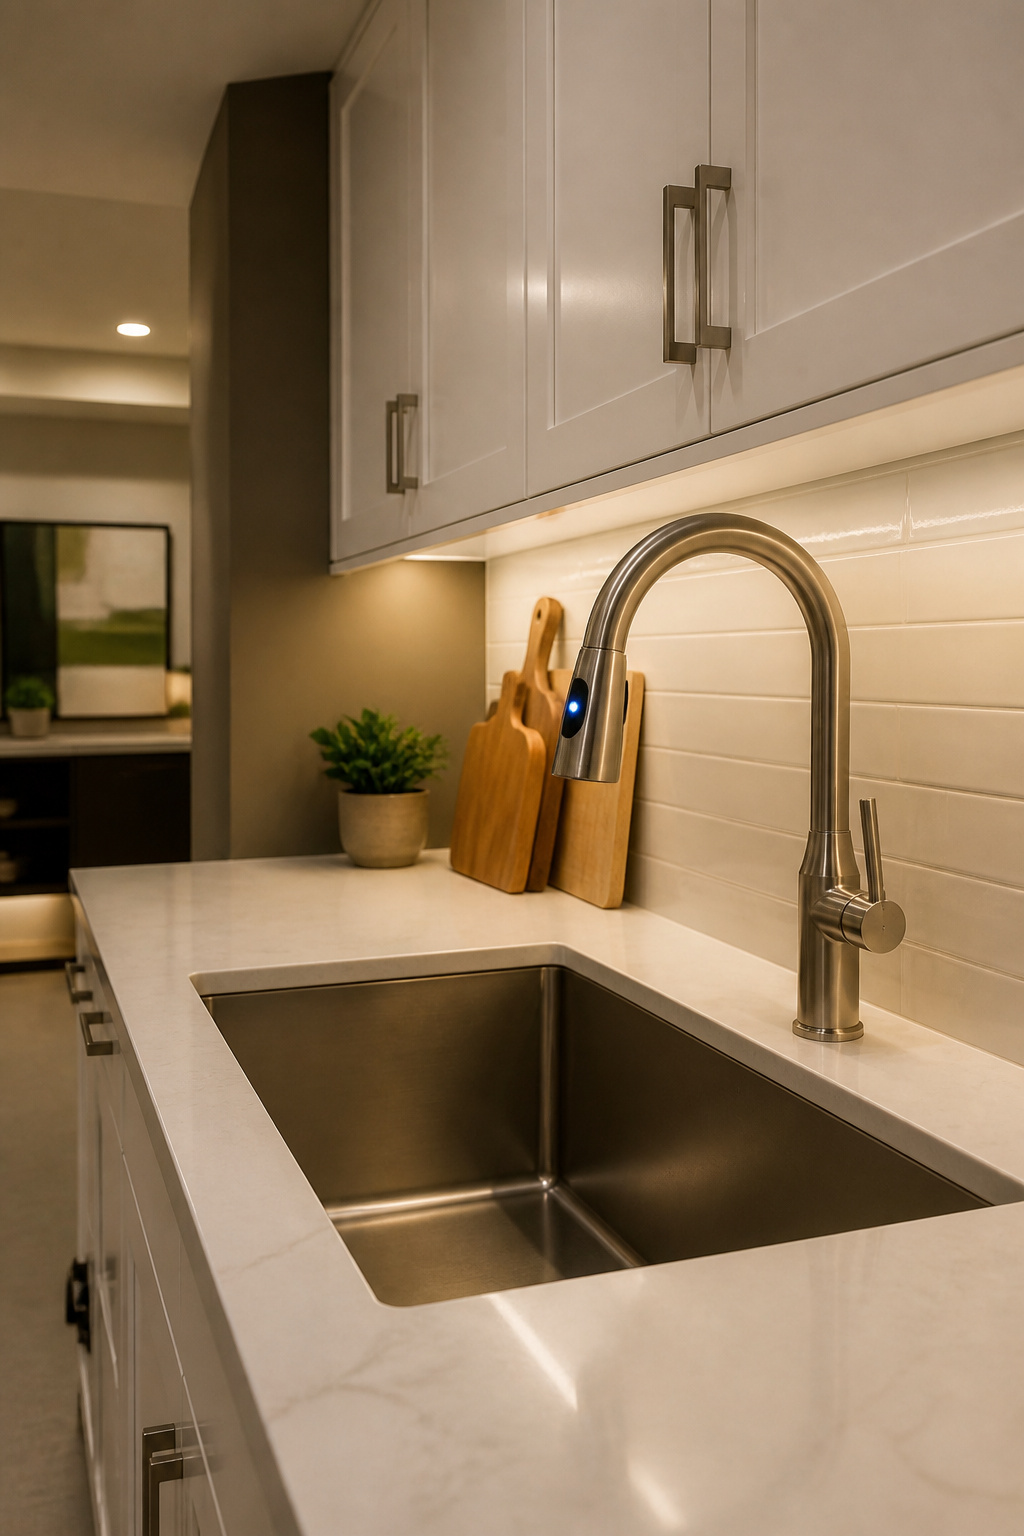
Motion-sensor faucets run between $150 and $400, and in a basement kitchen that price is easiest to justify by counting trips up the stairs. Your hands stay full down there: hauling laundry, carrying up leftovers, bringing down groceries. A faucet that turns on when you wave a forearm keeps you from fumbling with handles or leaving the water running while you set things down.
Battery-powered units install anywhere, which matters when your basement walls are concrete and running a new outlet costs more than the faucet itself. The tradeoff is swapping AAs every year or two, usually with a low-battery light that starts blinking at the worst moment. Hardwired models skip that chore but need an electrician if you do not already have a box under the sink. Most renters should stick with battery units and keep spares in the same drawer as the trash bags.
The real limitation is sink size. Sensors need a few inches of clear deck space to avoid misfires, and compact basement sinks sometimes mount the sensor so close to the backsplash that a cereal bowl sets it off. Test the detection zone with your own dishes before you buy, or look for models that let you adjust the range. A faucet that sprays every time you slide a cutting board behind it becomes background noise you stop noticing, which defeats the point of touchless.
13. Custom Wood Countertops
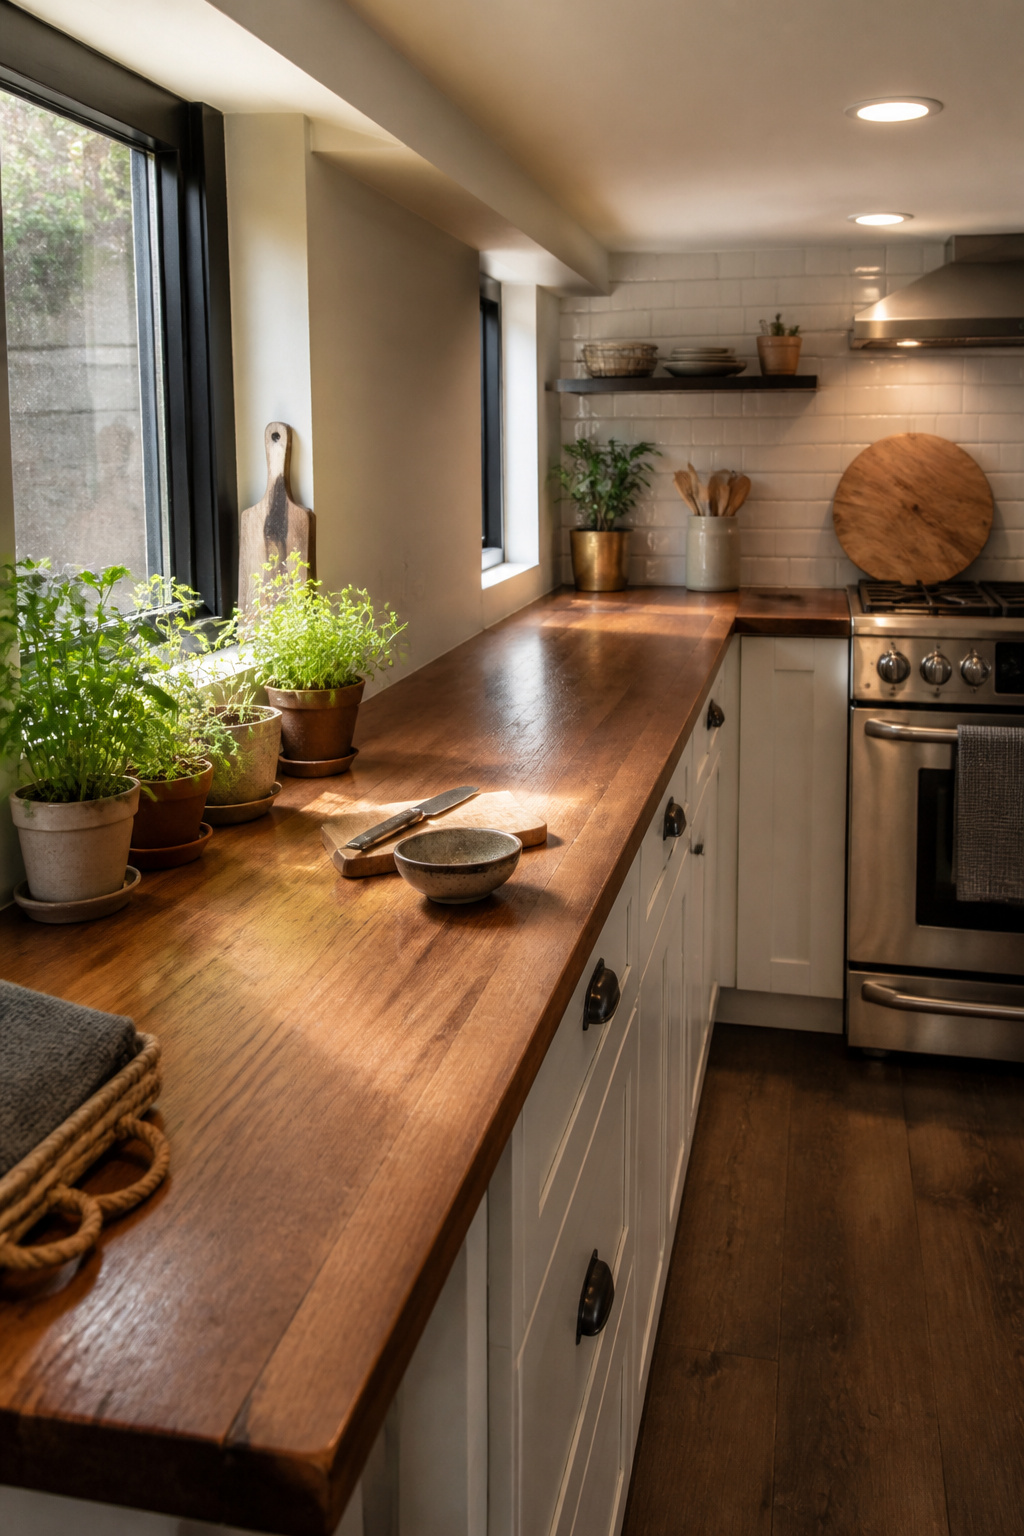
Wood countertops run $50–$100 per square foot installed, which lands you below most stone and even some laminate options. That price buys you a surface that warms up a basement kitchen in a way concrete never will, but the savings come with a maintenance schedule you should actually count on.
Oil the surface every 4–6 weeks, more often if you cook daily. Skip a month and the wood dries out, picks up stains, and starts looking like a cutting board left too near the sink. Mineral oil works; beeswax blends work better and last a few days longer.
Basements add a specific problem. Humidity swings make wood swell across the grain, which can warp seams or lift edges where the counter meets the wall. If your basement runs damp in summer, choose quartersawn white oak or maple over flat-sawn boards; the grain structure resists movement. A dehumidifier in the kitchen zone helps more than any finish will.
Soapstone costs roughly the same per square foot and handles moisture better, but it scratches and needs its own oiling ritual. The difference is forgiveness: a soapstone scratch darkens into the patina, while a gouge in wood stays visible until you sand it out. For a weekend project with hand tools, wood repairs easier. For a set-it-and-forget-it surface, neither material quite qualifies.
14. Detailed Backsplashes
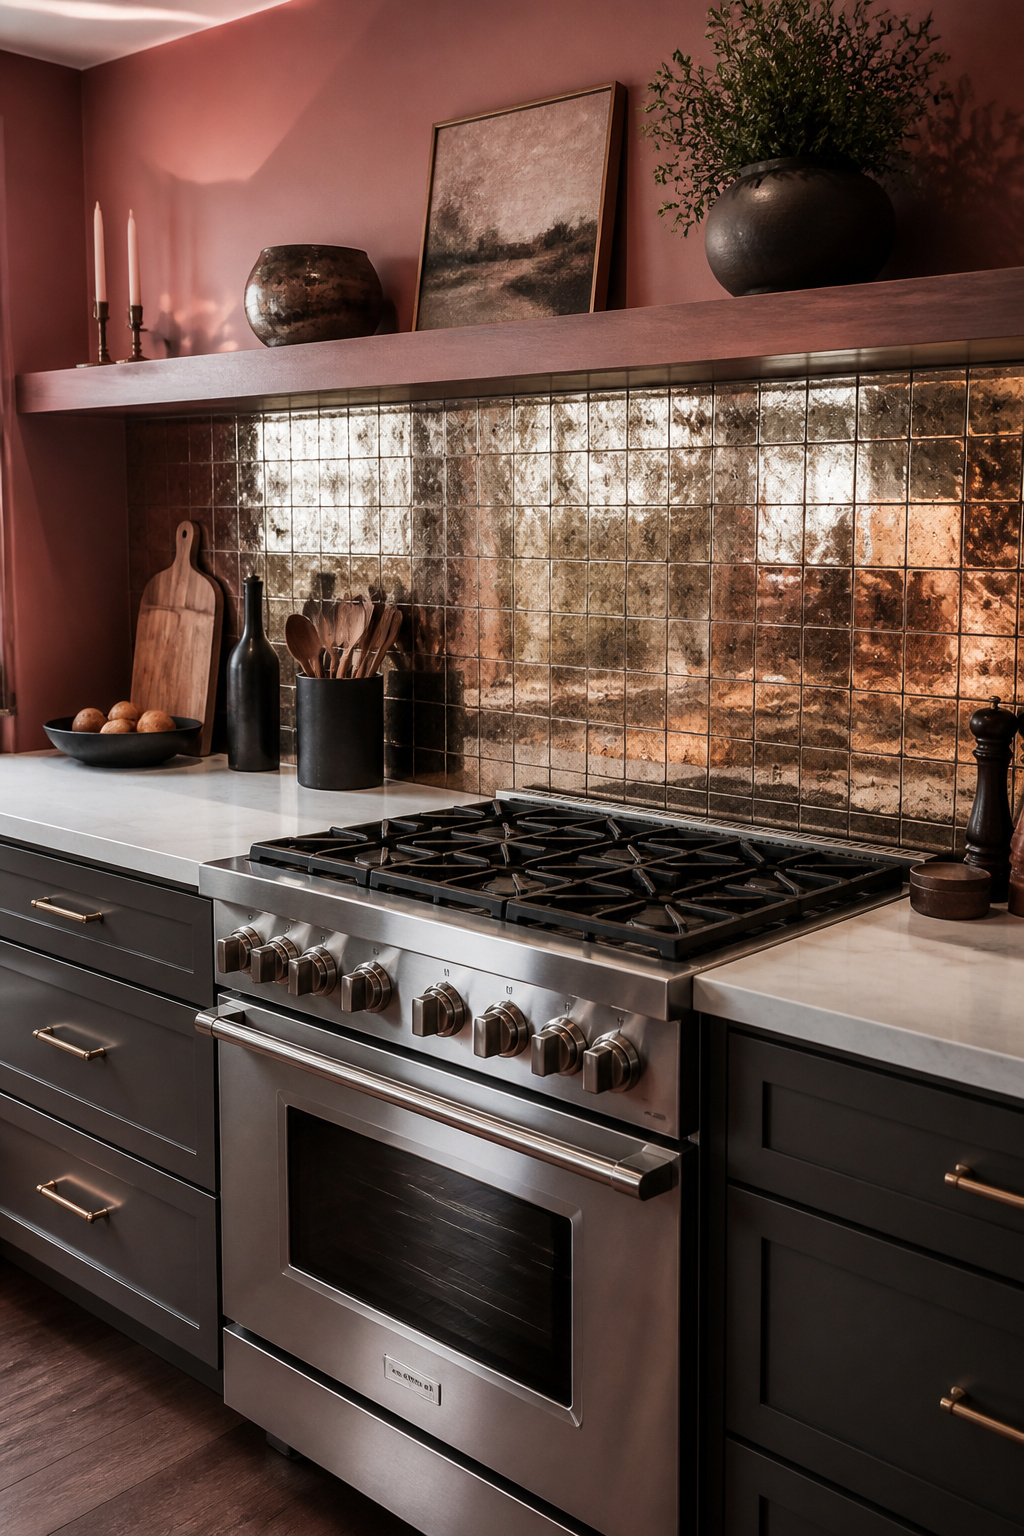
A backsplash is where you spend the color budget in a basement kitchen, because you will probably change it before you change the cabinets. That is the practical case for keeping the cabinets quiet and the wall behind the stove loud.
One way to go loud with light: Smolder Antique Mirror, a reflective tile that catches what little natural light a basement gets and throws it back into the room. It reads as a warm, aged silver rather than a flat bathroom mirror, and it pairs well with paint colors that lean moody. Stolen Kiss by Behr, a deep softened pink, works with it because the mirror warms up what could otherwise feel too sweet. The mirror shows you the rest of the kitchen while you cook, which matters when the layout cuts you off from the seating area.
Most backsplashes run about 18 inches tall, from counter to cabinet. That is enough real estate to matter visually but not so much that the material cost drives the project. If you tire of the mirror or the pink in six years, you are looking at a weekend and a few hundred dollars, not a cabinet order.
15. Sliding Glass Wall
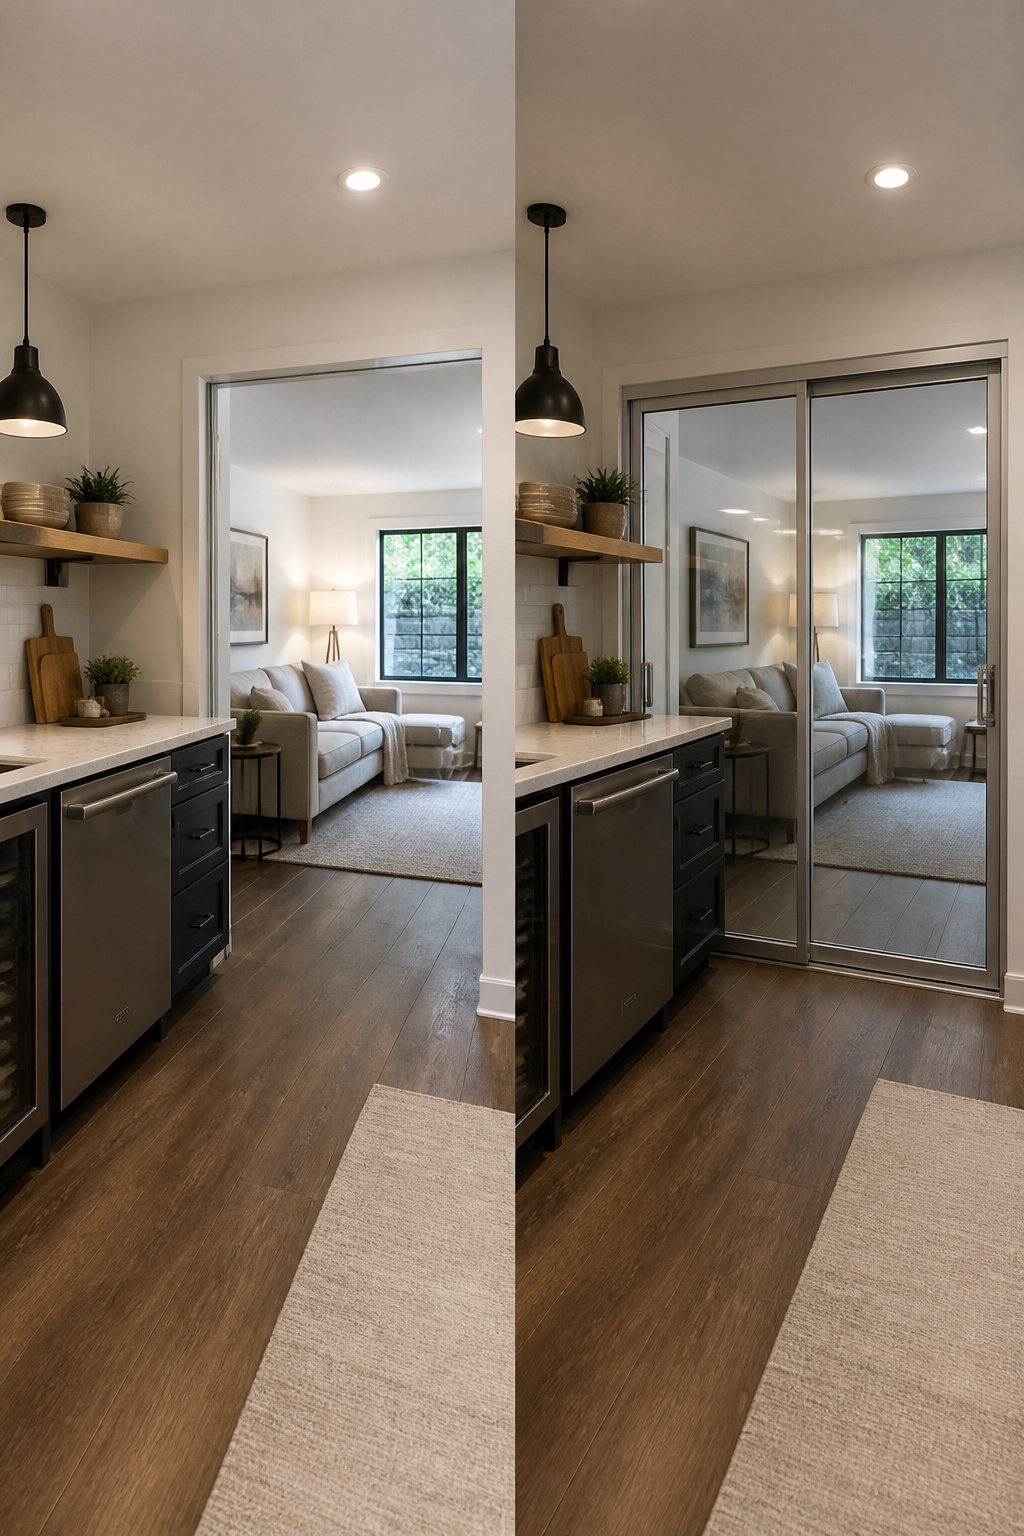
A six-foot sliding glass wall runs $2,500 to $5,000 installed, which is not trivial for a basement project but lands well below a full framed addition. The track mounts either to concrete or steel ceiling, so you will need a rotary hammer and the right anchors, or a contractor who has worked with both substrates before. Borrowed light is the real payoff here. The glass pulls daylight from whatever window exists in the adjacent basement space and carries it into the kitchen without the expense of cutting new exterior openings. You still get to close it when bacon grease hangs in the air or the laundry is running on the other side. Standard sliding panels with aluminum frames handle the division better than frameless glass in a basement, where the track takes abuse and needs real weatherstripping to seal cooking smells. Floor-length curtains or a retractable shade add privacy for guests sleeping in the rec room beyond, and both fit the track header without extra hardware.
What Basement Kitchens Cost
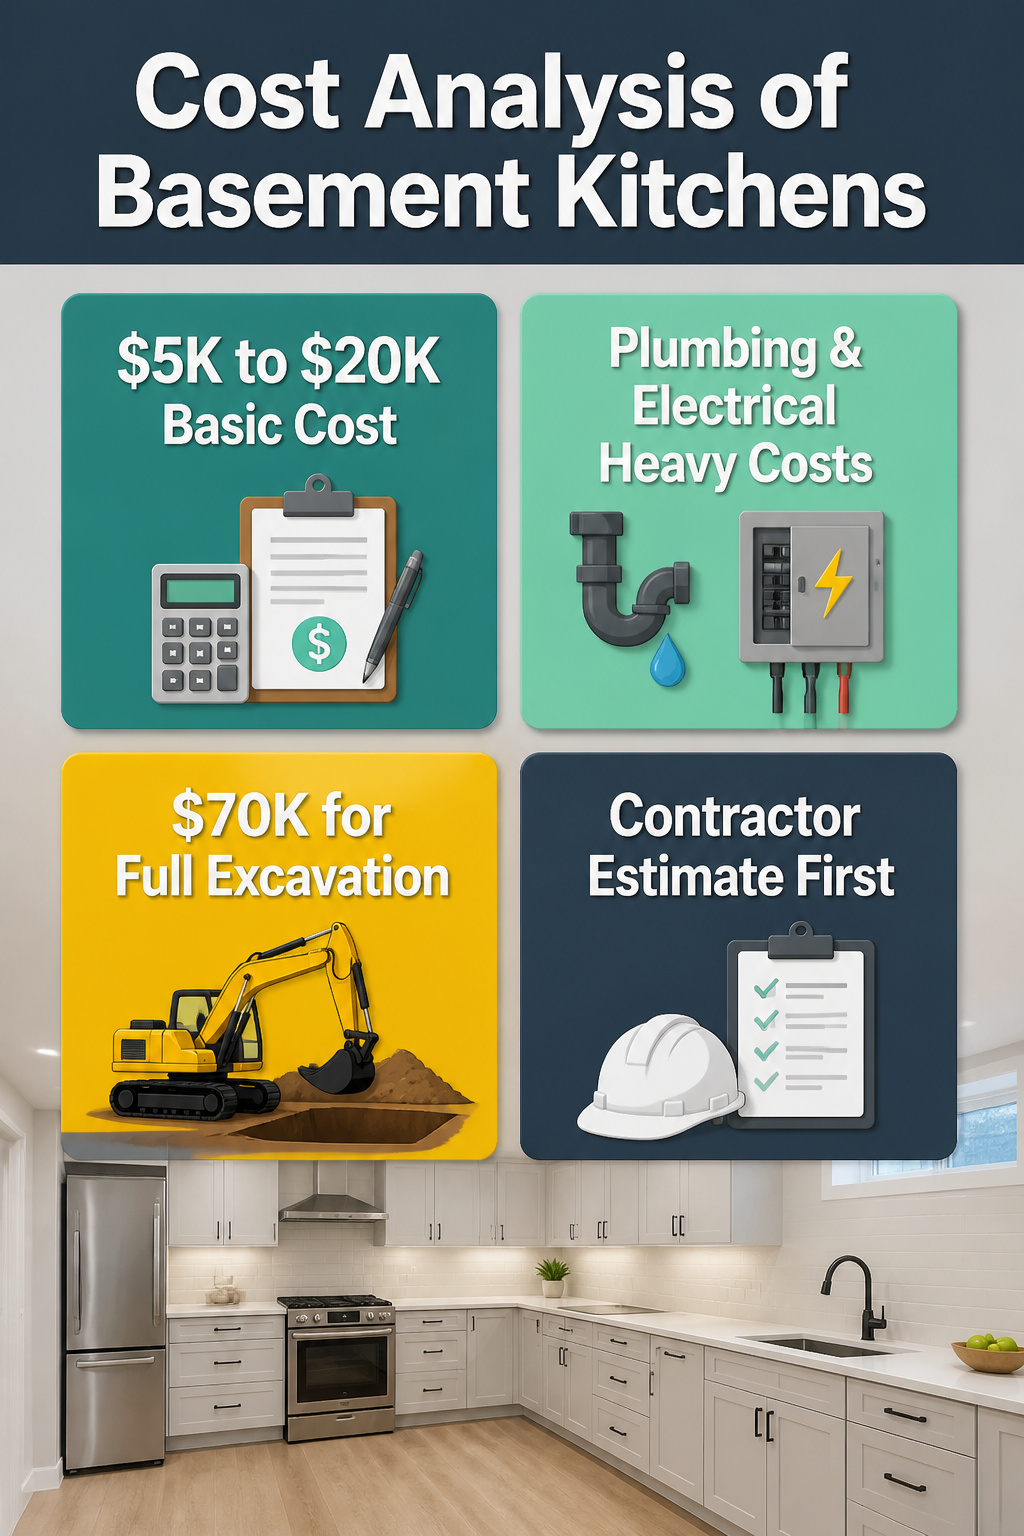
A small basement kitchen runs $5,000 to $20,000, with high-end work crossing $70,000. What pushes the number is rarely the pretty parts.
Plumbing rough-in, electrical panel upgrades, and meeting egress requirements eat most of the budget before you pick a single cabinet. In a basement, appliances and finishes are the minority of the bill, not the driver. That granite you priced out? It matters less than whether your panel can handle a second range or your plumbing can reach below grade.
The $5,000 end assumes you are handling some work yourself and the space already has decent headroom, windows that satisfy code, and power to spare. The $20,000 end brings in contractors for the systems you cannot safely DIY. Past that $70,000 threshold, you are looking at full excavation, structural changes, or turning the space into something that functions as a true second kitchen rather than a wet bar with ambition.
If you are budgeting now, get the contractor in for the infrastructure estimate first. Fall in love with the backsplash after you know what the rough-in costs.
Layout That Works in Low Light
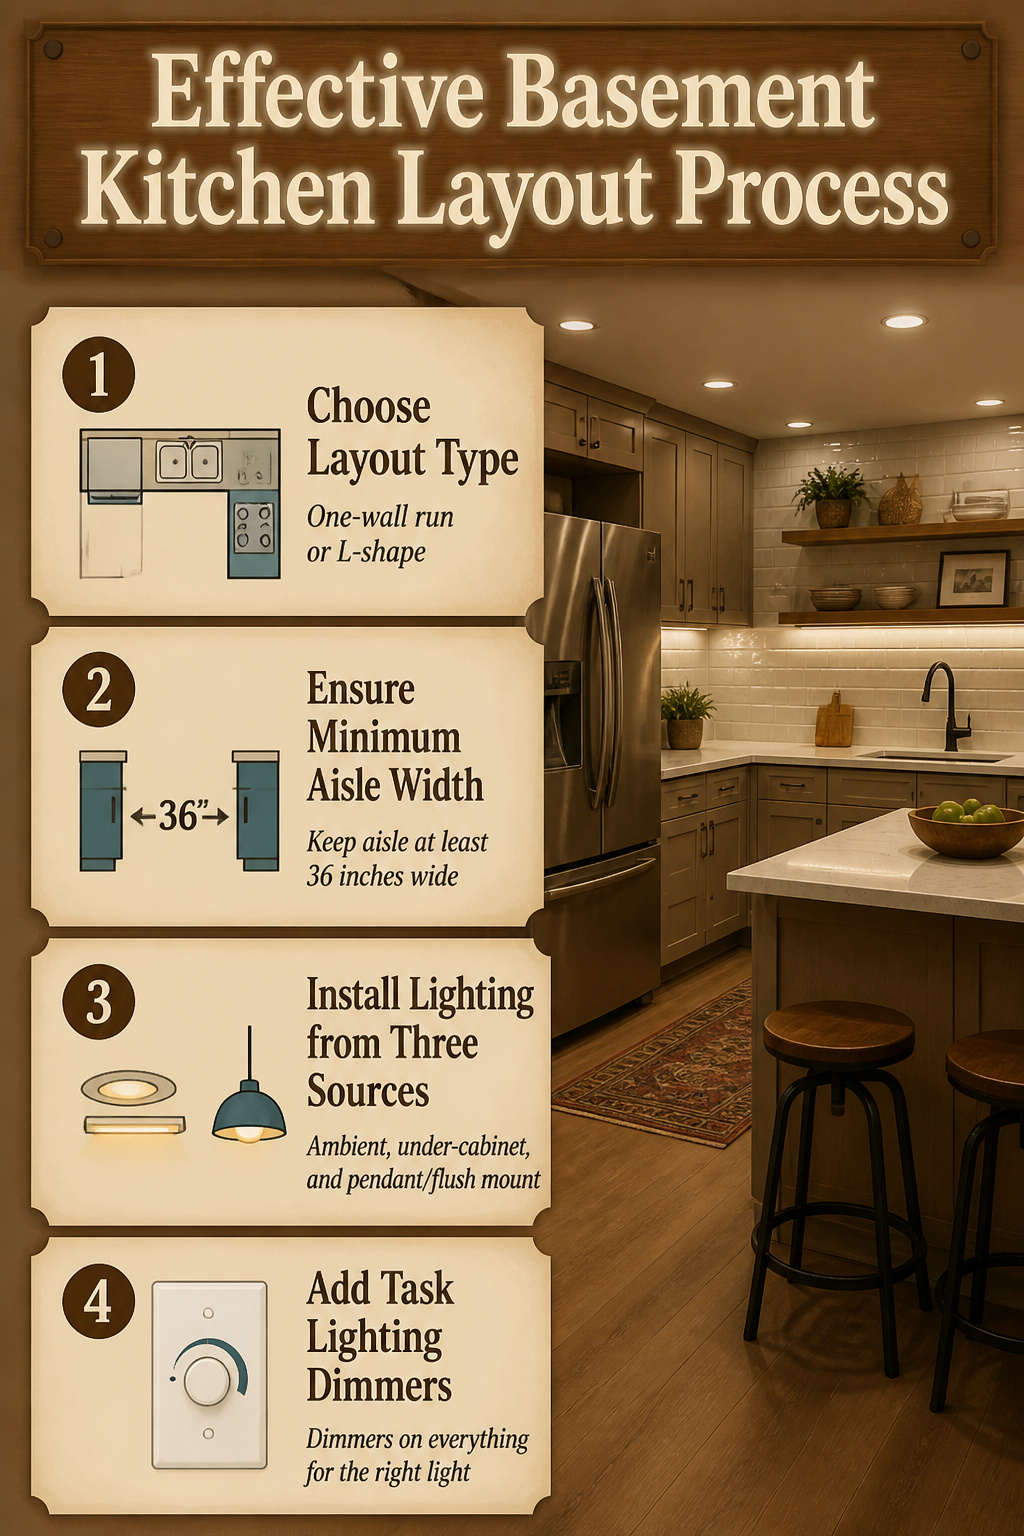
Most basement footprints leave you choosing between a one-wall run or an L-shape tucked into a corner. The one-wall layout keeps plumbing lines close together, which matters when you are tying into an existing bathroom stack or running a pump-up system. The L-shape gives you counter space on two planes and lets you set up a clean workflow: refrigerator to sink to cooktop, with no cross-traffic cutting through.
Keep the aisle at least 36 inches wide. Anything tighter and two people cannot pass with a hot pan between them. Galley kitchens, with counters facing each other, only work if you have natural light at both ends; otherwise you are standing in a tunnel with your back to the only light source. Most basements do not have windows at both ends, so skip the galley unless your space breaks that rule.
Lighting needs to come from three places. Recessed LEDs, dimmable and set on a low profile for standard basement ceilings, handle the ambient layer. Under-cabinet strips kill the shadows that fall directly over your cutting board. A pendant or flush mount over any eating spot zones that area without flooding the whole room. Bright white countertops and a reflective backsplash bounce what light you have back upward.
Darren Watts, design director at Wren Kitchens, put the safety point plainly for Homes & Gardens:
"Emphasizing light in any basement is essential, but more so in a basement kitchen when handling sharp and hot objects… Using LEDs under your cabinets and spotlights on your ceiling is a great way to add additional light."
That third layer, the task lighting, is what keeps you from guessing whether the chicken is done. Dimmers on everything let you pull the room back from utility to something you actually want to sit in after the work is finished.
Ventilation You Cannot Skip
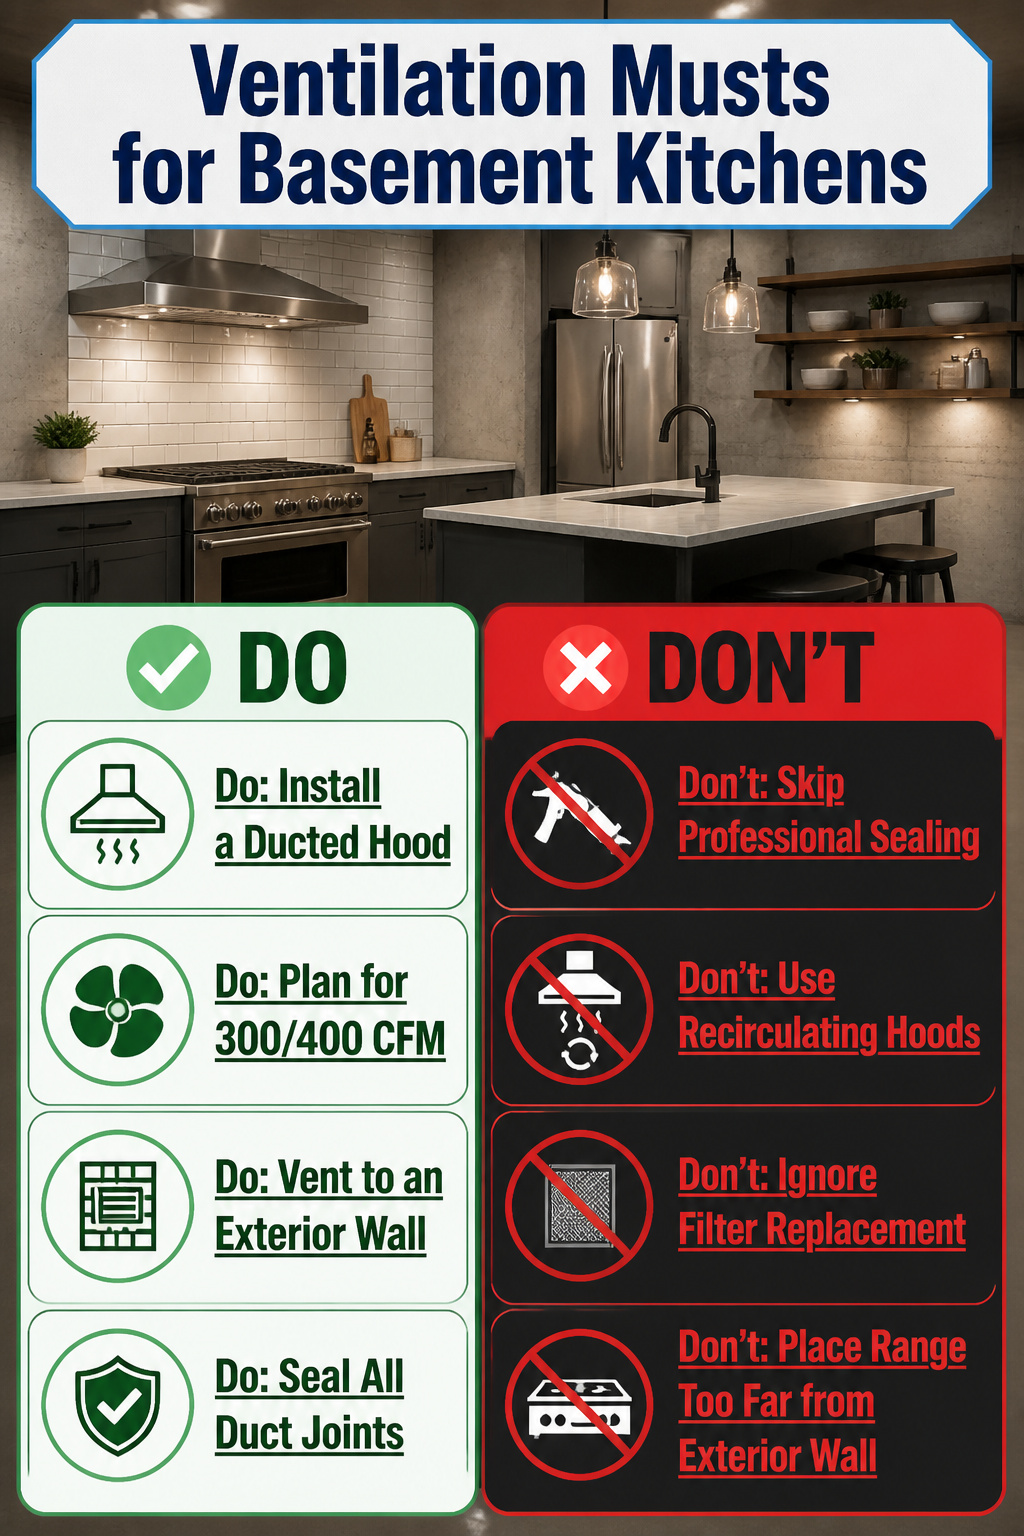
A basement kitchen has no windows to open for a cross-breeze, so cooking odors sit in the same air you are breathing until something mechanically pulls them out. Concrete walls and floors add humidity that upstairs kitchens never deal with, and grease particles find that damp air and stick. The hood over your range is not optional here. It is the only exit.
Plan for 300 CFM minimum if you cook on electric, 400 CFM if you cook on gas. Those numbers measure how many cubic feet of air the fan moves each minute, and anything less leaves you smelling last Tuesday’s salmon.
Ducted hoods win if you can run venting to an exterior wall. They push grease and moisture completely outside, which is what you want in a basement. Recirculating hoods only filter and blow air back into the room. They cost less to install because you skip the ductwork, but they do not actually remove humidity, and the charcoal filters need replacing every few months or they turn into another source of trapped odor.
Running duct to an exterior wall is where your budget takes the hit. In a finished basement you are cutting drywall, possibly routing around joists, and sealing every joint so grease does not leak into wall cavities. If your range sits in the middle of the plan with no exterior wall nearby, that run gets longer and the labor stacks up fast. Price it before you fall in love with a cooktop location.
Flooring for Concrete Subfloors

Luxury Vinyl Plank in Dusk Cherry with a 22 mil wear layer is the flooring you can actually install yourself on a basement slab that breathes a little moisture. It clicks together, shrugs off the damp that ruins real wood, and costs a fraction of what you’d spend babying engineered planks down there. That 22 mil layer matters if you’re dragging stools or dropping pans.
Polished concrete tempts plenty of people. It bounces light around a dark basement and needs no replacement. But it gives nothing underfoot, and if you have kids who spend mornings on the kitchen floor, you’ll hear about it. It also needs professional sealing to stop moisture pushing through, so the savings evaporate fast.
Engineered wood looks warm until it doesn’t. Below-grade humidity swells the layers, and most warranties void the moment you install over concrete without a perfect vapor barrier. Tile solves the moisture problem, but a basement slab is rarely flat enough for rigid pieces. Most manufacturers want the slab within 1/4 inch over 10 feet, and hitting that without grinding or self-leveling is luck, not planning.
LVP forgives the unevenness that tile punishes and the damp that wood absorbs. The Dusk Cherry tone reads richer than the gray concrete everyone’s tired of, and you can carry boxes home in a sedan and have it down by Sunday evening.
Storage Where There Is None
Basement kitchens tend to lose wall space fast. Furnaces, water heaters, and electrical panels chew through the spots where you would normally hang cabinets, which leaves you staring at six feet of counter and no pantry.
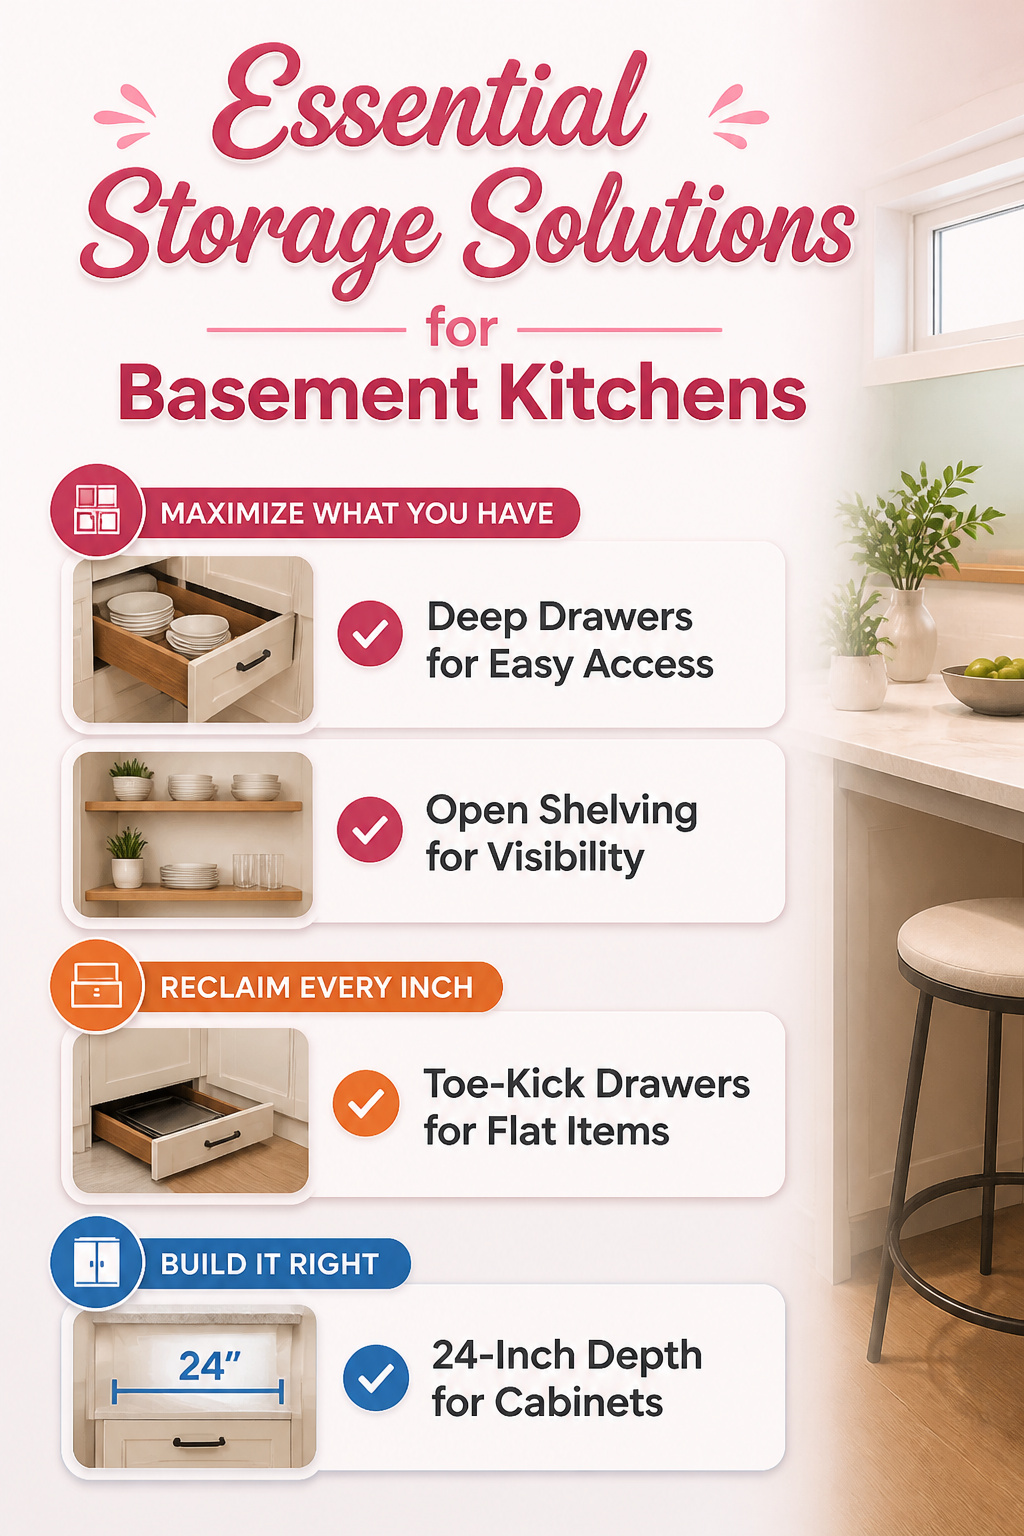
Deep drawers beat standard base cabinets in these conditions. You can fit a full stack of plates or a stand mixer without the kneeling and reaching that cabinets force on you, and the visibility means nothing gets buried behind something else. Pair them with open shelving above the counter where walls still exist; closed uppers above that would just close the space in.
Toe-kick drawers reclaim the four-inch gap at the bottom of your base cabinets. They are shallow, so store flat things: baking sheets, placemats, the spare trash bags. Ceiling-mounted racks over the island or the main walkway hang pots you have no wall for, though you will want to measure your head clearance before you commit.
One detail that matters: ask for 24-inch depth on base cabinets, not the 18-inch standard sometimes pushed for small kitchens. That extra six inches is the difference between a drawer that holds a Dutch oven and one that does not. The shallower size reads as generous in a showroom and stingy once you are actually cooking downstairs.
Frequently Asked Questions
Does a basement kitchen add value?
A basement kitchen can add value, but its impact depends on its design and how buyers perceive it. If it serves an in-law suite, rental unit, or entertainment space, it becomes a stronger selling point. Prepping the space with plumbing and electrical hookups without installing a full kitchen can also add flexibility that appeals to buyers who want to customize.
Can I put a small kitchen in my basement?
Yes, but you need to check local building codes first for compliance. Verify that your electrical panel can handle additional appliances, confirm water and drainage availability, and ensure proper ventilation is possible before starting.
How much does it cost to build a small kitchen in the basement?
A small basement kitchen runs $5,000 to $20,000, with high-end work crossing $70,000. Plumbing rough-in, electrical panel upgrades, and meeting egress requirements eat most of the budget before you select a single cabinet or finish.
What increases home value in the basement?
A well-designed basement increases home value when it feels like a true extension of the main living space. Full-size windows, natural light, and walk-out access help, as does a layout that makes the square footage genuinely usable rather than an afterthought.