
Cute camper decor ideas range from a $15 pack of Command Strips to a full furniture swap, and the difference between a weekend project and a season-long regret is knowing which camper surfaces can actually take adhesive weight. The water-resistant strip line costs the same as standard but keeps peel-and-stick wallpaper from curling in bathroom steam; skip it, and your new backsplash hits the floor by month two.
1. Peel-and-Stick Wallpaper and Decals
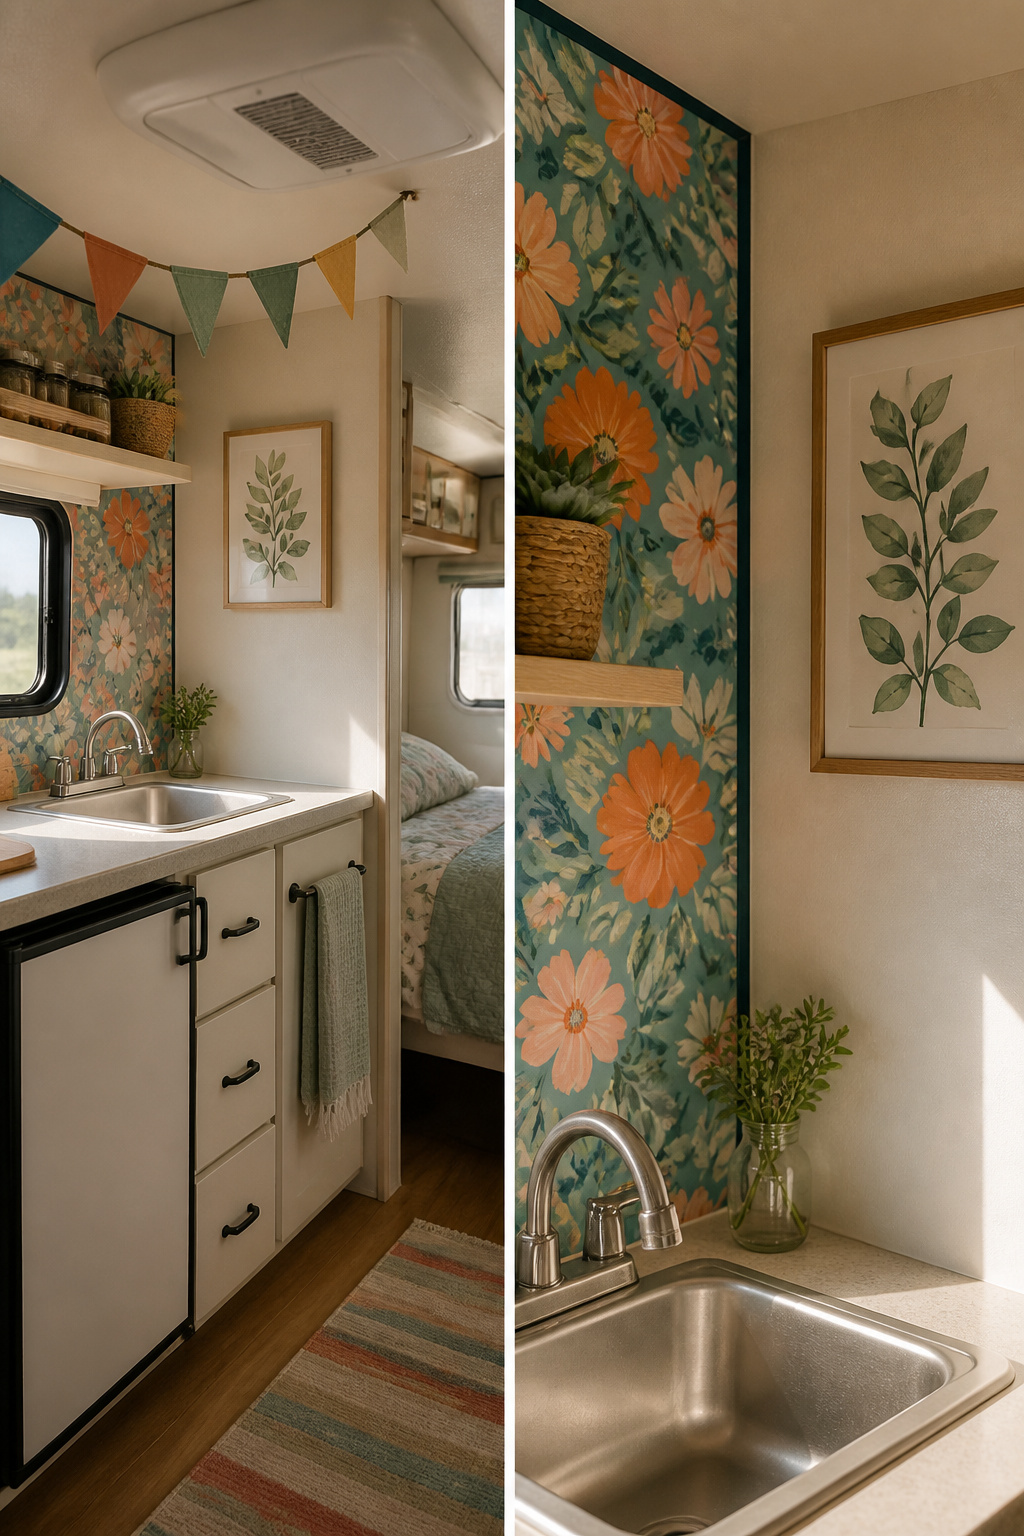
Peel-and-stick wallpaper turns camper walls from beige afterthoughts into the focal point of the whole space. A bold print behind the sink or along one bunk wall costs a fraction of a full renovation and pulls up cleanly when you sell the unit or your taste shifts. For anything you hang over it, Command Strips spare you the drill and the patchwork later; they hold lightweight frames, pennant banners, even small wire grids for sunglasses or hats.
The mistake that wastes the whole weekend is grabbing the wrong adhesive for a humid bathroom. Standard strips soften in shower steam and send your new backsplash curling toward the floor by month two. In that zone, switch to the water-resistant line or rely on the wallpaper’s own backing pressed firmly to a wiped-dry surface. Keep glass off every camper wall regardless; when a curve in the road meets a failed strip, you want a light piece of decor that bounces, not shatters.
2. Sheer Curtains and Mirrors
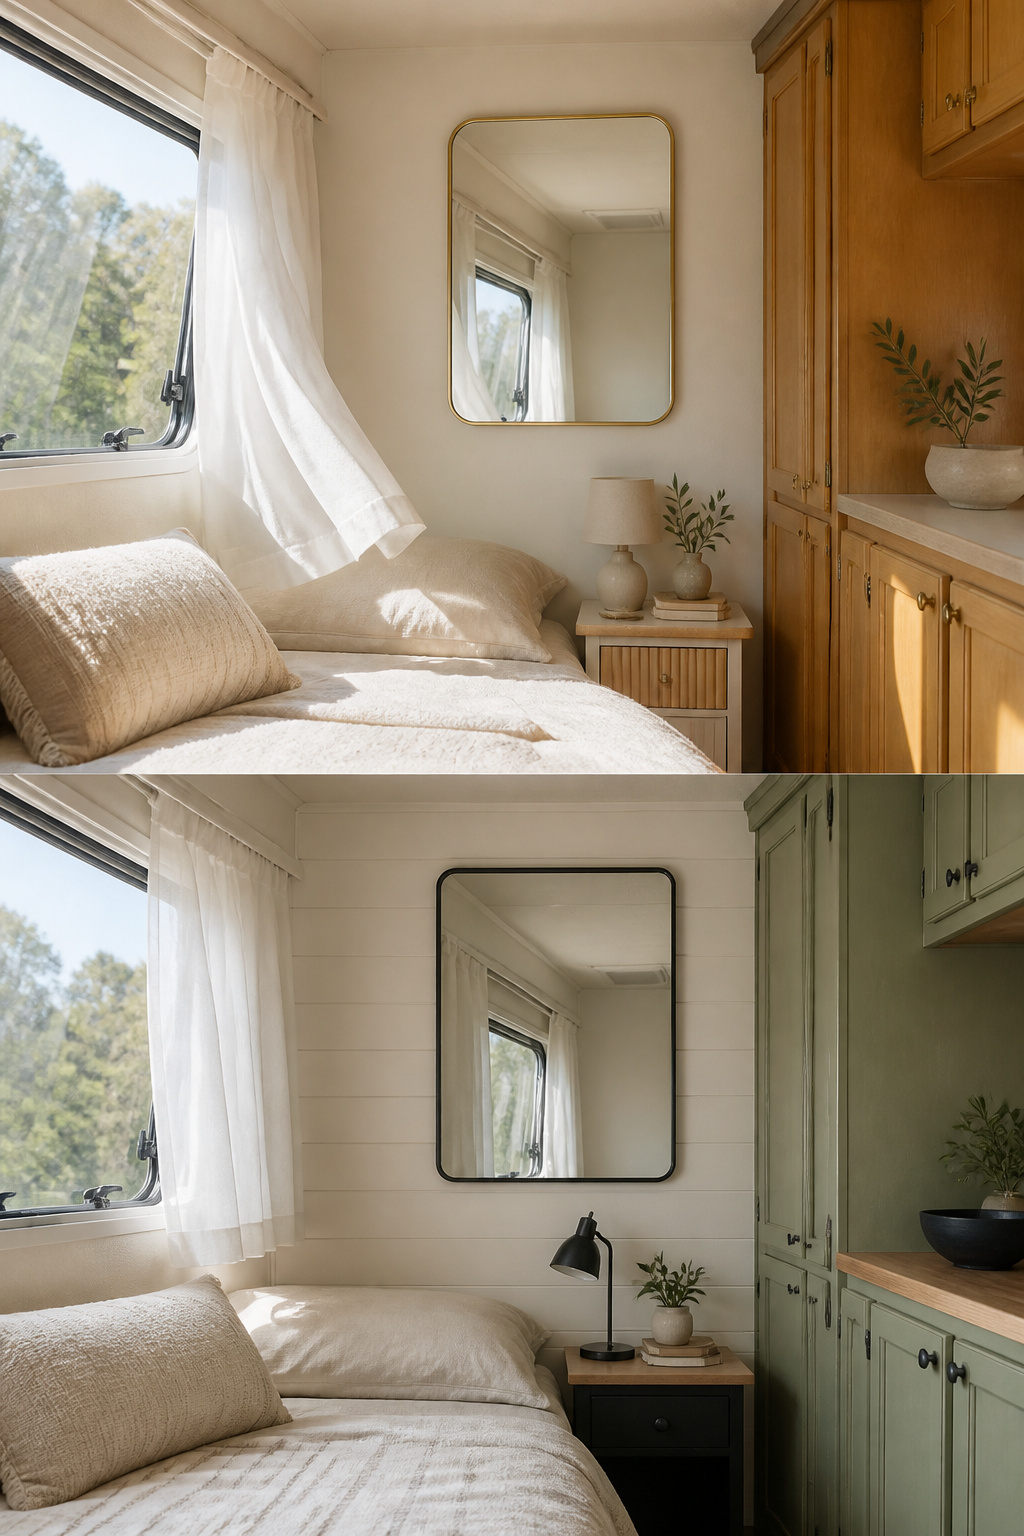
Sheer curtains and mirrors are the two fastest ways to convince a small camper that it has more room than it actually does. Hang a mirror directly opposite a window and it will throw daylight deep into the galley or sleeping area, doubling what you have to work with. Sheers in white, beige, or a soft pastel do the same job without blocking the glass the way blinds or heavy drapes do. The lighter the fabric, the more the walls seem to step back.
There is one placement that backfires: a mirror facing the door on the entry wall. Every time you walk in, you meet your own reflection head-on and the space feels like it stops right there. The fix is to shift it to a side wall, angled to catch the window instead. The room opens up, and the light keeps moving.
3. Smart Lighting
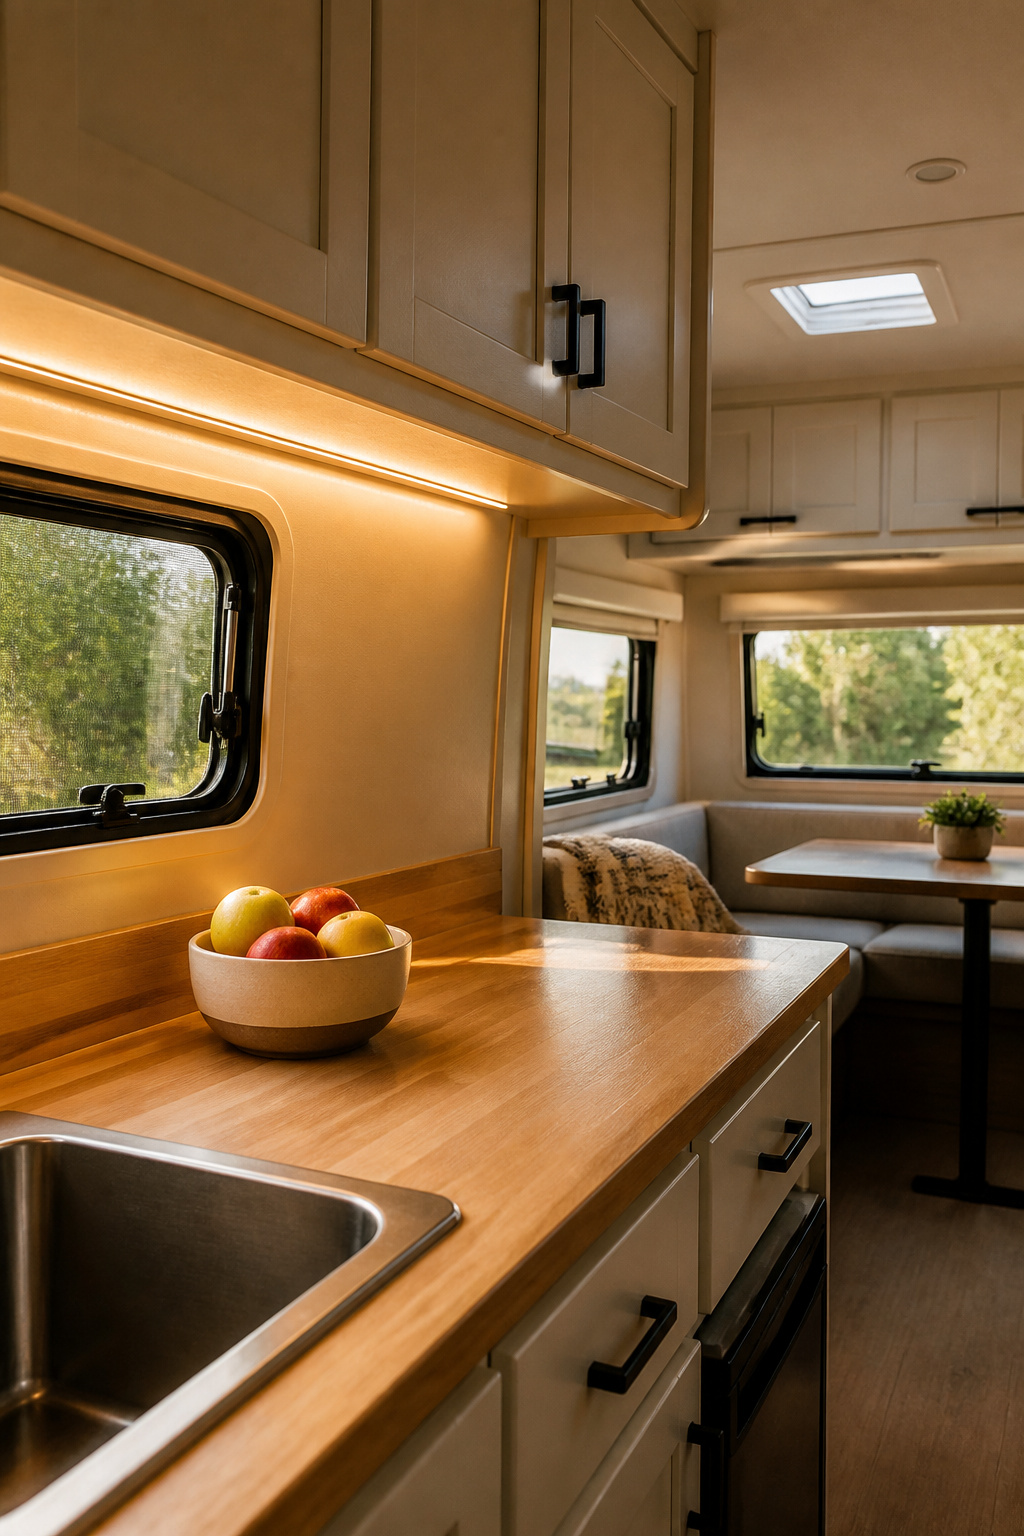
Light in a camper either works with you or against you, and the stock overhead fixtures usually work against you. They blast one flat tone that makes a narrow space feel like a waiting room. What changed the feel in mine was running a Govee Strip Light 2 Pro above the cabinets and under the bench seat, where the glow skips your eyes and washes the walls instead. The app lets you pull the color temperature down to candle-warm at night or push it bright and cool when you are cooking. The adhesive backing held through two summers of humidity, though I cleaned the surface with alcohol first and let it dry half an hour.
I started with a cheaper non-dimmable strip from a hardware store and regretted it within a week. It was either blazing or off, nothing between, so I pulled it down and spent the extra fifteen dollars for the adjustable kit. For areas without wiring, a small battery-operated lamp with a frosted shade does the same job. Sit it on a shelf or clamp it to a cabinet edge. The batteries last longer than you expect if you stick to warm white LEDs, and you can move the light where you need it instead of committing to a fixture.
4. Throw Pillows and Blankets
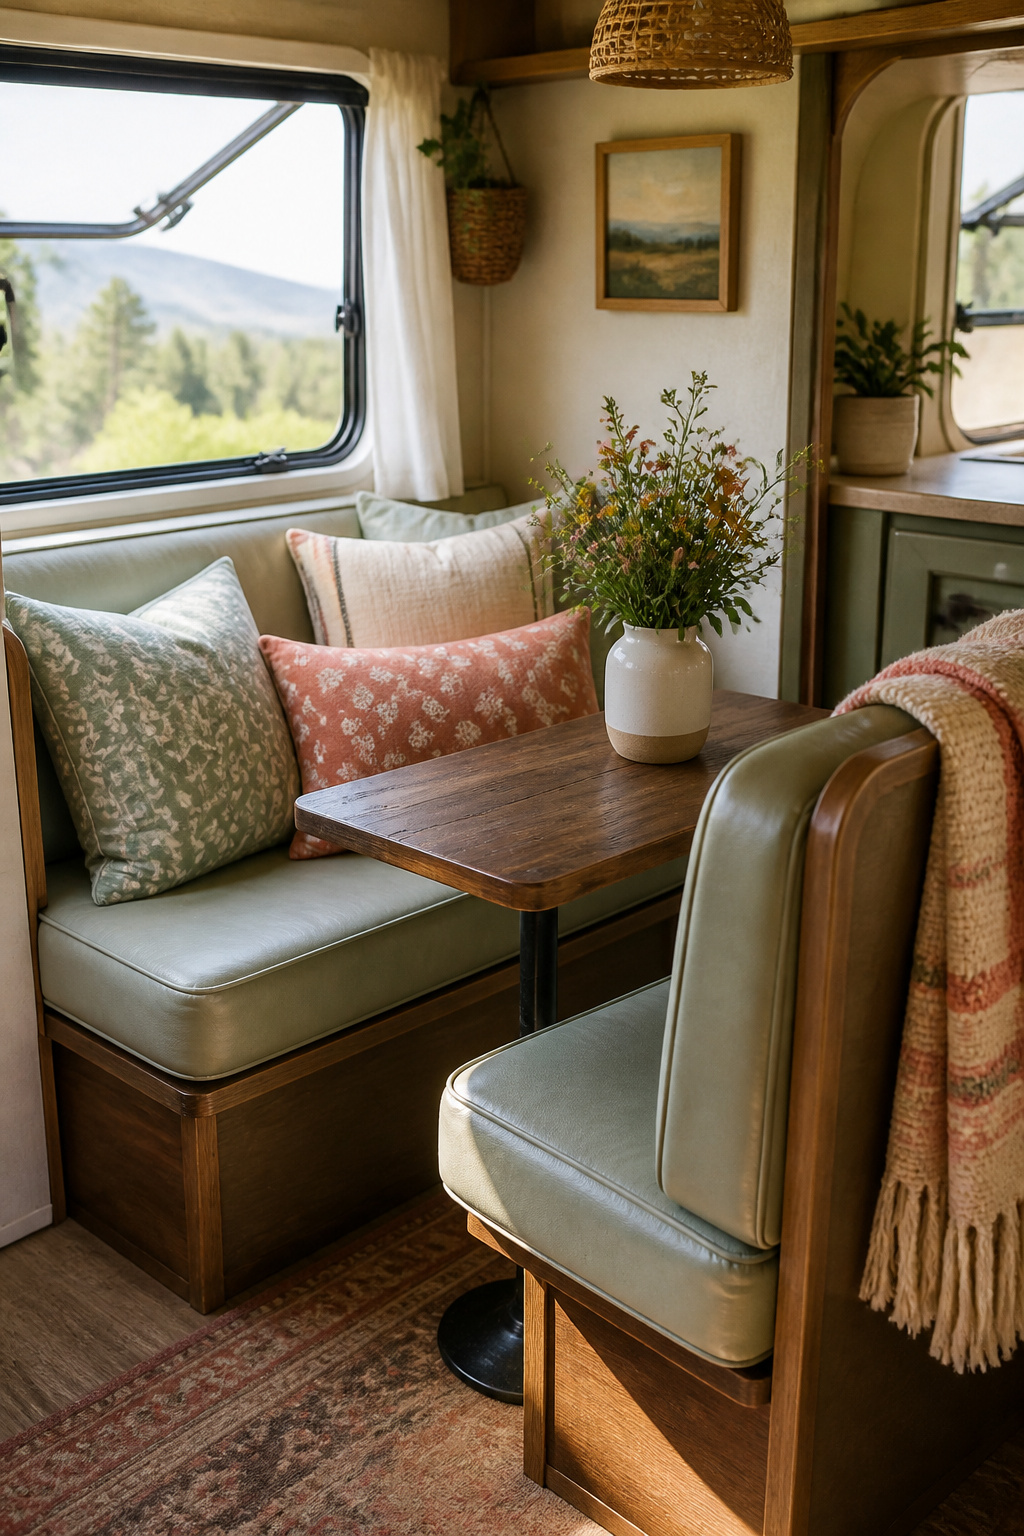
Throw pillows and blankets are where most camper makeovers start, and they are also where budgets separate into two clear tiers. At roughly $40, you are looking at a couple of standard polyester-filled pillows and a fleece throw from a big-box store. They read as colorful for about two weekends, then the fill packs down and the surface starts pilling where it rubs against vinyl seating. At $120, you can source two pillows with removable covers in a cotton-linen blend plus a woven acrylic blanket. The removable covers matter more than the pattern, because camper seating collects road dust and coffee drips faster than any living room.
For fabric choices, outdoor-rated acrylic or a cotton-poly canvas holds shape through temperature swings and compression. Straight cotton gauze or loose-knit chenille looks soft in the store but flattens into a pancake after a few drives, especially if someone naps against the window. If you store bedding in overhead bins during transit, pick fabrics that spring back rather than remembering every crease. Velcro or ties on pillow backs keep them from sliding onto the floor every time you take a curve, a detail that costs nothing extra and saves constant repositioning.
5. Multi-Purpose Furniture
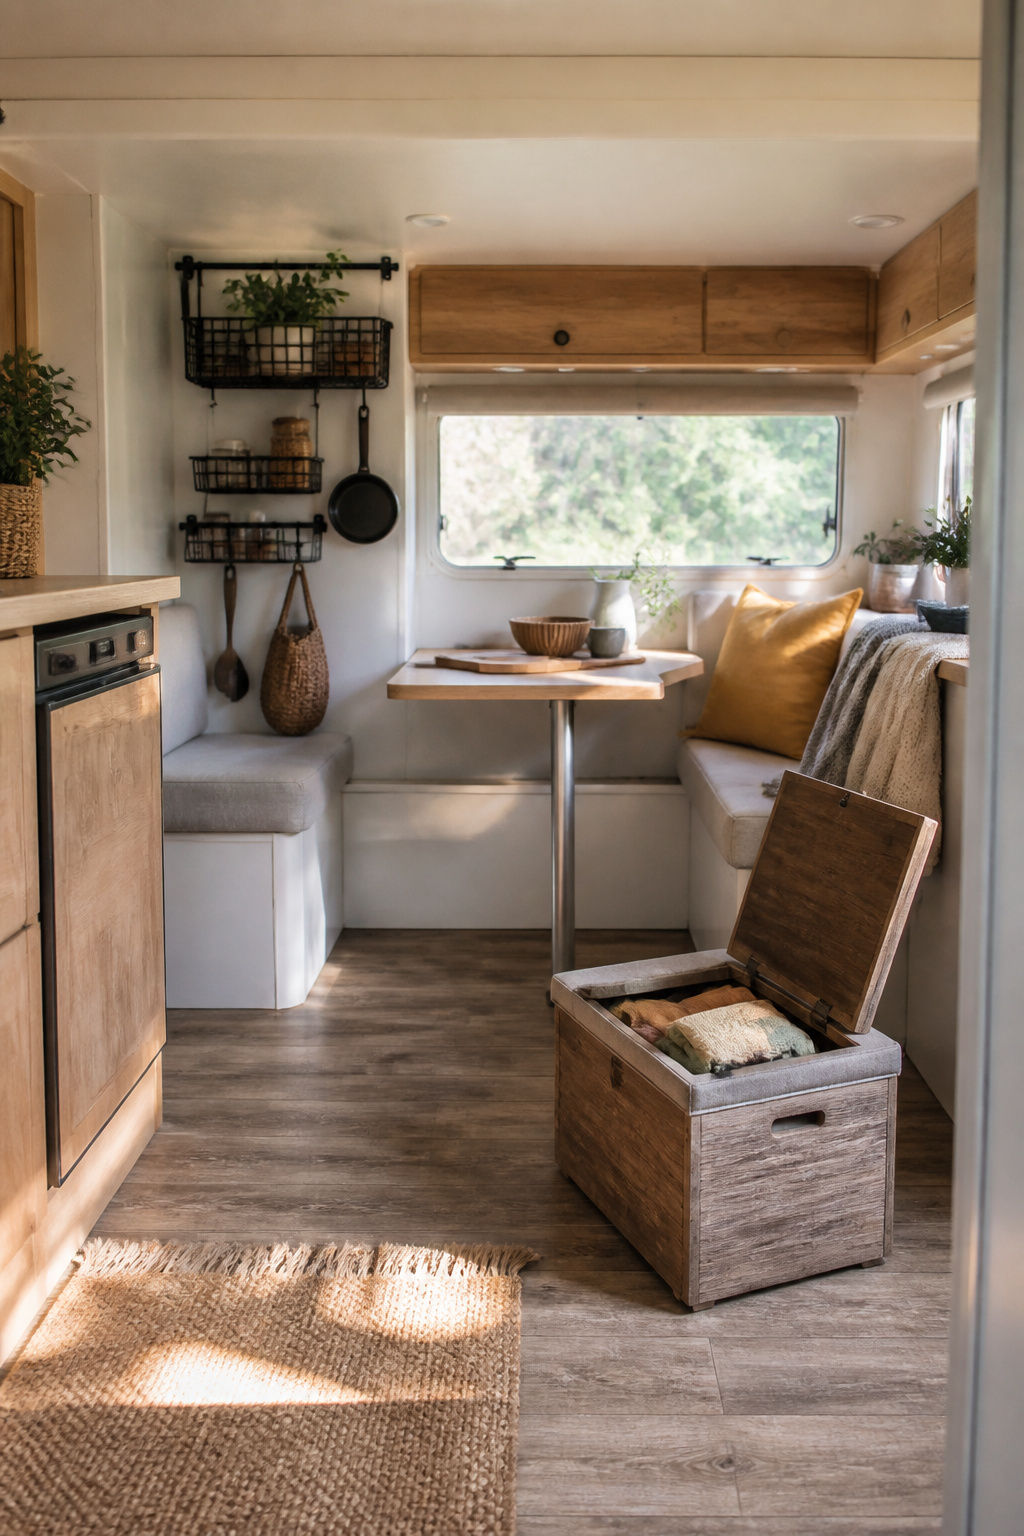
Small campers punish every piece that does only one job. A bench that stores bedding, a table that drops into a sleeping platform, a stool that opens to a cooler: these are the pieces that let you cook dinner without climbing over your own furniture. The sources all point toward compact, foldable pieces that tuck away when the floor needs to clear for a project or for guests.
The danger is assuming that "compact" means it can take adult weight. Check the weight rating before you buy, and do not trust the photo. One common failure is a folding storage ottoman rated for light storage that collapses under the weight of someone sitting down to lace their boots. The frame may be particleboard with a fabric skin, and the hinge hardware bends in a month of real use. Look for a static load rating, not just a shipping weight, and test it in person if you can. A piece that holds 200 pounds will survive being stepped on to reach an overhead cabinet; one that holds 80 will not.
IKEA, Home Reserve, Recpro, and Flexsteel all make lines sized for RV dimensions, though you will still need to bolt anything down before you drive. That step matters more than the brand.
6. Faux Plants
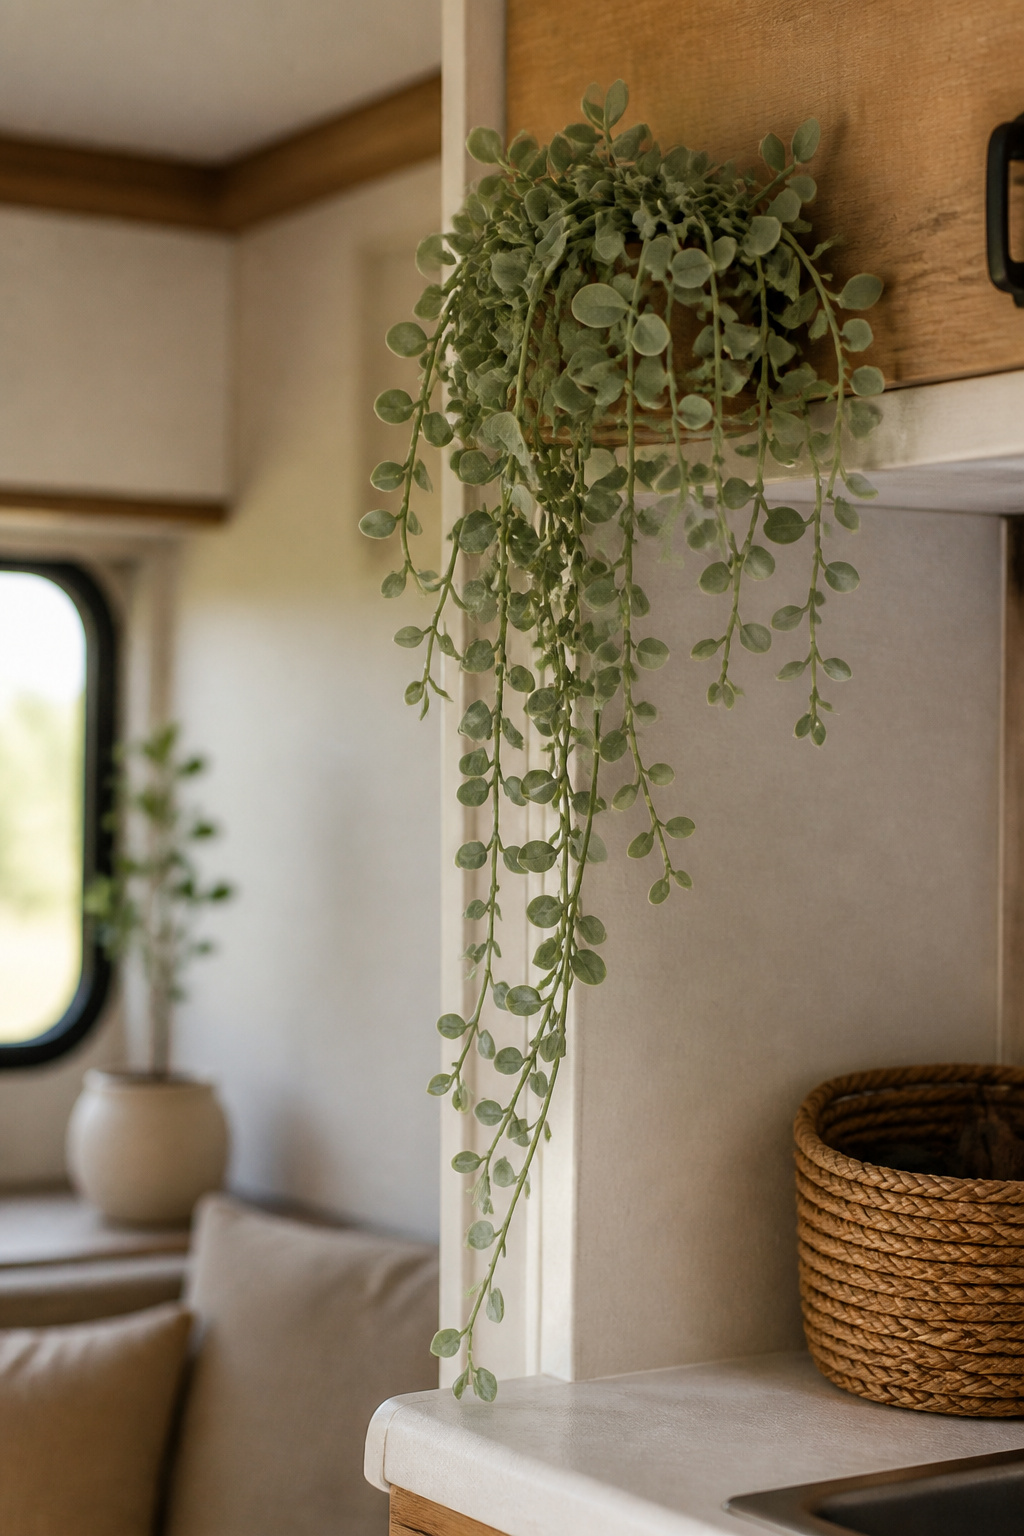
Real plants rarely survive a camper. The light shifts with every parking spot, the temperature swings between noon and midnight, and a water spill on a curve means a mess you did not plan for. Faux plants solve all of this, and the good ones now cost less than a single season of replacing dead pothos.
The mistake most people make is grabbing the first cheap succulent from the big-box shelf. One variety that looks fine on the rack turns plastic from two feet away: the standard echeveria rosette with a uniform waxy coat and no color variation. The edges are too smooth, the center too perfect, and under camper LEDs it reads as obvious toy.
What to hunt for instead is matte texture and imperfect edges. Look for leaves that carry a soft, almost dusty finish, with slight curling or browning at the tips. The best fakes mimic plants that are slightly thirsty, not showroom-perfect. Snake plants and trailing pothos imitations pull this off more convincingly than succulents do, because the real versions are already a little rough.
Hang a small trailing vine from a cabinet corner, or set a single stem in a thrifted ceramic pot on the dinette. Skip the soil unless it is convincingly dark and uneven; glossy black pebbles or plain sand read cleaner and need no dusting.
7. Outdoor Rugs and Furniture
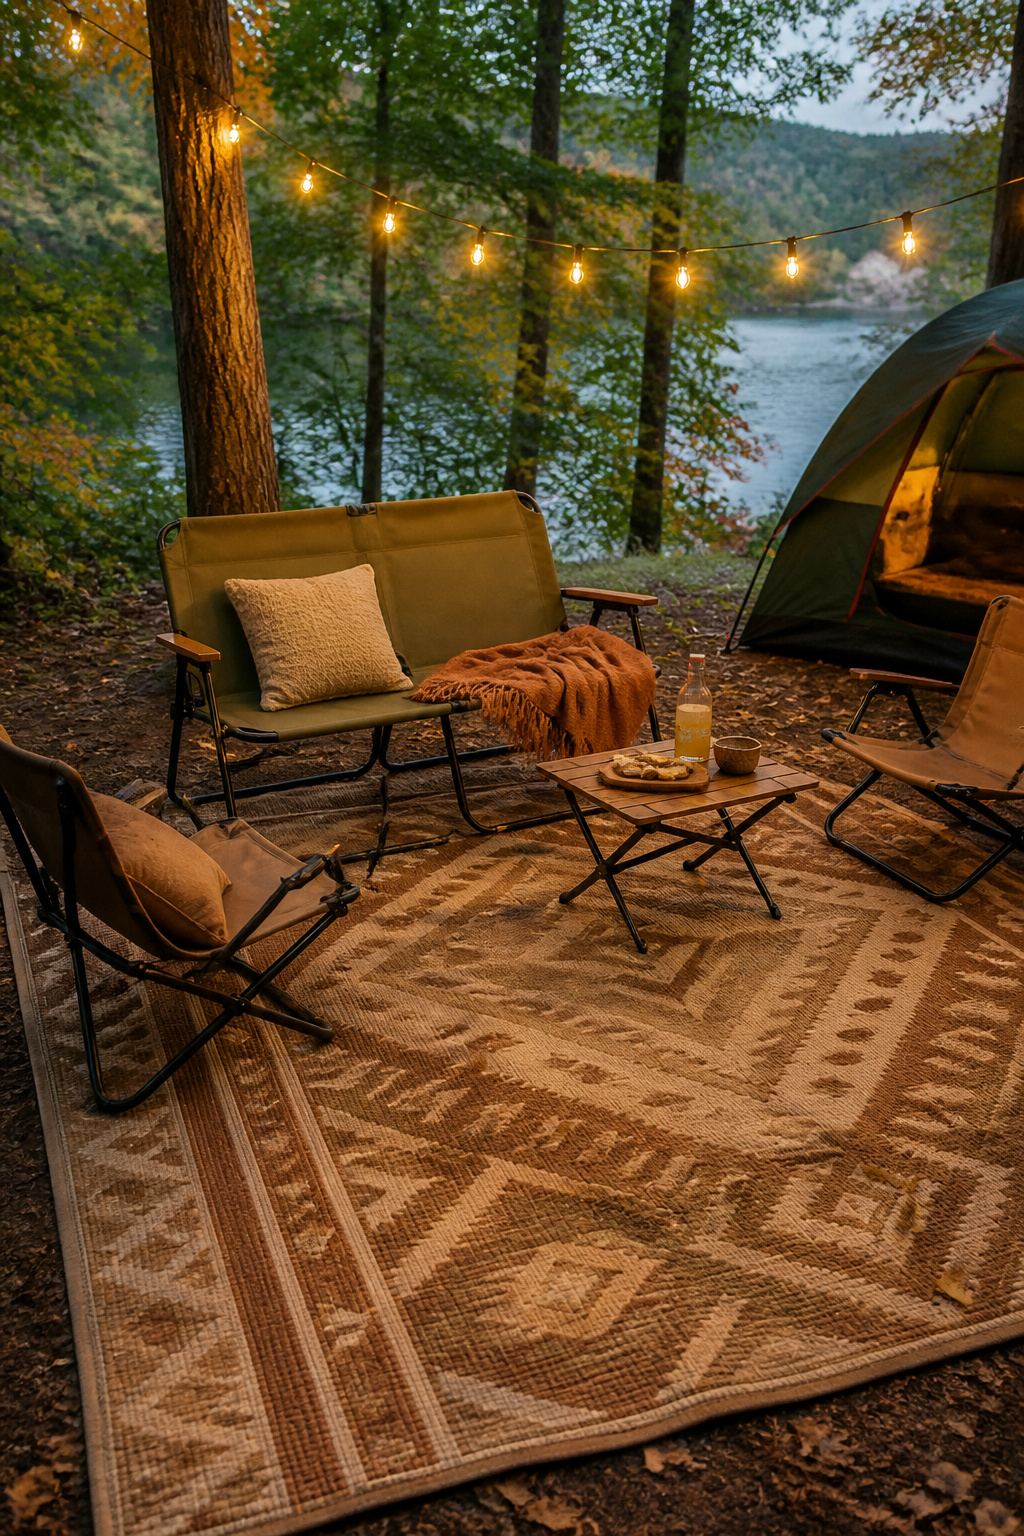
The outdoor space is where you actually live on a camper trip, so it pays to think of it as a room without walls. Start with a rug that can handle dew and the occasional spilled drink. I learned the hard way that a standard cotton-backed mat will mildew after one good rain, even if it dries in sun the next day. Switching to a polypropylene weave solved that completely; the same hosing-off you give your camp chairs keeps it clean.
For lighting, Govee Outdoor String Lights 2 run about $45 and give you app-controlled color temperatures without climbing a ladder each evening. The warm white setting at 2700K is what you will use most, but having a dimmer matters more than you think when you are trying to read by picnic-table light and your partner wants to stargaze.
A folding camp loveseat and two low chairs fit most standard pads without crowding the fire ring path. If your campground supplies only the table, a $12 vinyl tablecloth with elastic edges beats wiping sap daily.
8. Themed Decor
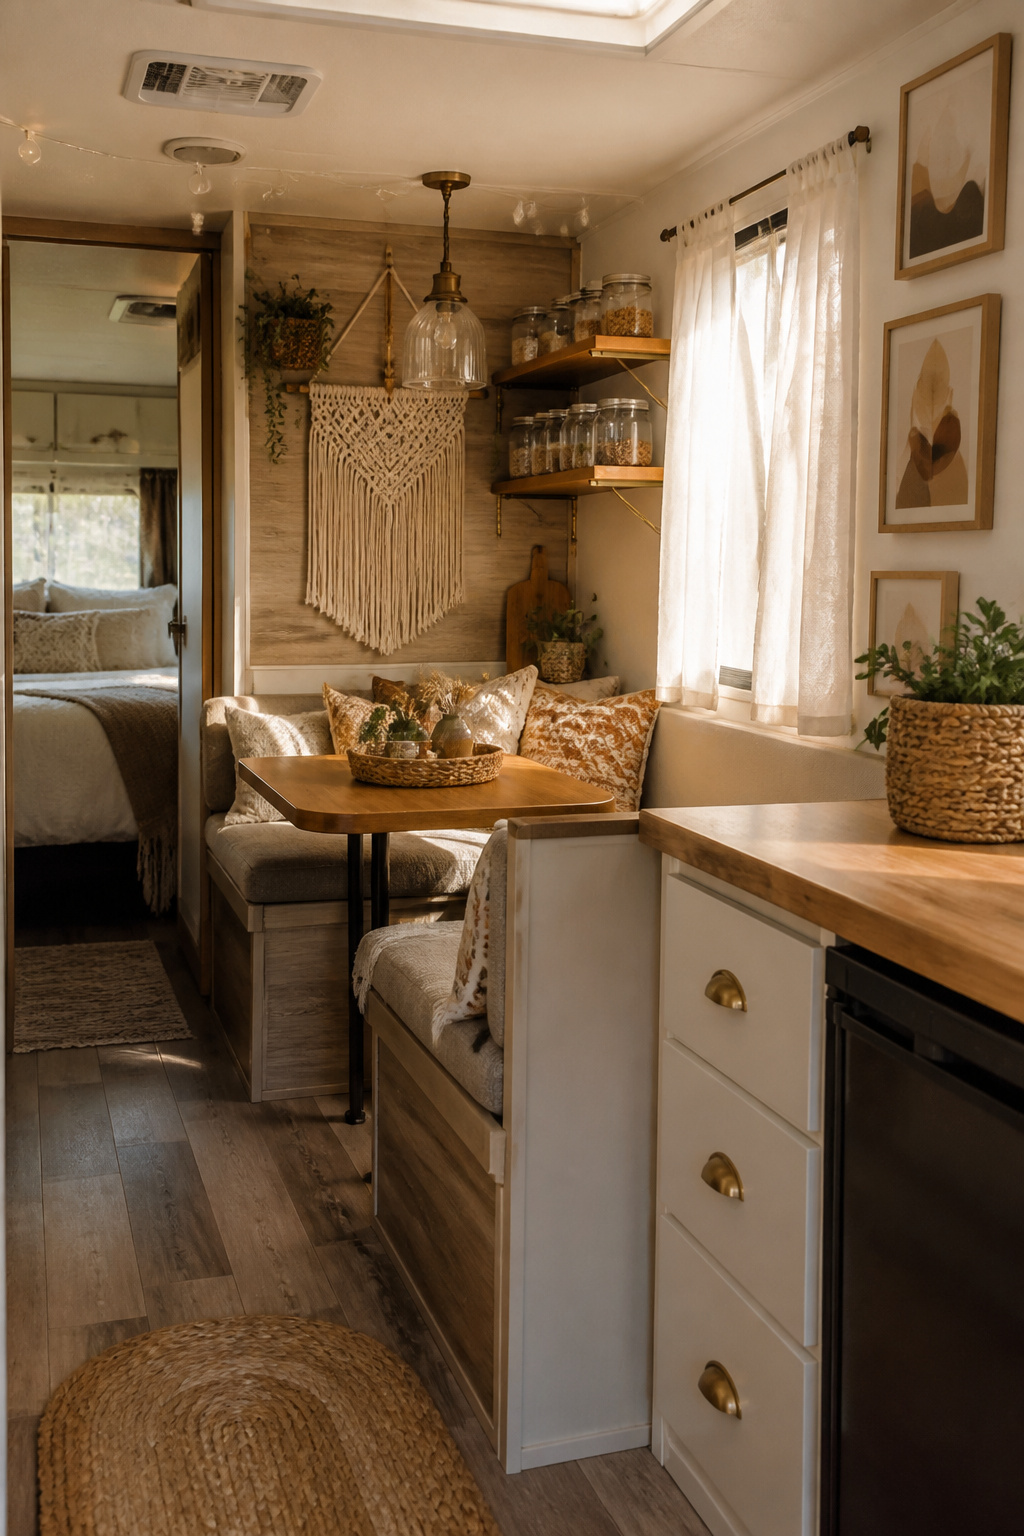
Pick one lane and stay in it. Bohemian with macramé, warm tones, and natural fibers, or rustic with wooden accents, mason jar storage, and vintage-style fixtures. Both work because a camper is small enough that a few accessories carry the whole look.
The mistake is trying to split the difference. A reader who mixes two themes ends up spending a weekend re-coordinating, pulling half the pieces out and starting over. The color scheme decides whether it looks intentional or accidental. A consistent palette saves you from that do-over, even when the individual items are simple throw pillows and a shower curtain.
9. Vintage and Rustic Elements
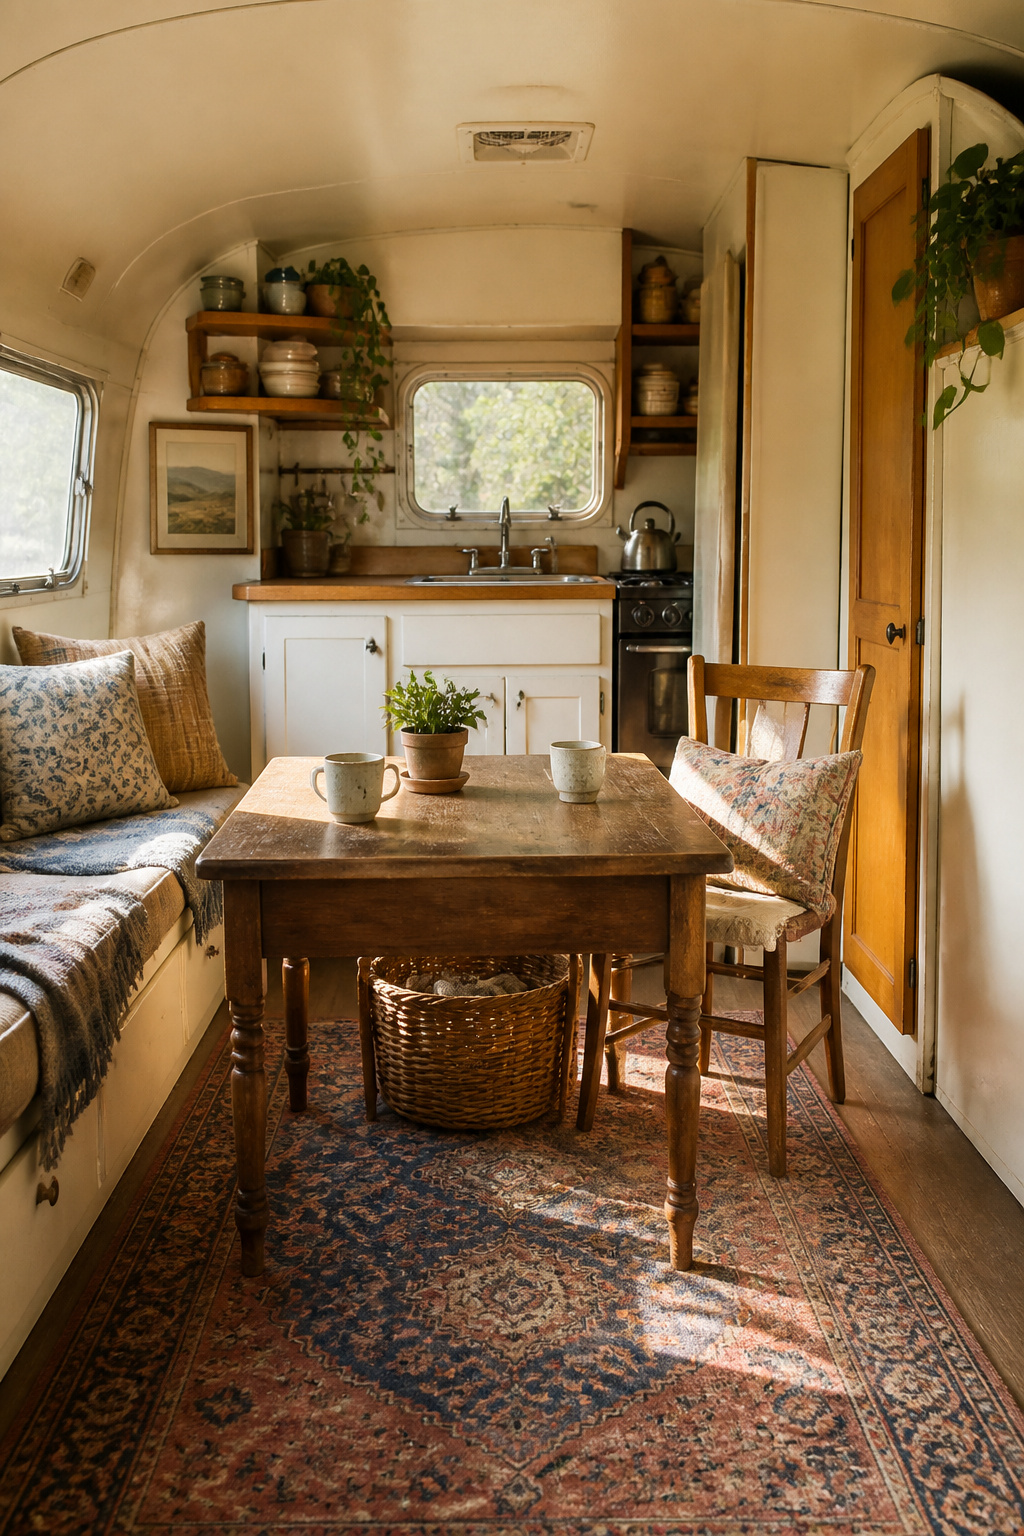
Old wood carries weight a factory finish never matches, but not every crack is character; some cracks mean rot. You learn this after a stool you loved collapses under a grocery bag.
Start with the stress points. Wiggle legs on chairs, lift drawers fully out of cabinets, and press your thumb hard into any joint that looks suspicious. If it gives like a sponge, walk away. Solid wood dents; particleboard crumbles. Smell for mildew in cushions you cannot unzip, and hold frames up to daylight to check for warping that only shows from the side.
Flea markets and estate sales price by romance, not engineering. A seller who calls something "farmhouse" has already added twenty dollars. Arrive late on the last day, when they would rather halve the tag than haul it home. Habitat ReStores and Facebook Marketplace move faster but show more honest photos, and you can message to ask about weight limits before you drive.
The piece that fell apart on me looked fine in the golden hour light. It was painted pine, maybe forty years old, and the paint hid where a previous owner had already glued the leg once. I had not checked underneath. Now I flip everything before I pay, and I carry a small flashlight even in summer. A twenty-dollar find that lasts one season is not a deal; it is a weekend lost to repairs you did not plan for.
10. Seasonal Decor
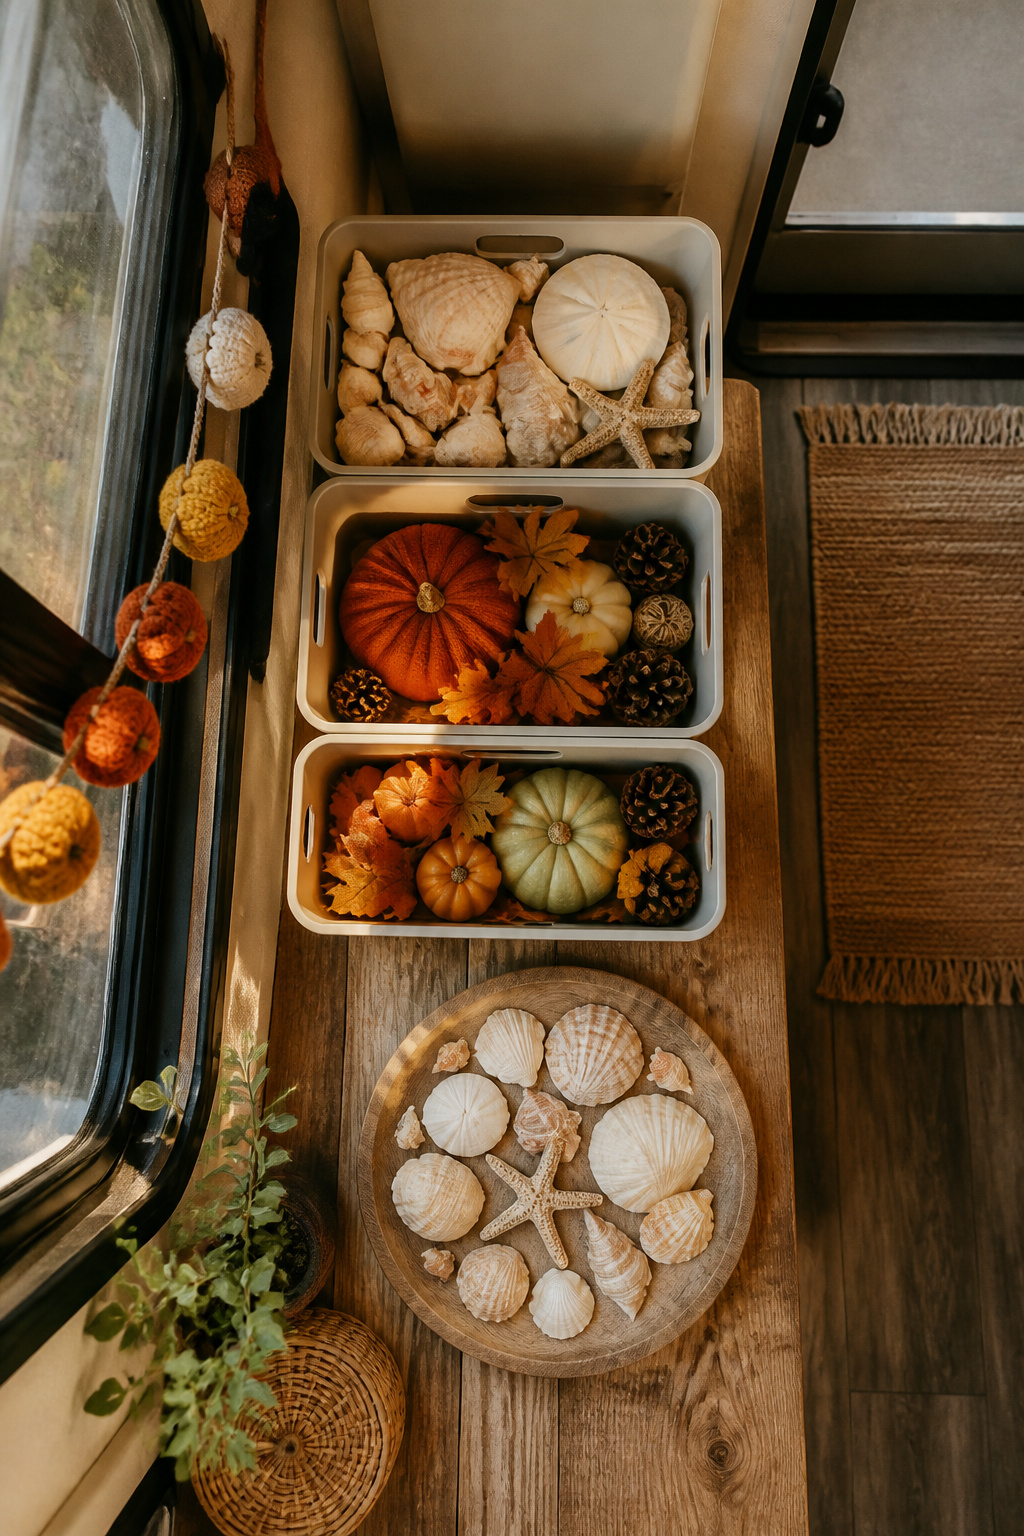
Seasonal camper decor sounds manageable until you try to store it all. That one exterior compartment, roughly the size of a large cooler, is what you are working with. Most owners fit three to four labeled bins in that space if they stack flat and skip the bulky plastic latches. That is your entire year: spring, summer, fall, winter. Not every micro-season, not the Pinterest board for coastal grandma July. Four bins, maybe five if you compress the textiles.
The rotation you plan rarely survives June. You start out swapping every equinox, but by mid-July the fall bin is still buried under the beach towels and you are clipping dollar-store gourds to the same command hooks that held the Fourth of July garland. The schedule that actually works is simpler: two swaps a year, Memorial Day and the weekend after Thanksgiving. Anything more frequent and the bins stay out on the dinette, blocking the one walkway, which turns decorating into a chore you skip.
Seashells and mini pumpkins share the same weakness: they look collected, not cute, unless you edit hard. A dozen shells in a shallow dish reads intentional. A jar of forty looks like you forgot to unpack. The same rule holds for string lights shaped like leaves or snowflakes. One strand, one surface. The camper is small enough that repetition becomes noise fast.
11. DIY Decor Projects
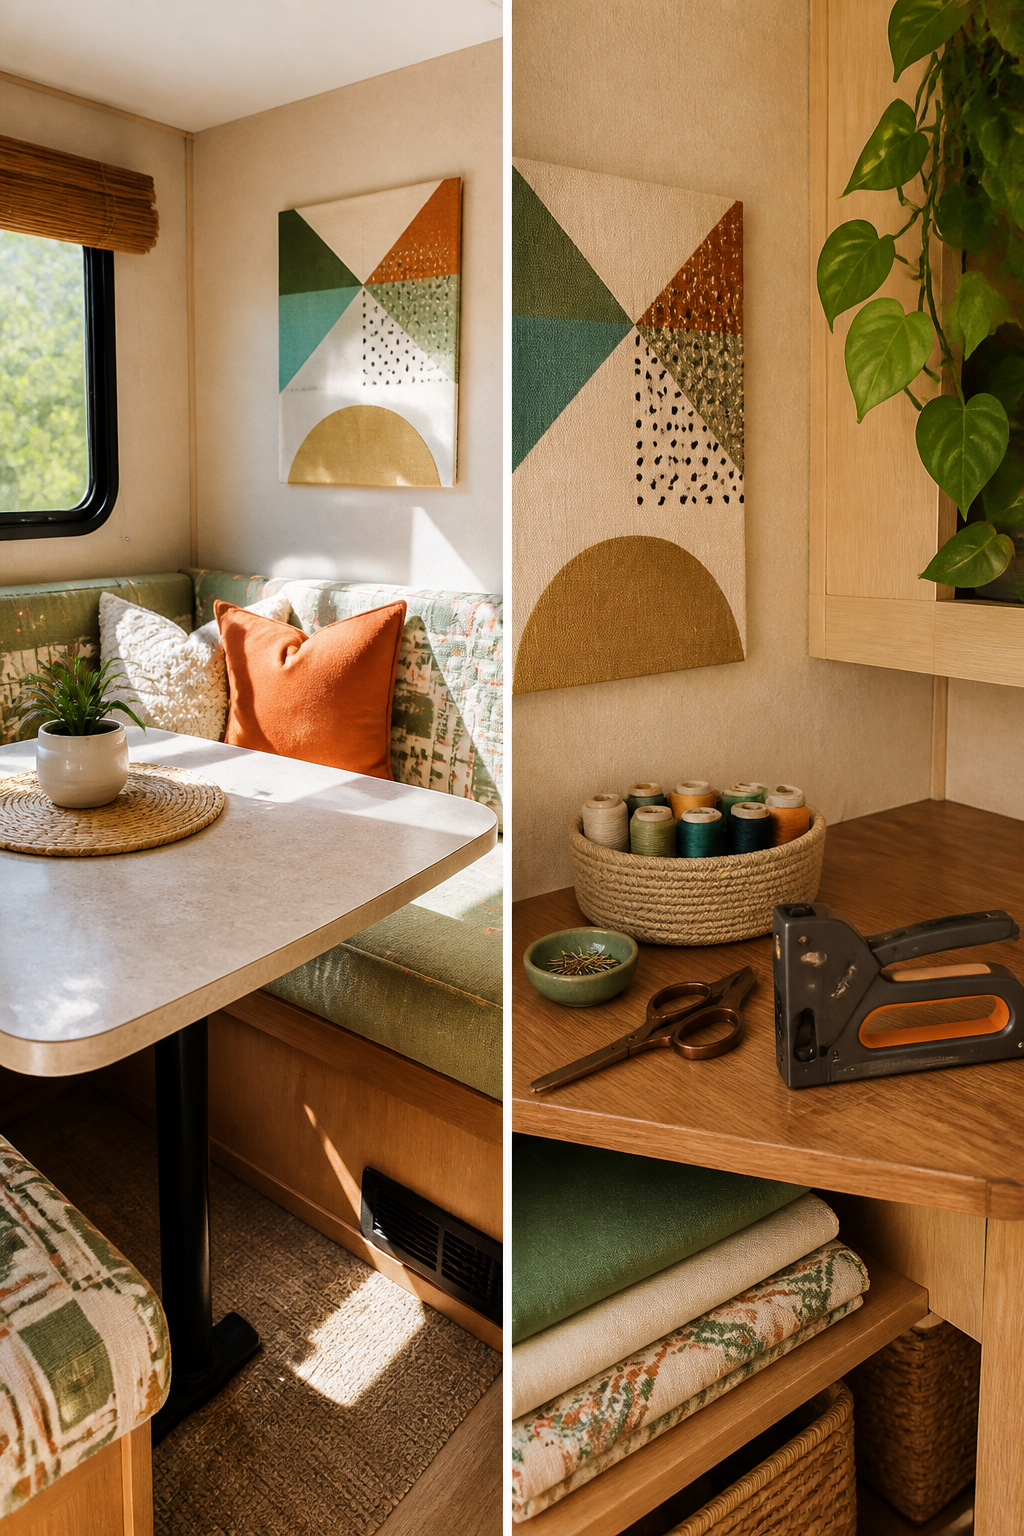
Handmade wall art is where a camper stops looking like a rental and starts looking like yours. A fabric-covered canvas takes up no space at all, weighs next to nothing, and hides the odd stain that comes with buying used.
Reupholstering the dinette cushions is the project that teaches you patience. One weekend, budget two hours; plan on six. The seams fight you, the corners bulge, and the staple gun you borrowed does not have the right crown width, so you hand-crank half the staples with pliers until your thumb goes numb. The stripes come out straight enough from across the aisle. From the doorway, you notice the bench back tilts a degree left. It has stayed that way through two seasons now.
The point is not perfection. It is walking in after a long drive and seeing something you fixed with your own hands.
12. Storage Solutions
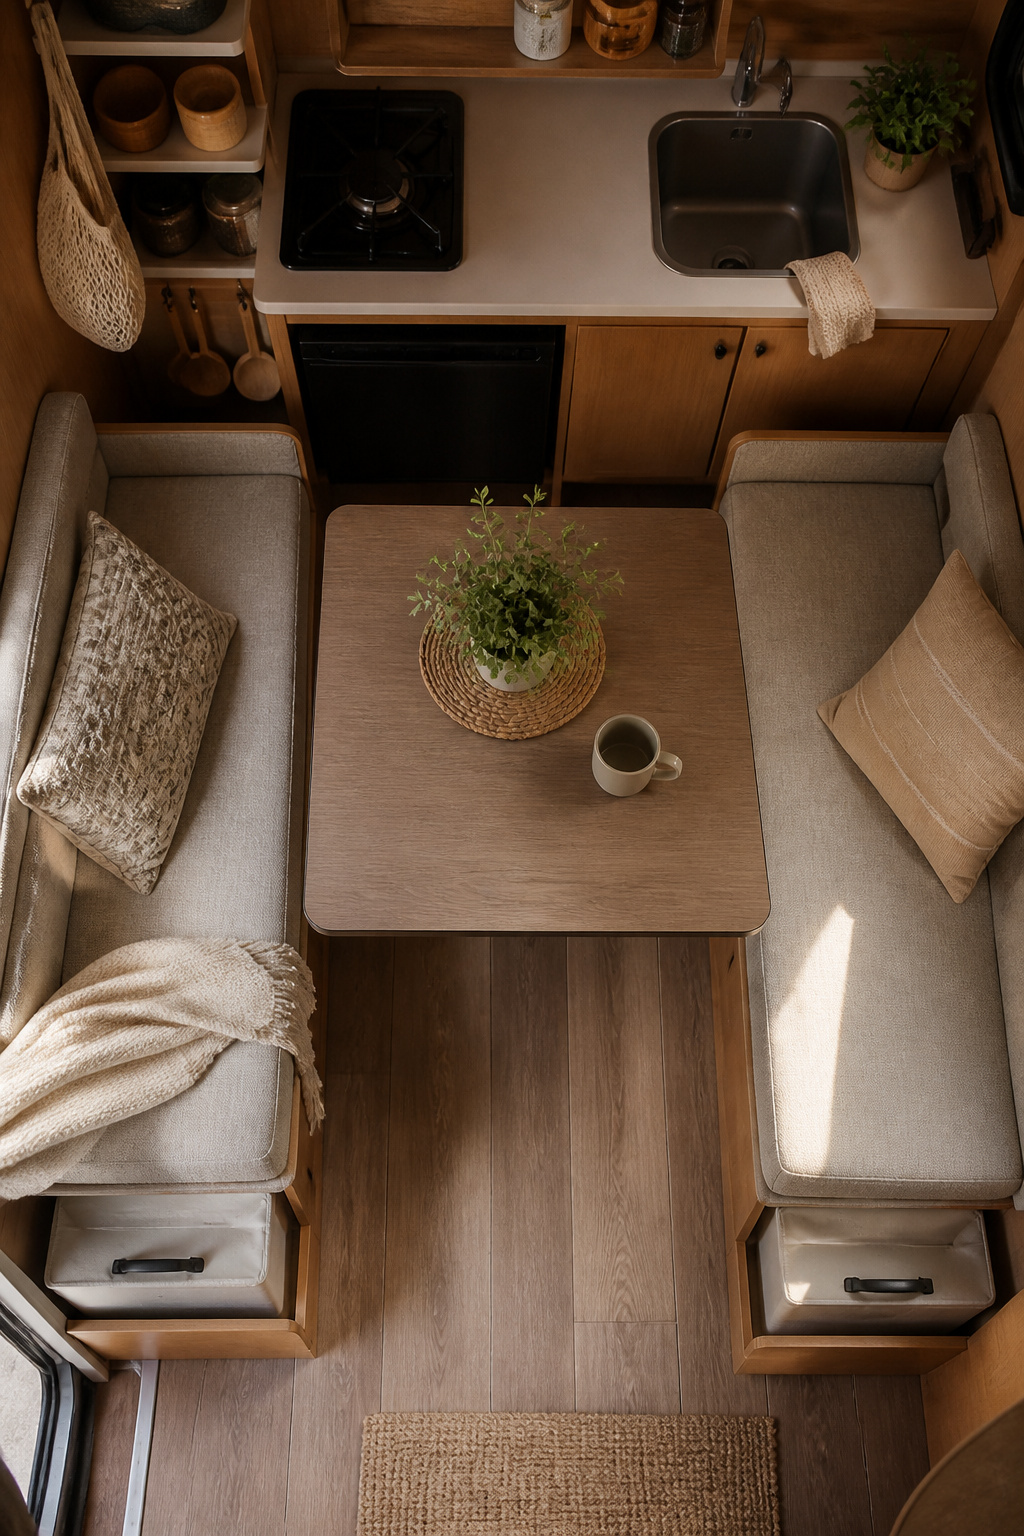
The first thing to know about organizing a small camper is that the bin that stacks in the store may not stack once you load it. You need bins with straight sides and a lip that locks, not the tapered kind that nest for shipping and slide apart the first time you hit a curve. I learned that the hard way with a set that looked uniform on the shelf and turned into a sliding mess under the dinette.
Shelves help, but test your wall before you commit. One set of utility shelves I considered needed anchor points the thin paneling simply could not take. The better move is often freestanding units inside cabinets or wardrobes, maybe with a strip of carpet on the surface to keep baskets from shifting while you drive. Under-bed storage is where the real volume hides, and it is worth the effort to find bins that slide out on their own rather than forcing you to lift the mattress every time.
For walls, Command hooks and strips let you hang utensils or small gear without drilling. Keep the weight light and skip anything with glass. The less you leave out in the open, the larger your camper feels.
13. Wall Art and Souvenirs

Wall art in a camper works best when it weighs almost nothing and carries a story you already own. A paper map from a road trip, a pennant picked up at a state fair, a grid of printed photos from your phone; these fill wall space without the cost or heft of framed prints. Command strips handle the hanging, since screws in thin camper walls are a repair you will want to avoid.
One warning from the road: skip the wax souvenir. The kind molded into a shape and sold at gift shops will soften in summer heat parked in full sun, then leave residue on whatever surface it touched. Use Command strips, not adhesive backing, on anything with sentimental value. If a piece has glass, leave it home; vibration and tight turns break it, and the weight adds up faster than you expect. Wire grids and lightweight fabric banners are the safer bet for personality that survives the drive.
14. Cozy Bedding

The first upgrade most people attempt is a set of proper sheets, and thread count above 400 is usually wasted on camper mattresses, which run short of standard lengths and wear fitted sheets at the corners faster than a stationary bed. What convinced me, reading through a dozen of these setups, is that deep-pocket construction matters more than any number on the package. A regular queen fitted sheet on an RV short queen will fight you every morning, and the corner that worked loose on night three will pop off entirely by night four.
The $8 fix is a set of elastic sheet straps, the kind with metal clips that hook under the mattress. Thread them corner to corner before you make the bed, and the sheet stays put through rolling over, climbing down, and the small earthquakes of road travel. For top layers, skip the heavy duvet; two lighter blankets stack warmer and store flatter in the overhead bin you are probably using for linens already.
Lighting Strategy
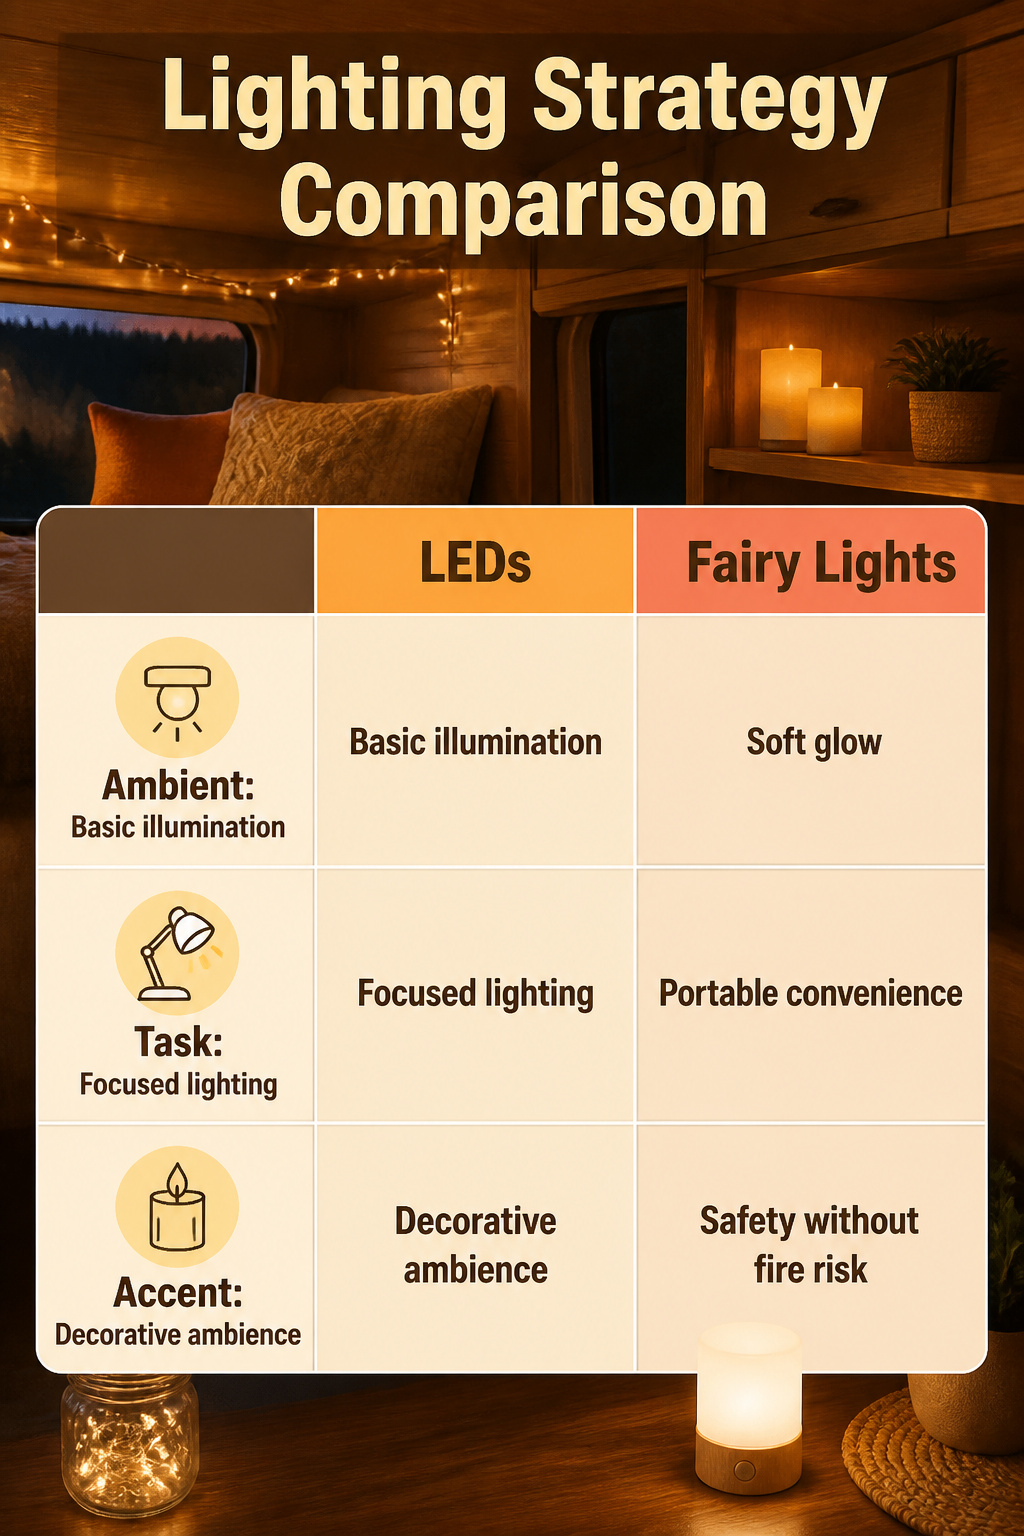
The overhead LEDs in most campers do the job of lighting a space, but they do not do the work of making it feel like one. That is where the layering starts. Build from three kinds of light and you stop living inside a single switch.
Ambient light is your base layer, the glow that lets you move around without reaching for a fixture. This is where fairy lights earn their keep in a small space. Strung above the bed or coiled in a mason jar on the counter, they give enough spread to relax by without the clinical punch of factory fixtures. They replace smart strips in spots where you want softness over programmability, and they travel without wiring.
Task light is what you need to actually do things: read, cook, find the back of a cabinet. Rope lights taped to the rear wall of a deep cabinet solve the shadow problem that overhead LEDs create. For the kitchen counter or a side table, a small battery lamp gives you a directed pool you can move where the work is.
Accent light is the layer that reads as decor. Battery candles on a shelf or windowsill give the warm flicker of flame without the fire risk in a moving vehicle, and they stow in a laundry basket when you roll.
The mistake is treating these as either-or choices. Fairy lights do not replace a reading lamp. A battery candle does not light your prep space. Run all three on separate controls and you get a camper that shifts from functional to settled with the turn of a few switches.
Color Choices That Expand Space

White walls and bedding open a camper up the way a window does: they catch whatever light you have and push it back into the corners. Go too far with white and the place turns sterile, so you need a second color to ground it. The ratio that keeps the balance is about 80% light to 20% dark, which in a 20-foot camper means pale walls, ceiling, and bedding with one charcoal cushion, a navy throw, or forest green cabinet hardware. Darker accents read as punctuation, not walls closing in. Skip the bright cushions and splashy rugs unless you want the space to feel busy; a single deep tone against all that white does the personality work without stealing the square footage.
Furniture That Folds
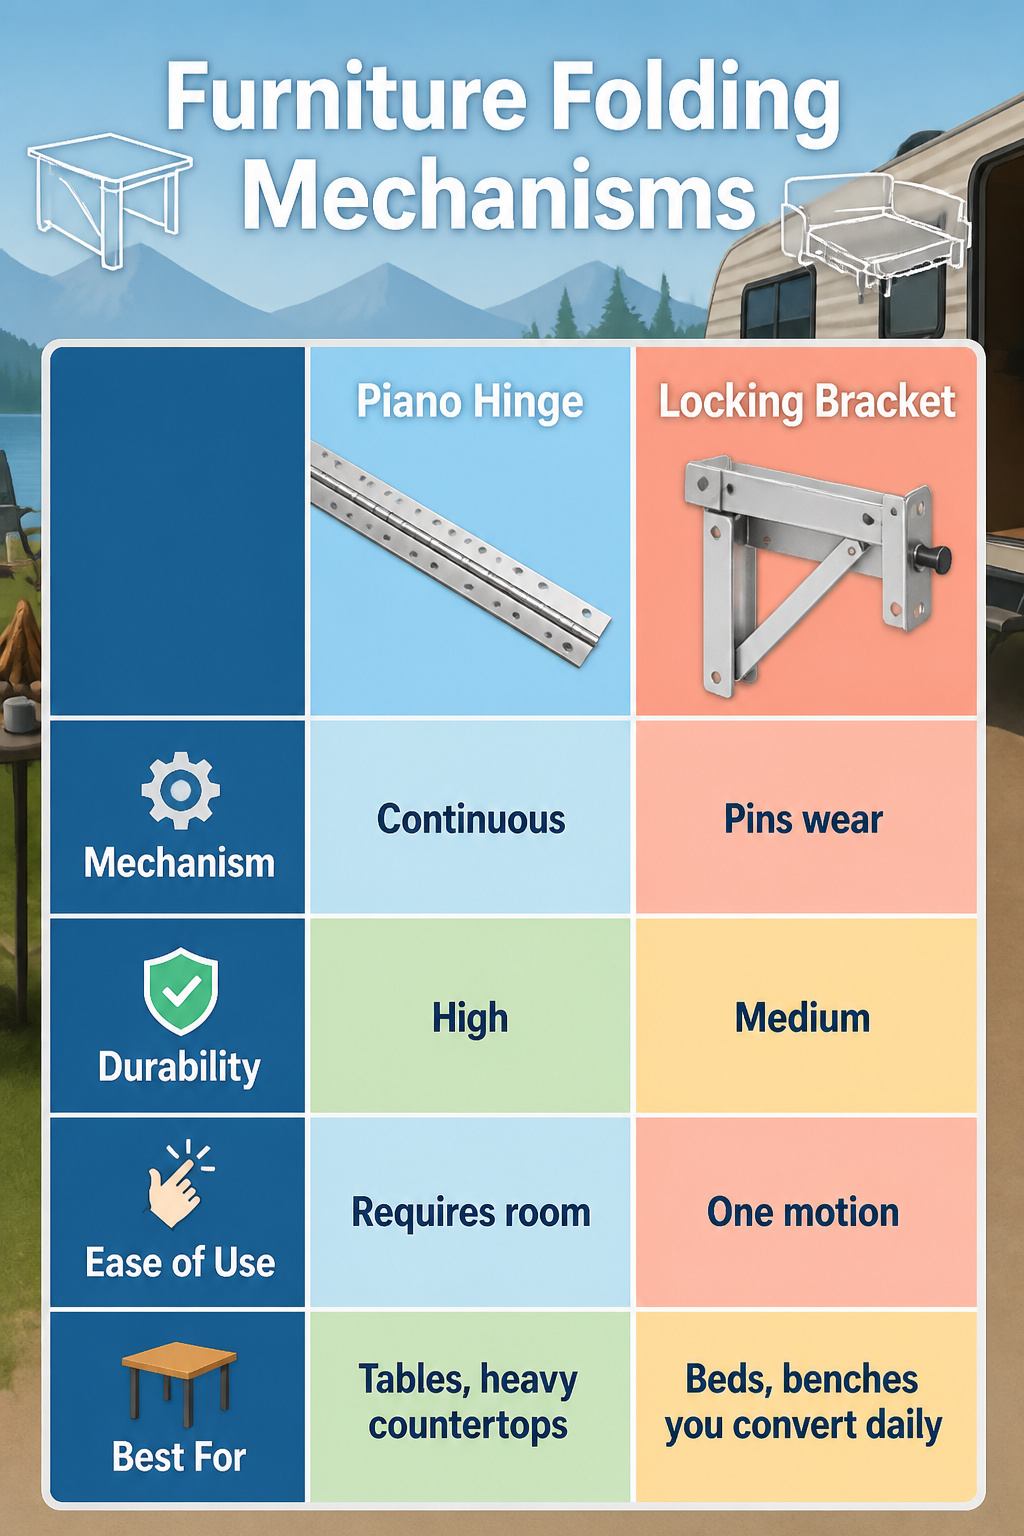
Wall-mounted drop-leaf tables and sofa beds get most of the attention in small campers, but the hardware underneath matters more than the style on top. What convinced me, reading through a dozen of these builds, is that the hinge system determines whether you actually fold the thing up every morning or leave it down and trip over it.
| Mechanism | Durability | Ease of Use | Best For |
|---|---|---|---|
| Piano hinge (continuous) | High; no single stress point | Needs two hands and clearance space | Tables, heavy countertops |
| Locking fold-leg brackets | Medium; pins wear with frequent cycles | One motion, positive click | Beds, benches you convert daily |
| Wall-mounted swing arms | High; minimal moving parts | Requires strength and attention to clearance | Compact kitchens, occasional use |
Piano hinges distribute weight evenly across the full width, which is why they survive in camper tables that hold cast-iron skillets. The tradeoff is you need room to fold the leaf down and someone to guide it, so in a 6-foot-wide trailer, you are moving the dog and the laundry basket first.
Locking brackets win for anything you transform twice a day. The audible snap tells you the leg is engaged, which matters when you are setting up beds at midnight in a Walmart parking lot. They do loosen over years of vibration; check the pin quarterly if you full-time.
Swing arms keep the floor clear but demand precise alignment. Miss by half an inch and the tabletop binds against the wall. They work best for galley extensions you swing out for breakfast and stow before driving, not for surfaces you need in a hurry.
Outdoor Space Math
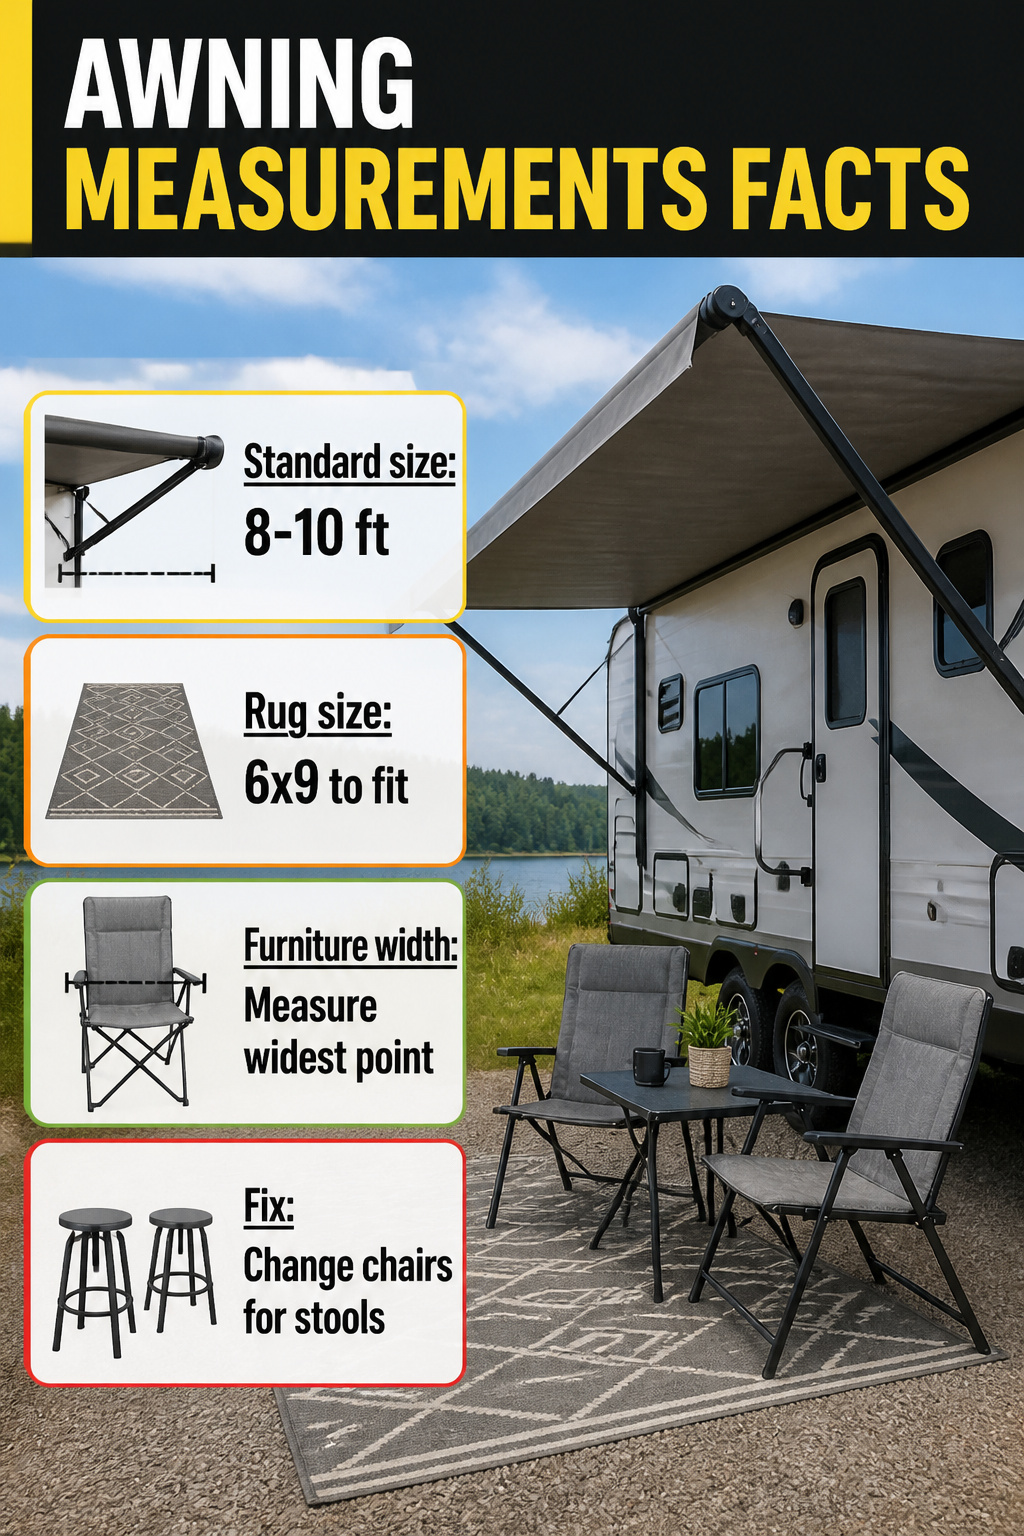
Most awnings extend eight to ten feet out from the camper wall, but the width varies by rig. Measure the full span between the arms, not just the fabric, because the support brackets eat an inch or two on each side. That number tells you whether a standard 8-by-10 outdoor rug will sit flat or bunch against a leg.
Rug sizes are forgiving. A 6-by-9 works under a café table and two chairs; 9-by-12 fits most full setups with room to walk around. The problem is rarely the rug. It is the furniture.
A folding bistro set listed at 36 inches wide often measures 38 at the armrests, or the legs splay past the frame. Two extra inches means the chair back hits the awning arm, or the whole set sits crooked on your rug. Measure at the widest point, including any hardware that does not fold flat. Bring a tape measure to the store, or check the assembled dimensions in the reviews, not the box specs.
If the set is already bought and too wide, swap the chairs for sling stools that tuck under. The table usually stays; the seating is what crowds the space. That fix runs about sixty dollars and saves you from staring at a return label in a campground parking lot.
What Makes Decor Stick
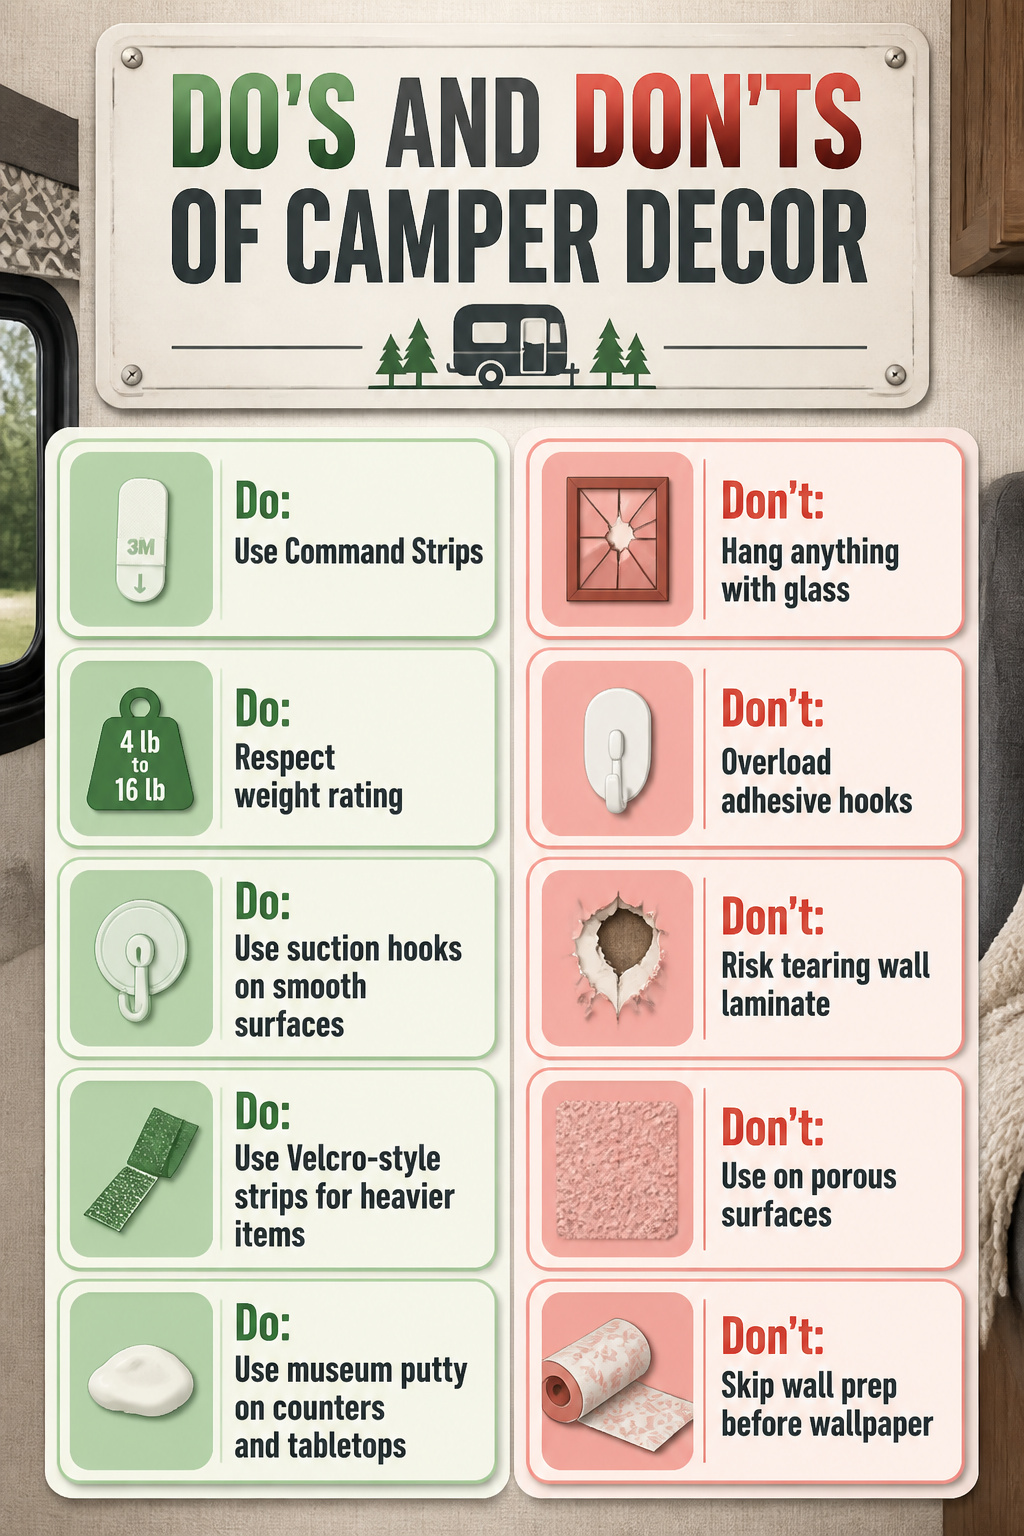
Camper walls are thin, hollow, and hiding wires you do not want to hit. That rules out screws and nails for most of what you will hang.
Command Strips carry the weight if you respect their rating. The small pairs top out around four pounds; the large ones near sixteen. Check the package against the actual weight of your frame, backing included, and add a margin for road vibration. Sources who have lived with this say they skipped anything with glass entirely. If it falls, it shatters. If it falls, it is also expensive.
Suction hooks work only where you have glass or sealed laminate. The bathroom mirror, a window, slick acrylic. On anything porous or textured, they release without warning.
One couple learned the hard way that a single adhesive hook, overloaded, tore a coin-sized flap of wall laminate clean off. The repair is visible forever. Spread weight across two attachment points, or step up to Velcro-style strips that distribute shear force along a longer line.
For peel-and-stick wallpaper, the wall prep matters more than the paper quality. Grease from camp cooking, silicone treatments, even old cleaner residue let the edges lift in heat. Wash with plain water, dry completely, and test one strip behind the door before you commit the roll.
Museum putty on counters and tabletops saves you from packing the fruit bowl every time you roll. It is not for walls; it is for the things that would otherwise rattle off them.
Frequently Asked Questions
How can I make my RV look nice?
Pull the design together with a clear theme, add personal touches like road-trip souvenirs or handmade art, and layer your lighting so the space feels settled rather than clinical. A consistent color scheme does more heavy lifting than individual pieces, and soft accent lights beat a single overhead switch every time.
What colors make your RV look bigger?
White, beige, and soft pastels push light back into corners and make walls seem to step away from you. Keep the ratio at about 80% light to 20% dark; one charcoal cushion or navy throw against pale walls adds personality without closing the space in.
How do I organize a small camper?
Use straight-sided bins that lock together, not tapered ones that slide apart on curves. Freestanding shelves inside cabinets work better than wall-mounted units in thin paneling, and under-bed storage holds the most volume if you find bins that slide out without lifting the mattress.