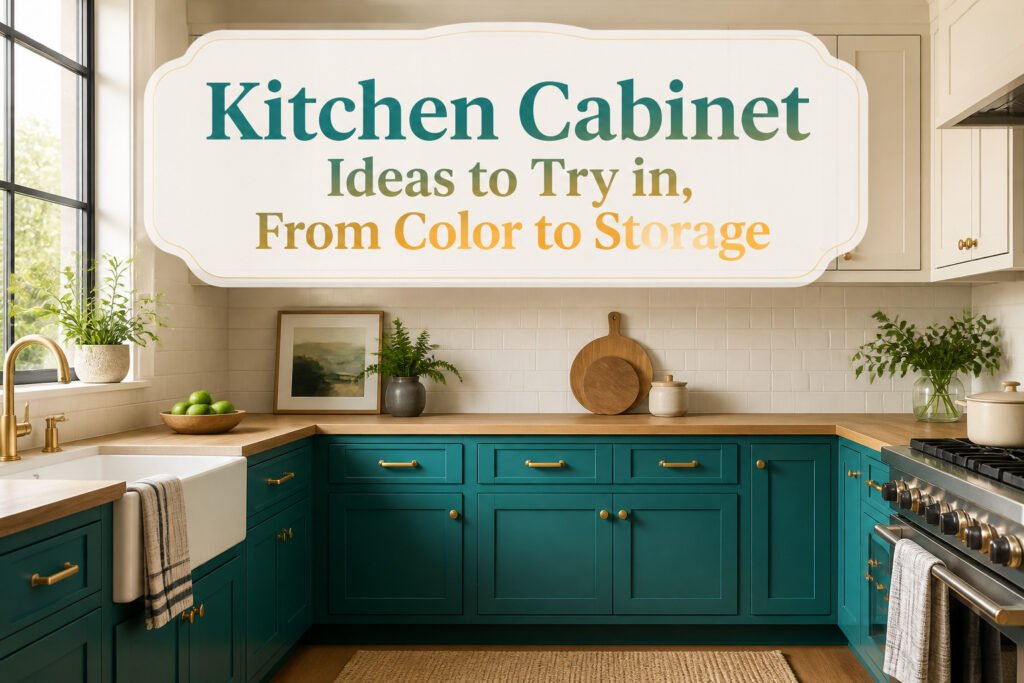
The right kitchen cabinet idea depends on whether you own the space or just the weekend. Renters can fake a two-tone kitchen with peel-and-stick veneer on lower faces, while buyers building from scratch need to decide now if they want panel-ready appliances, those matching panels run $6,500–$9,000 before installation and must ship from the same finish batch as the cabinets. That split between temporary and permanent is what separates the projects you can start tomorrow from the ones that lock you in for a decade.
1. Paint Them a Cheery Yellow
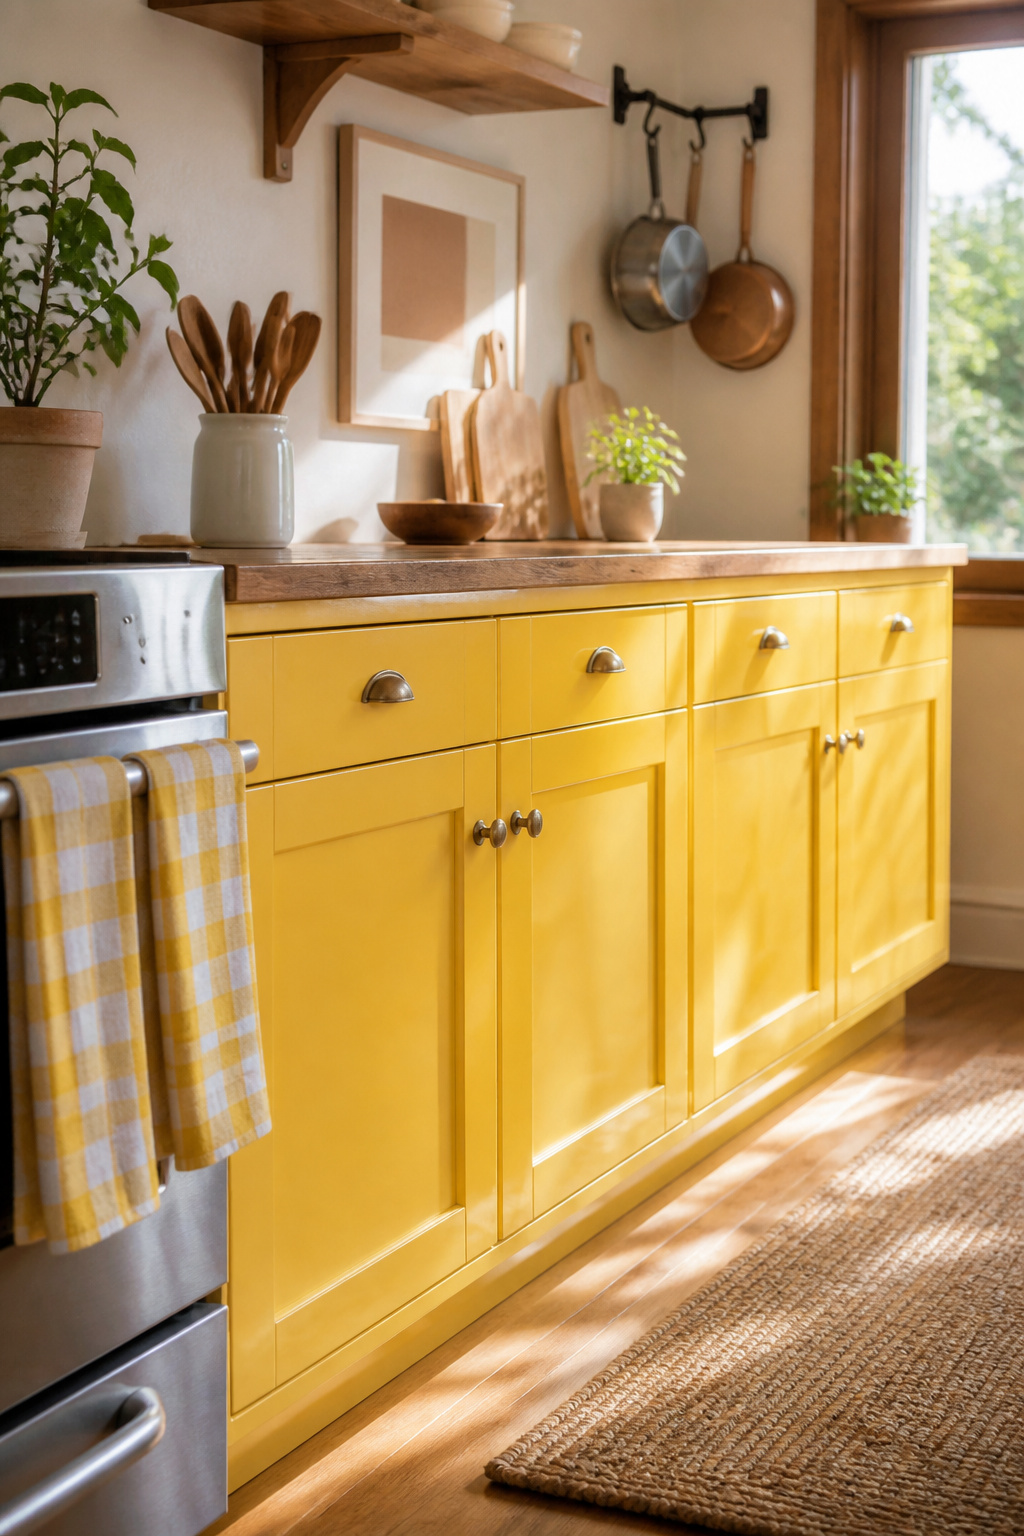
Yellow cabinets work best when you keep them below eye level on a bank of lowers, or when you use them to anchor one wall rather than wrap the room. The bright hue can overpower a small kitchen fast, and grease and steam will dull a high-sheen finish faster than you expect near a range. If you still want that sunshine effect, Benjamin Moore’s Sunflower 2019-30 is a solid starting point, with Sparkling Sun 2020-30 and Yellow Flash 2021-10 as bolder steps up. A hand-painted finish helps here, because you can scuff-sand and repaint in a weekend when the color starts to look lived-in rather than cheery. The real budget win is that a gallon of cabinet paint and a Saturday of prep runs well under the cost of new doors, and you are not locked in if the yellow starts to feel like too much breakfast every morning.
2. Use Your Cabinets to Embrace Kitchen Trends
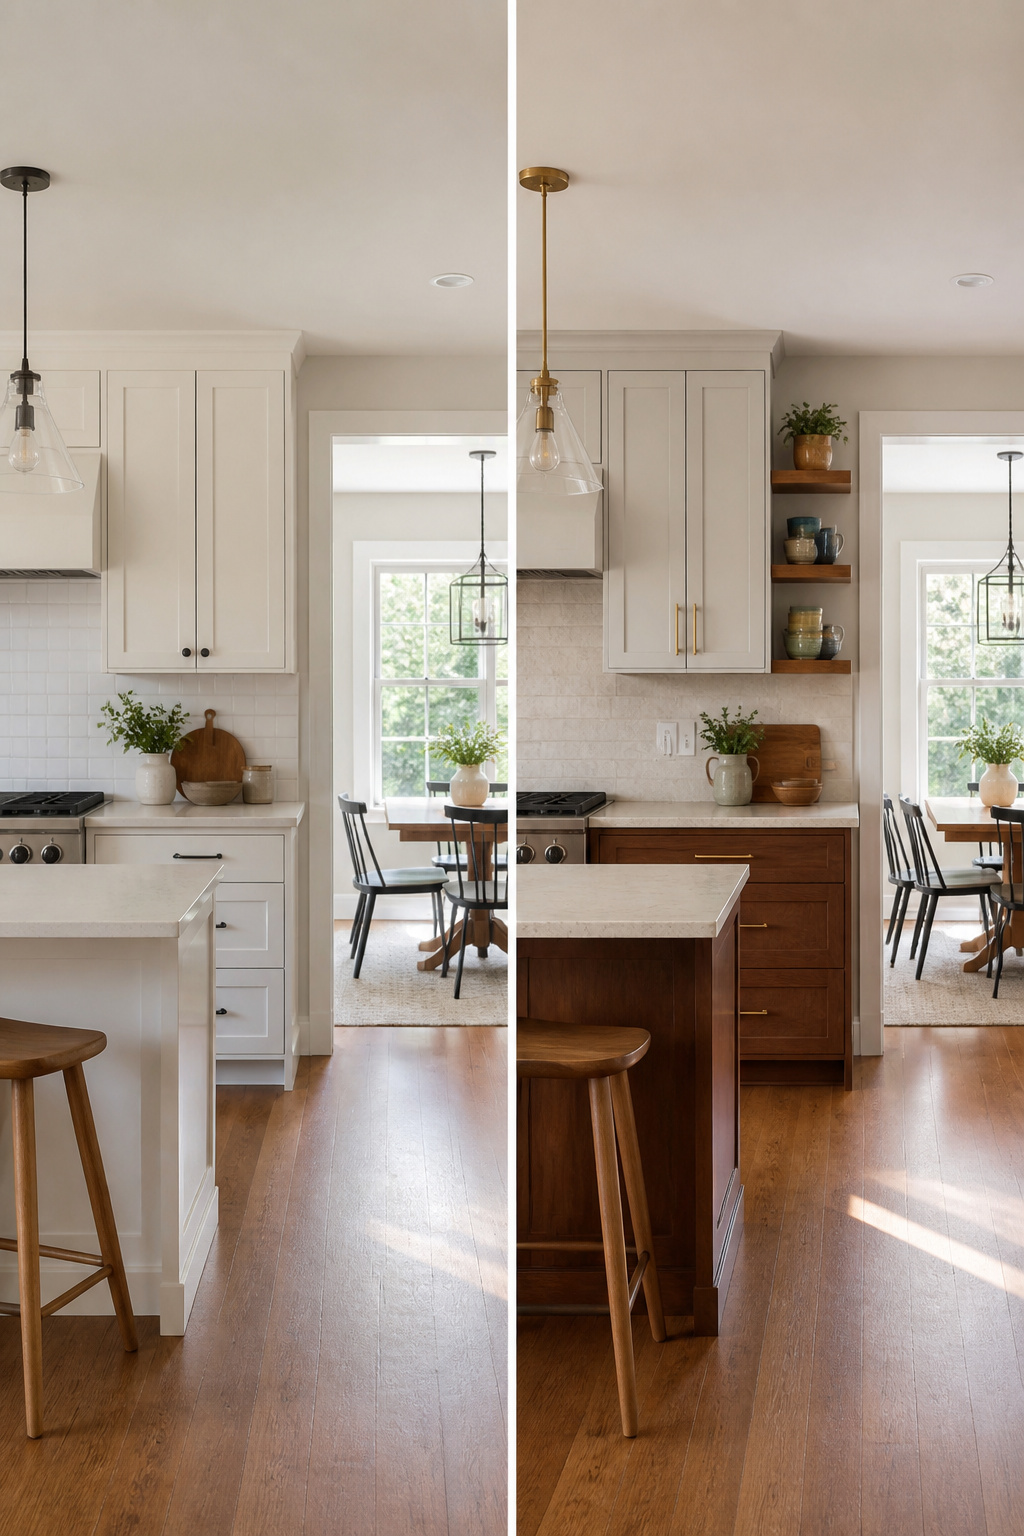
The fastest way to test a trend is through your cabinets, because you can change them without tearing out countertops or rewiring for appliances. Two-tone kitchens have shifted since the white-over-navy era that dominated the last decade. The current version pairs light painted uppers with wood-toned lowers or a wood-grain island, a combination that leads contrast choices at 37% among Houzz renovators. Blue and green still show up, but they trail at 19% and 14% respectively. The wood-on-light formula warms the room without the hard visual break of darker painted bases. If you want to try it, keep your wall color quiet and let the cabinets carry the contrast. Renters can get close with peel-and-stick veneer on lower faces, though the texture reads best on real slab or shaker doors.
3. Pair Both Old and New Cabinetry
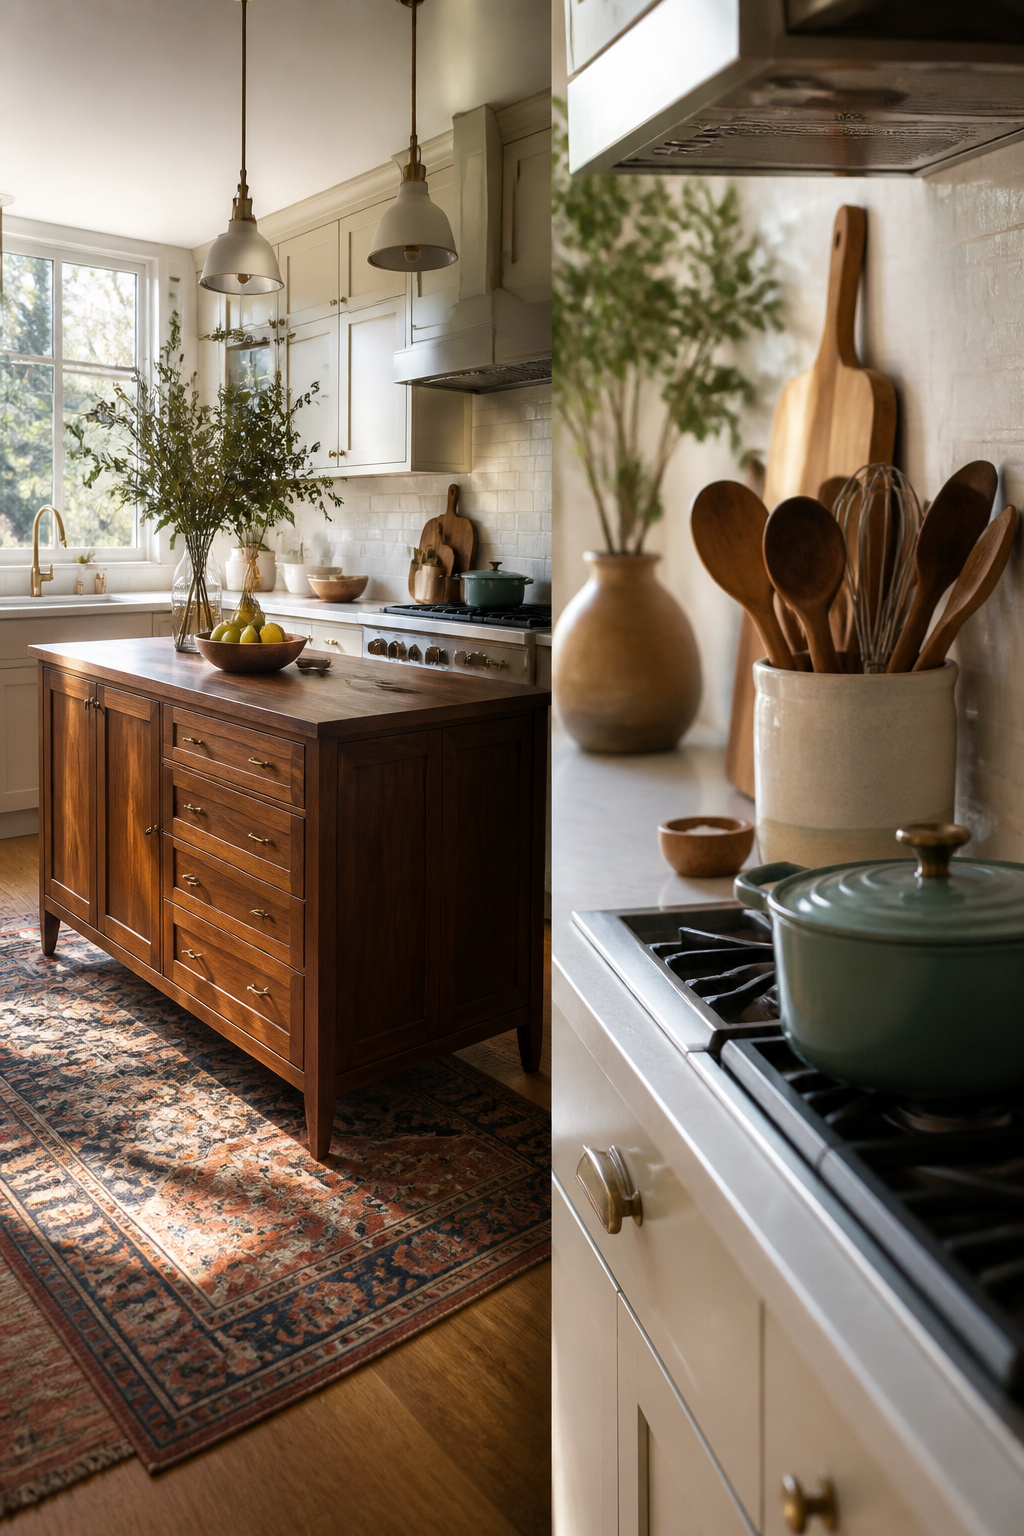
Mixing vintage and modern cabinets works best when you anchor the look in something the kitchen already has. In a 1960s Tennessee home, designers kept the era’s solid walnut for the island base and paired it with new cabinets that matched the scale and finish rather than competing with it. The warmth comes through without turning the room into a period set.
Mid-century cabinets are seeing the strongest revival for this mix, with mid to dark woods reading as collected rather than reproduced. Avoid anything with an orange undertone; that particular finish has not aged well and will pull the whole room toward dated instead of timeless.
For salvaged pieces, treat them as the starting constraint rather than the final accent. A Dallas show house built its entire kitchen plan around salvaged cabinetry and flooring, designing the new island and layout to look like later additions to an old space. The oversize island became the modern element, but the proportions respected what was already there.
The mistake is treating vintage as jewelry: one antique hutch against walls of brand-new shaker boxes reads as an afterthought. Instead, let the old material cover at least one continuous run, base or upper, so the eye reads it as architecture rather than decoration.
4. Paint Them a Soft Neutral Tone
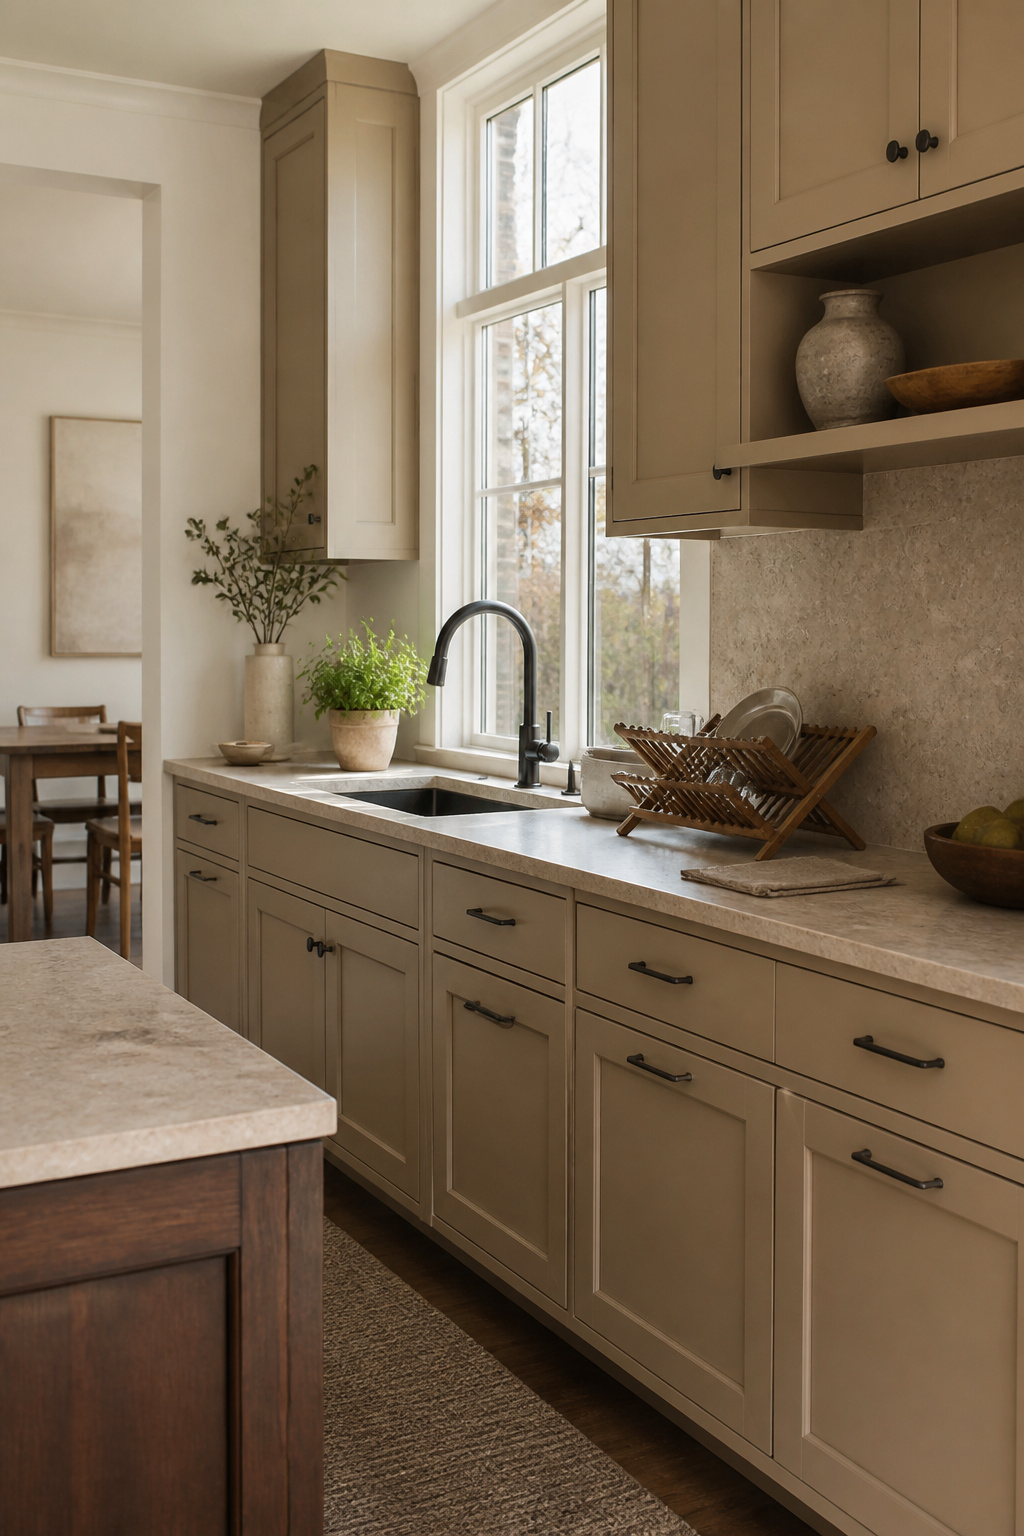
Warm neutrals like khaki and mushroom are replacing the stark whites and cool grays that dominated the last decade. In the 2026 Houzz study, natural wood tones edged out white as the top finish choice by a single percentage point, 29 to 28, which tells you where the momentum is heading. These softer, earth-based colors read as color without shouting, and they age better than trends that announce themselves too loudly.
For cabinets that take daily abuse, Benjamin Moore’s Advance Interior paint holds up to the grease, steam, and repeated cleaning a kitchen demands. The finish matters more than the exact shade. A greige like Natural Cream balances visually against darker elements in the room, an island in walnut or a honed stone counter, without competing for attention.
Resale value sits in this same quiet zone. Buyers can picture their own dishes against a warm neutral. They cannot picture their life against your bold personal statement. Khaki and mushroom let you live with something that feels current now and still photograph reasonably when the listing goes up.
5. Change Up Your Hardware Direction
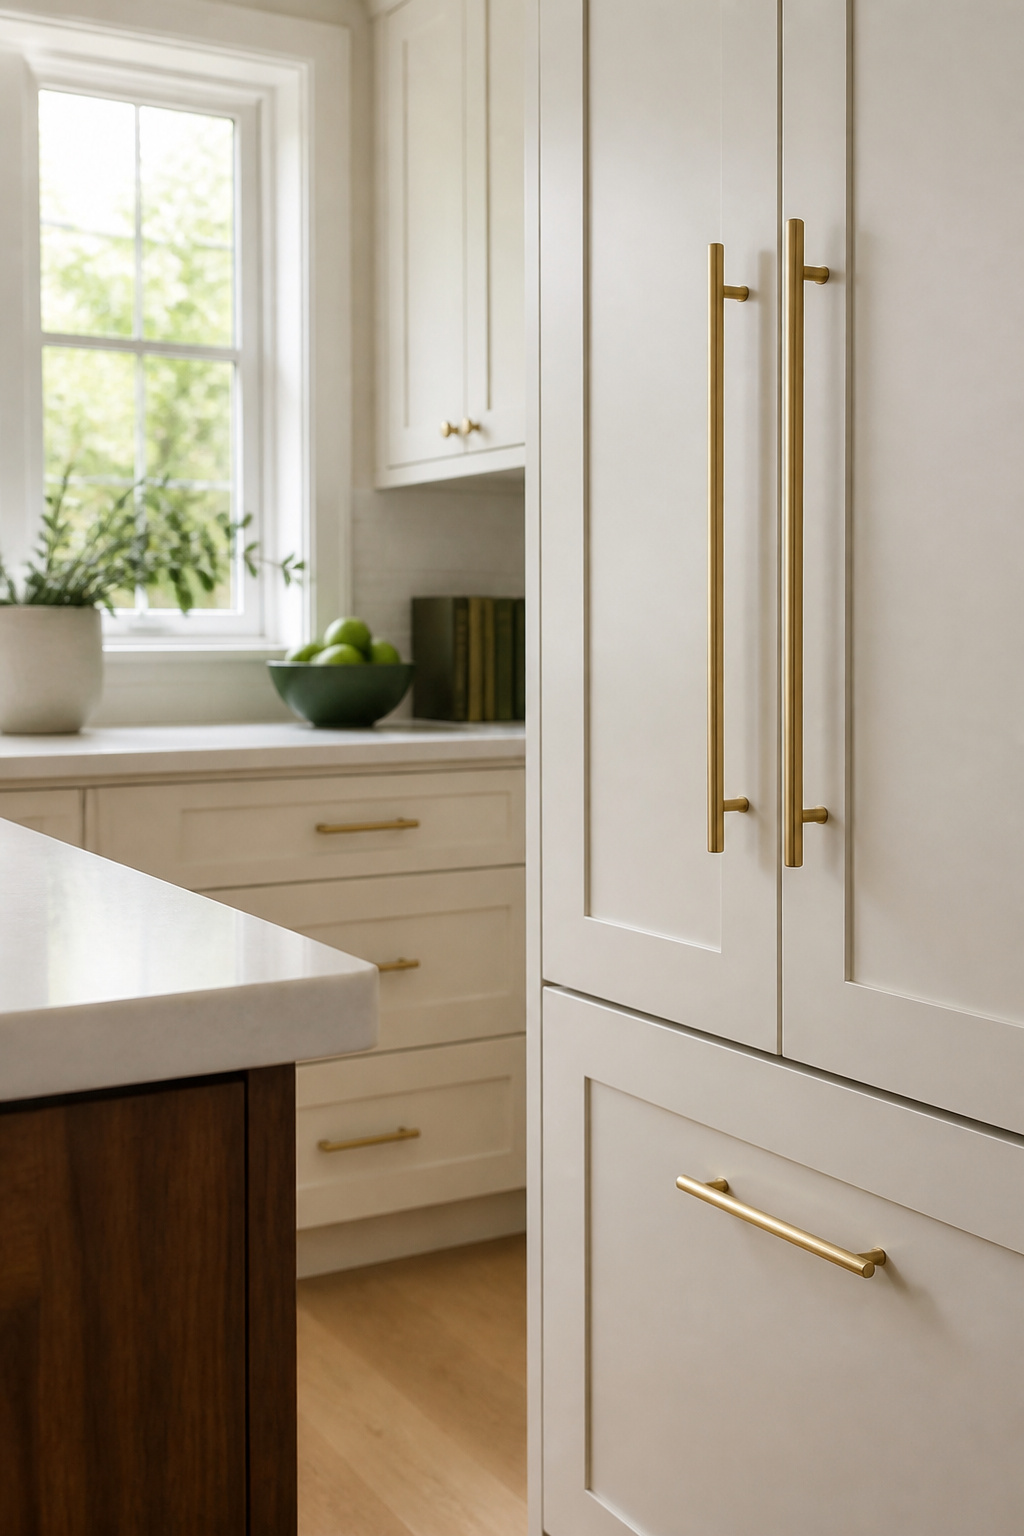
Horizontal pulls read modern; vertical ones read traditional, and the switch costs nothing but an afternoon. If your cabinets already have a single knob or a centered pull, moving the hardware to the bottom corner of an upper door turns a standard flat panel into something that looks designed, not assembled. The same bar pull mounted horizontally across a wide drawer reads utilitarian until you rotate it ninety degrees and center it vertically on a tall pantry door. Brass or mixed metals work either way, and mixing finishes is standard now, not a risk. A 5–8 inch pull suits most doors; 10–16 inches balances a wide drawer front. The whole swap runs the price of the hardware plus a drill, and you will know inside an hour whether the new placement actually opens the way your hand wants to move.
6. Mix and Match Storage Styles
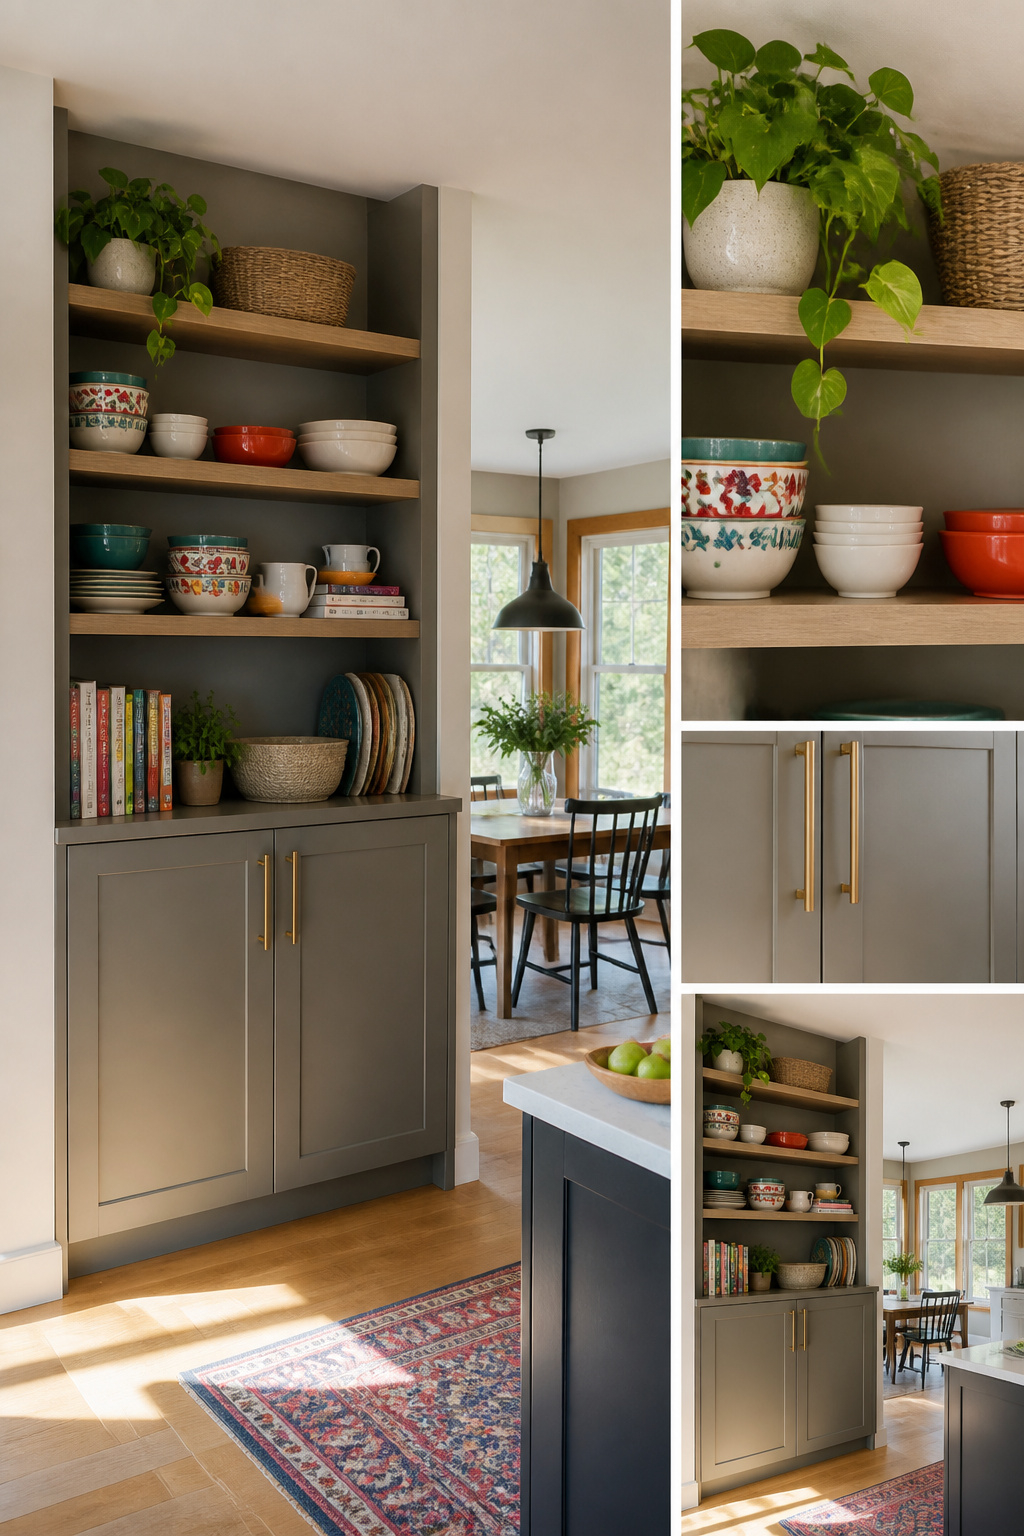
A single 24-inch-deep floor-to-ceiling pantry cabinet holds about as much as three standard wall cabinets, which is why trading one wall of uppers for a tall column often wins in smaller kitchens. You keep the storage, lose the visual weight, and gain a place for the stand mixer and blender that otherwise colonize the counter.
Ceiling-height cabinets work best when you mix the formats inside them. Pair that tall pantry with open shelving elsewhere for the daily dishes you reach for without thinking, and keep closed lowers for the clutter you don’t want to see. The uninterrupted vertical line reads as one clean plane, but the function stays layered.
The risk is turning every wall into a solid block. One full-height run is usually enough; add a second and the room starts to feel like a corridor of doors. Balance matters more than maximizing every inch.
7. Mimic Your Architecture
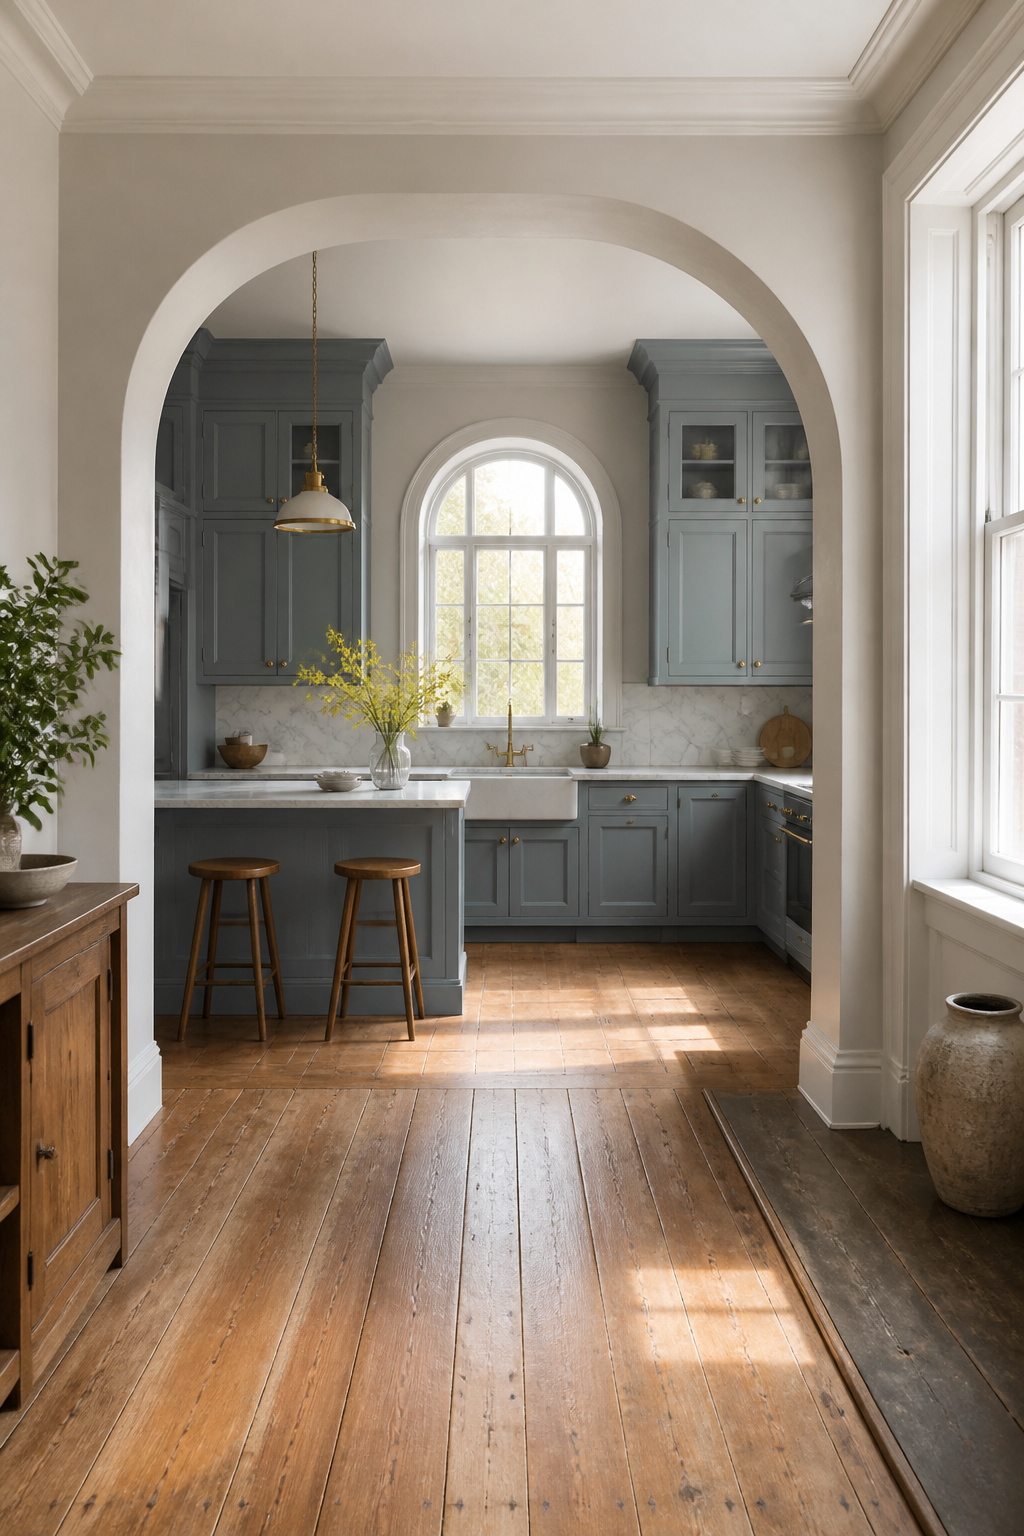
A kitchen where the cabinets ignore the arch of the window or the profile of the baseboard looks like furniture that wandered in from another house. Match the curve of your trim in the cabinet door, and the room reads as one thing that grew there.
Start with what you already have. A 1960s ranch with its original doors probably has flat-panel or simple recessed panels. Repeating that same plane on your cabinet doors costs nothing extra at most cabinet shops, yet it ties the decades together. In a new build with tall ceilings and arched openings, carrying that arch into the upper cabinet silhouette or into a cut-out detail above the range borrows the architecture’s own gesture rather than inventing a new one.
Contrasting works too, but it needs a reason. A sleek slab door in a Victorian brownstone can look deliberate if you repeat the existing wood tone or hardware finish somewhere else in the room. Without that thread, it just looks like a kitchen remodel that skipped the rest of the house. The safer move for a weekend budget is to echo one detail and let the others stay quiet.
8. Embrace Color
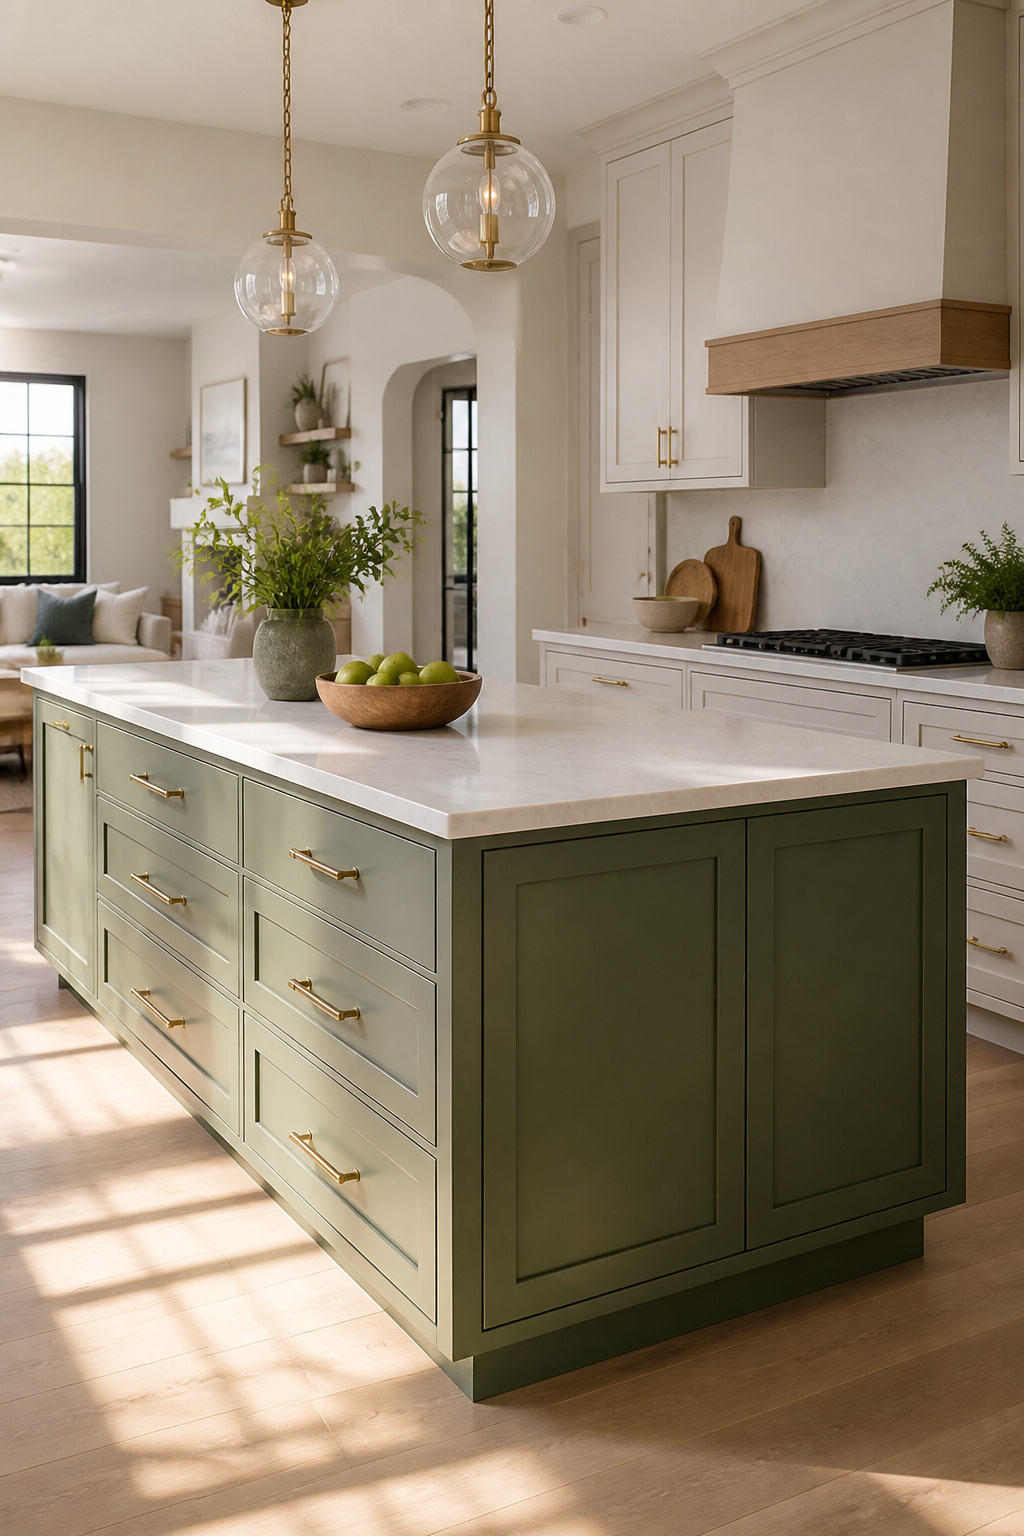
Sage green and navy blue have settled in as the two bold cabinet colors worth considering if yellow feels too sunny for your kitchen. Behr’s 2026 color of the year is a smoky jade in this family, and cabinet lines like Fabuwood’s Echo already carry Sage Green as a standard finish. A sage island against white perimeter cabinets is one of the most-ordered combinations right now, which tells you the look has moved past trend and into reliable choice.
Navy sits at the other end of the same decision. Both colors read as personality without shouting, but they wear differently over time. Darker colors hide dirt better; forest green, charcoal, and deep navy all collect less visible grime than lighter shades where every fingerprint shows. That said, the same depth that hides dirt can also hide wear until it is suddenly obvious. A satin or semi-gloss finish on a quality cabinet paint like Benjamin Moore’s Advance line gives you the furniture-like surface that withstands scrubbing, which matters more with bold color because touch-ups are harder to blend. If you cook daily and wipe cabinets weekly, navy saves you effort. If you want the calm of green and worry about maintenance, keep the sage to an island or lower cabinets only, where splatter is less of a factor.
9. Make Space for Oversized Storage
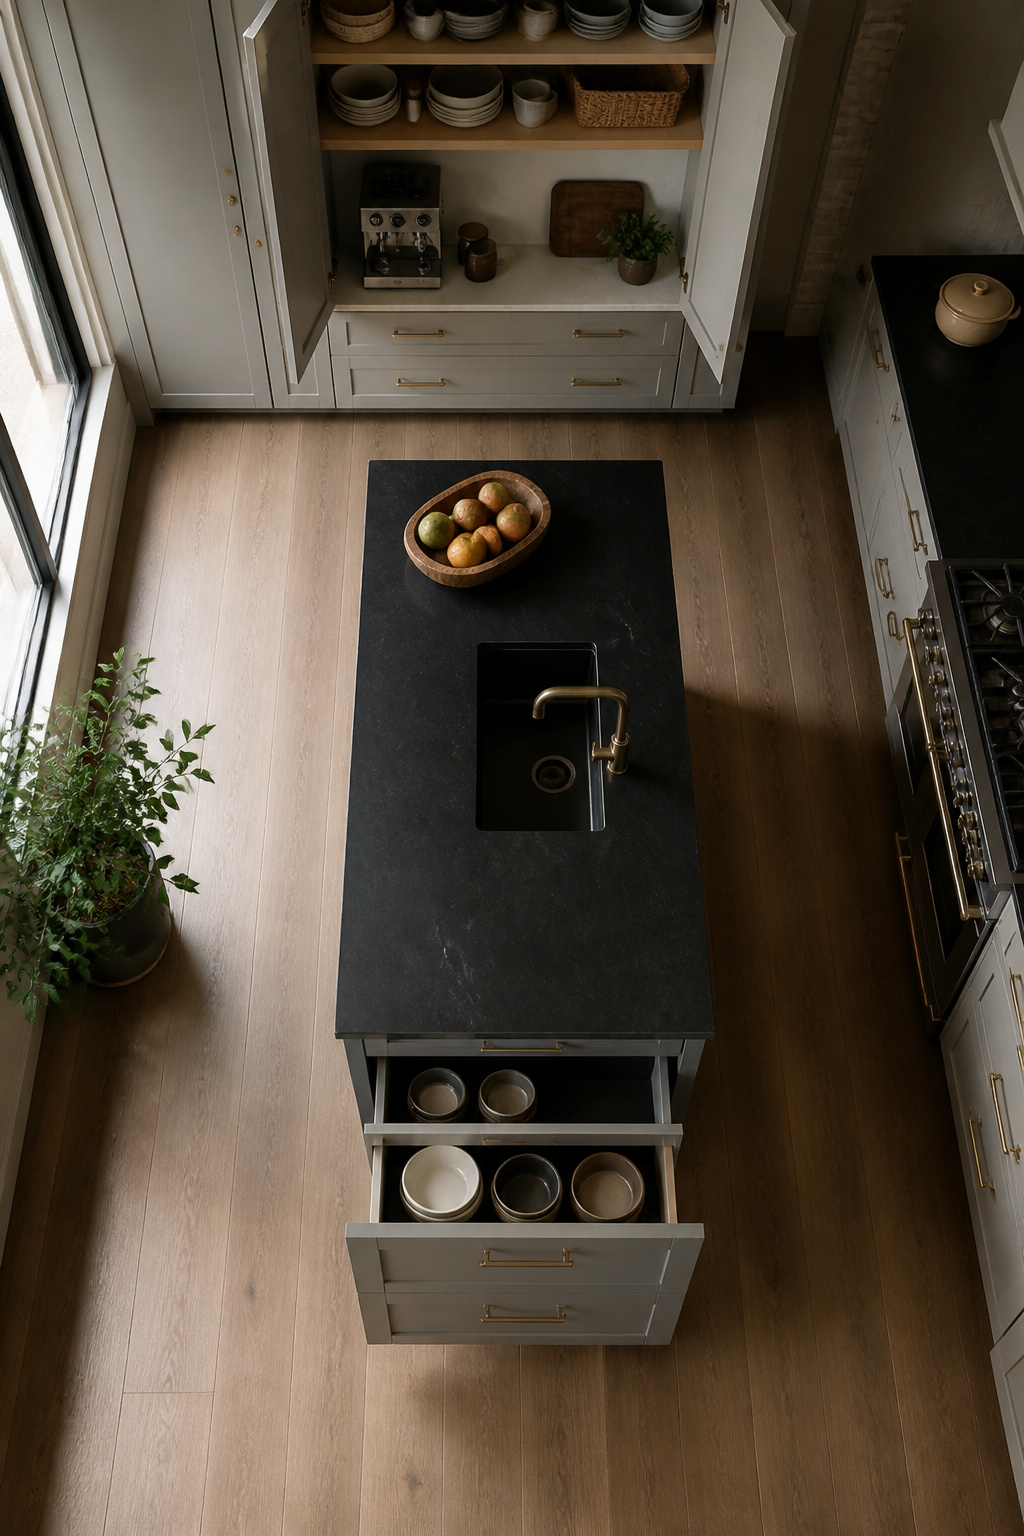
Standard cabinets leave your slow cooker, Dutch oven, and serving platters fighting for the one too-tall shelf or the floor of the pantry. If you are laying out cabinets from scratch, build in extra-deep bases at the island or along one wall and size them for the real dimensions of what you own. A tape measure and five minutes of inventory will keep you from guessing.
The same principle works at counter height for the appliances you use daily. A breakfast station or coffee corner behind bi-fold doors keeps the machine, cups, and what you need for them in one compact zone. Add an integrated fridge drawer below for milk if your layout allows it, and the whole morning routine stays off the counter and out of sight.
10. Split the Lower and Upper Cabinets
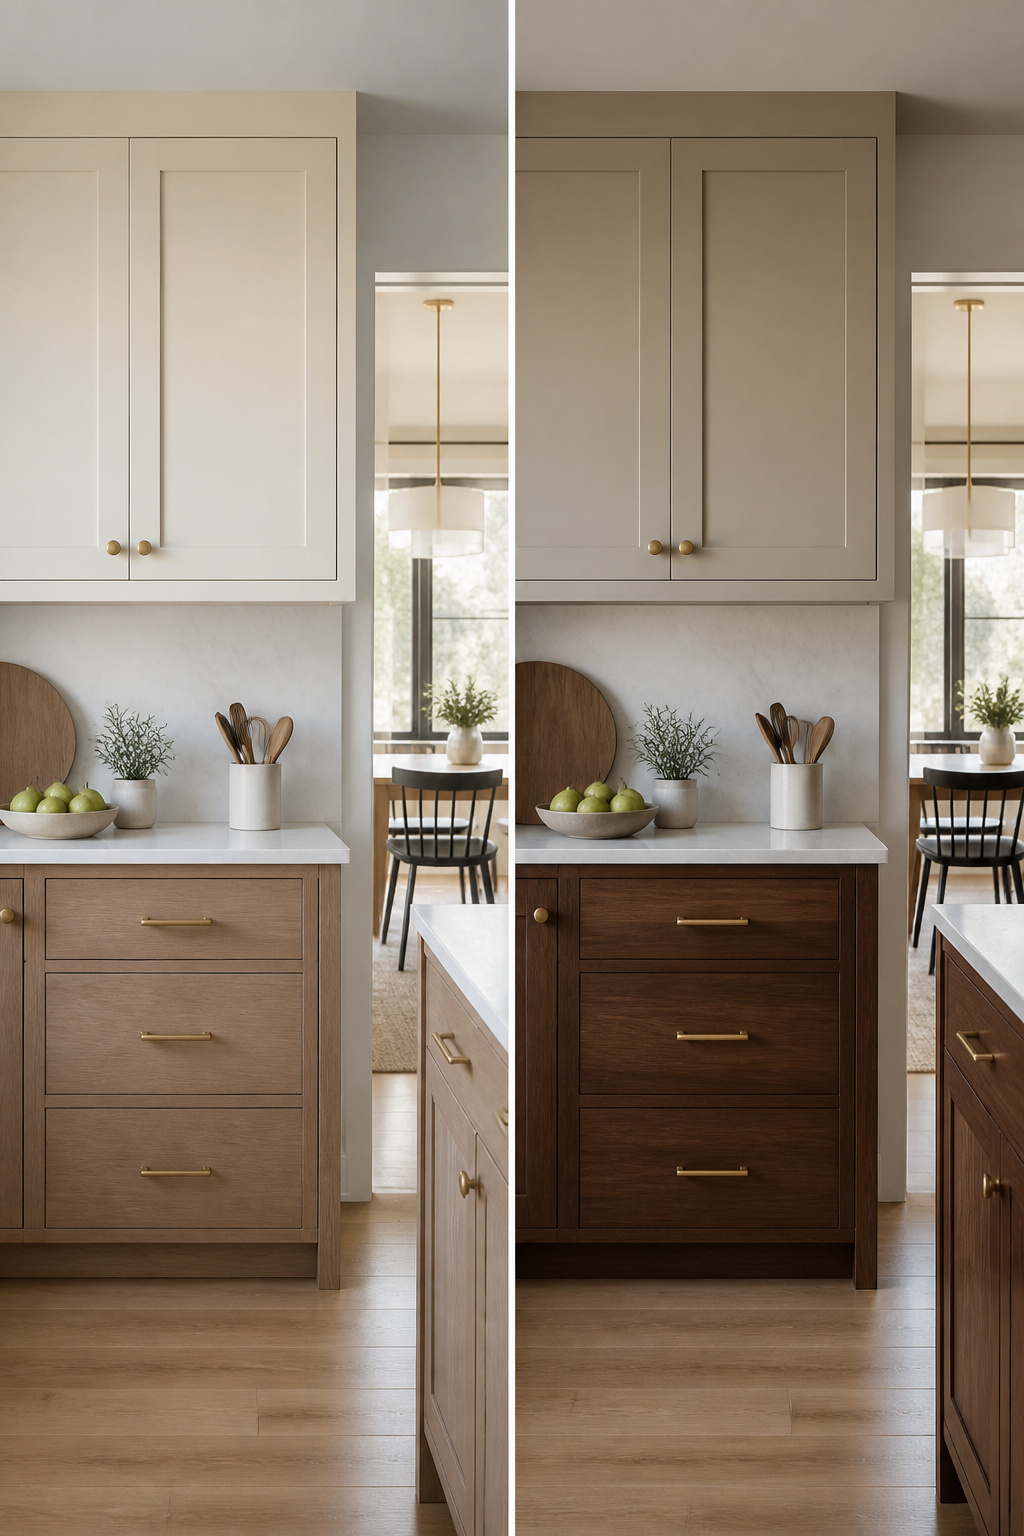
Two-tone kitchens are still the move, but the formula has shifted. Wood-toned lowers or islands now lead the contrast choices at 37% among Houzz renovators, well ahead of blue at 19% and green at 14%. The old white-over-navy pairing reads as dated now; the current version puts light painted uppers over wood-grain or deep-toned lowers, which grounds the room without that hard, graphic contrast.
What convinced me, reading through the recent project photos, is how much quieter the wall color needs to be for this to work. Let the cabinets carry the tension. A pale warm white or soft greige on the uppers keeps the eye moving upward, while the wood or dark base does the visual weight. The mistake is still trying to make every surface compete: keep the wall color quiet and let the split do the work.
11. Add Vented Cabinets
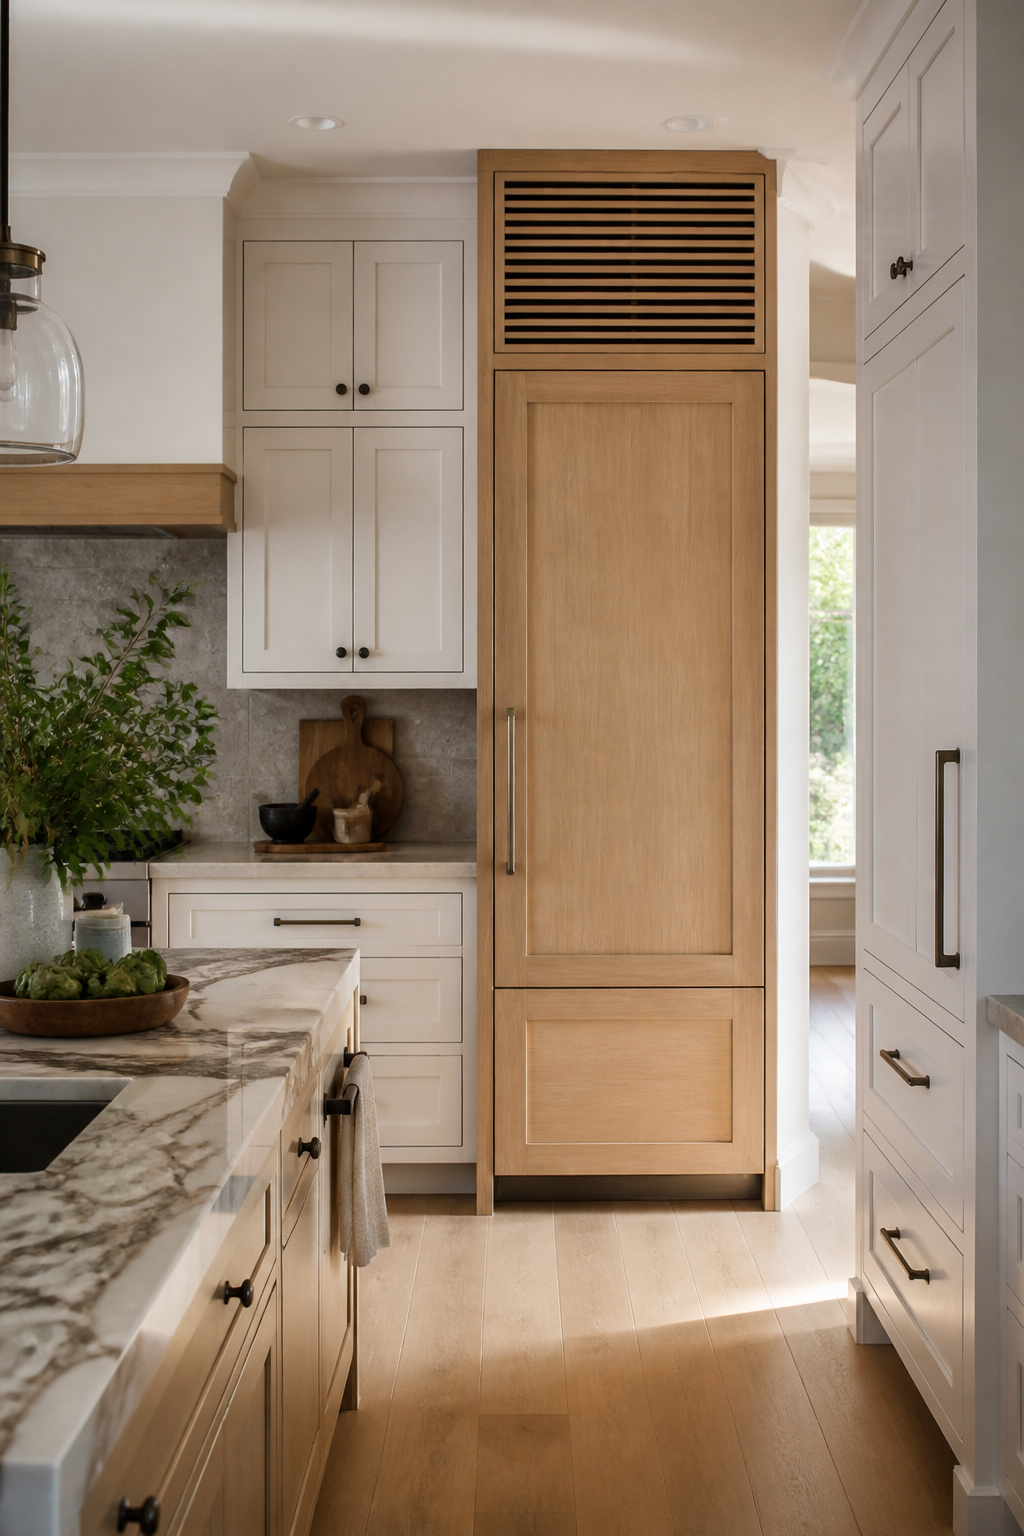
Heat builds up faster than most people expect inside a closed cabinet. A refrigerator, dishwasher, or under-counter ice maker that cannot breathe works harder, burns more energy, and dies years sooner than it should. The gap you leave around the appliance is what lets it survive.
The problem usually shows up after the fact. You install a panel-ready dishwasher, admire the seamless front, then notice the dishes come out hotter than they used to, or the motor runs loud and long. That is the unit fighting for air. The same thing happens when a built-in microwave loses its trim kit, or when someone boxes in a wine fridge with custom sides to match the cabinetry.
Retrofitting is mostly about subtracting, not adding. Remove the solid shelf above a refrigerator and replace it with a slatted or wire panel so warm air can rise out. Cut a vent strip into the toe-kick below a dishwasher, or into the cabinet side if it faces an open room. For a microwave cabinet, you need an exit path: a louvered door panel, or a gap at the rear top that connects to a ducted grille. The work takes a Saturday and a jigsaw. The alternative is replacing a compressor or a control board, and that costs more than a weekend.
12. Keep It Rich
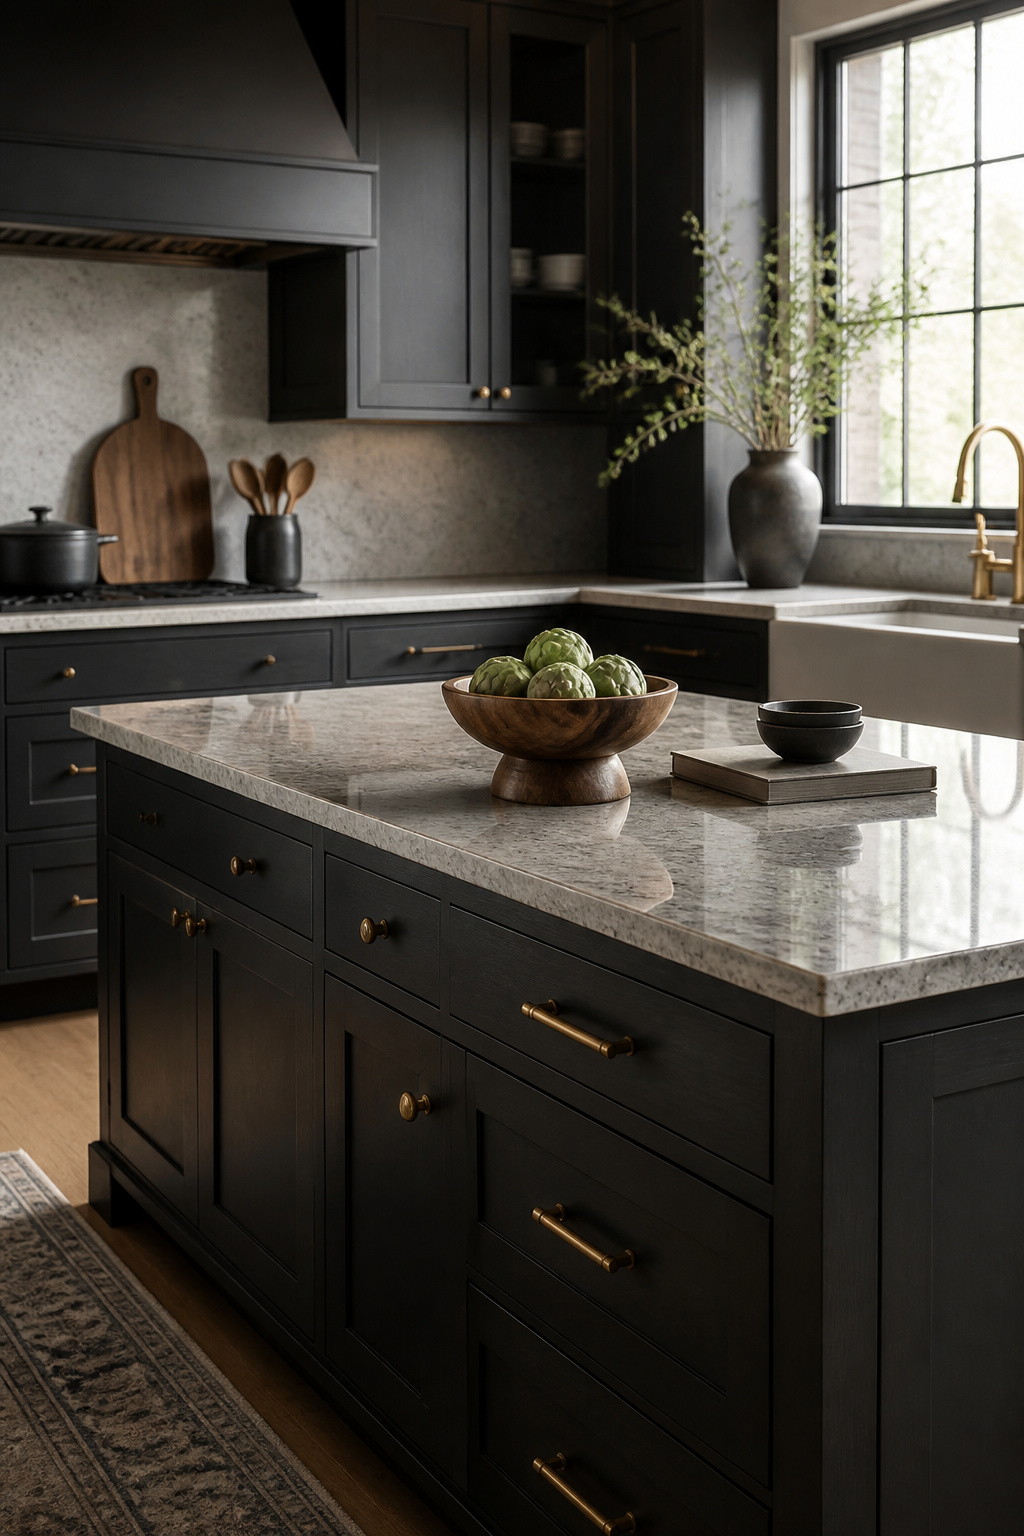
Deep color on cabinets works harder than it looks. Forest green, charcoal gray, dark brown and black all hide the daily grime of cooking far better than lighter finishes, which means you spend less time wiping down fronts and more time actually using the kitchen. That alone can justify the choice if you cook most nights and do not want to baby the surfaces.
The current run on espresso-charcoal browns is worth watching. Benjamin Moore’s 2026 color of the year sits in this range, and stained walnut delivers a similar depth with grain still visible. Either way, keep the weight low: rich browns and blacks do their best work on base cabinets or islands, paired with lighter counters above to keep the room from caving in on itself.
High-gloss lacquer in black or near-black is the dramatic exception. One Connecticut pantry used lacquered onyx with too many coats to count, and the designer noted six weeks of work with no shortcuts possible. The result is stunning, but the timeline and labor scale sharply. For a weekend project with real budget limits, a satin or semi-gloss cabinet paint in a deep hue gets you most of the richness without the workshop commitment.
13. Make It Hazy
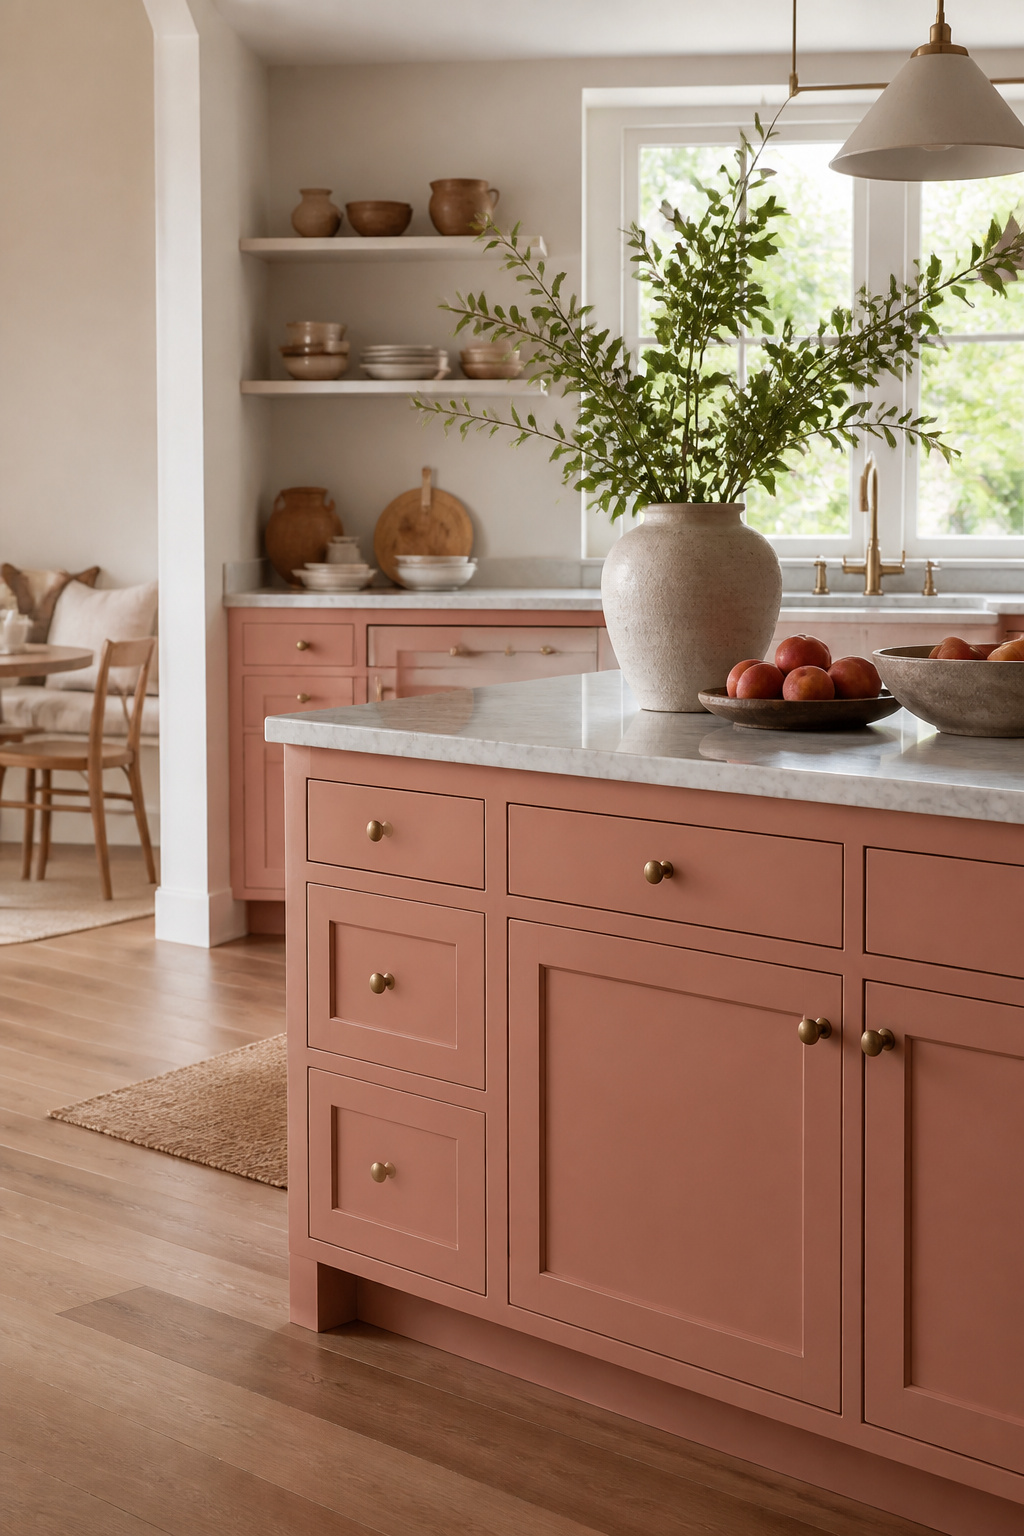
A hazy cabinet finish reads as color without ever shouting for attention. Think of the muted terra-cotta pink used in a Nashville butler’s pantry: warm, present, but still soft enough to live with. In a small kitchen or one with limited natural light, this is where matte finishes in desaturated tones earn their place. They add personality where stark white feels sterile, yet they do not swallow the room the way a saturated color would.
Light still matters. Off-white and light neutrals reflect more of it and keep a tight space feeling open, which is why they dominate small-kitchen advice. A hazy finish splits the difference. It borrows enough from that light-reflecting playbook to keep the walls from closing in, while the slight color shift hides the flatness that pure white can fall into under a single ceiling fixture or a north-facing window.
The risk is going too gray. A desaturated tone with no underlying warmth can read as dirty once the afternoon fades. What works in a sunlit showroom dies under kitchen fluorescents. Test your sample at the hour you actually cook, not at noon.
14. Keep It Minimalist
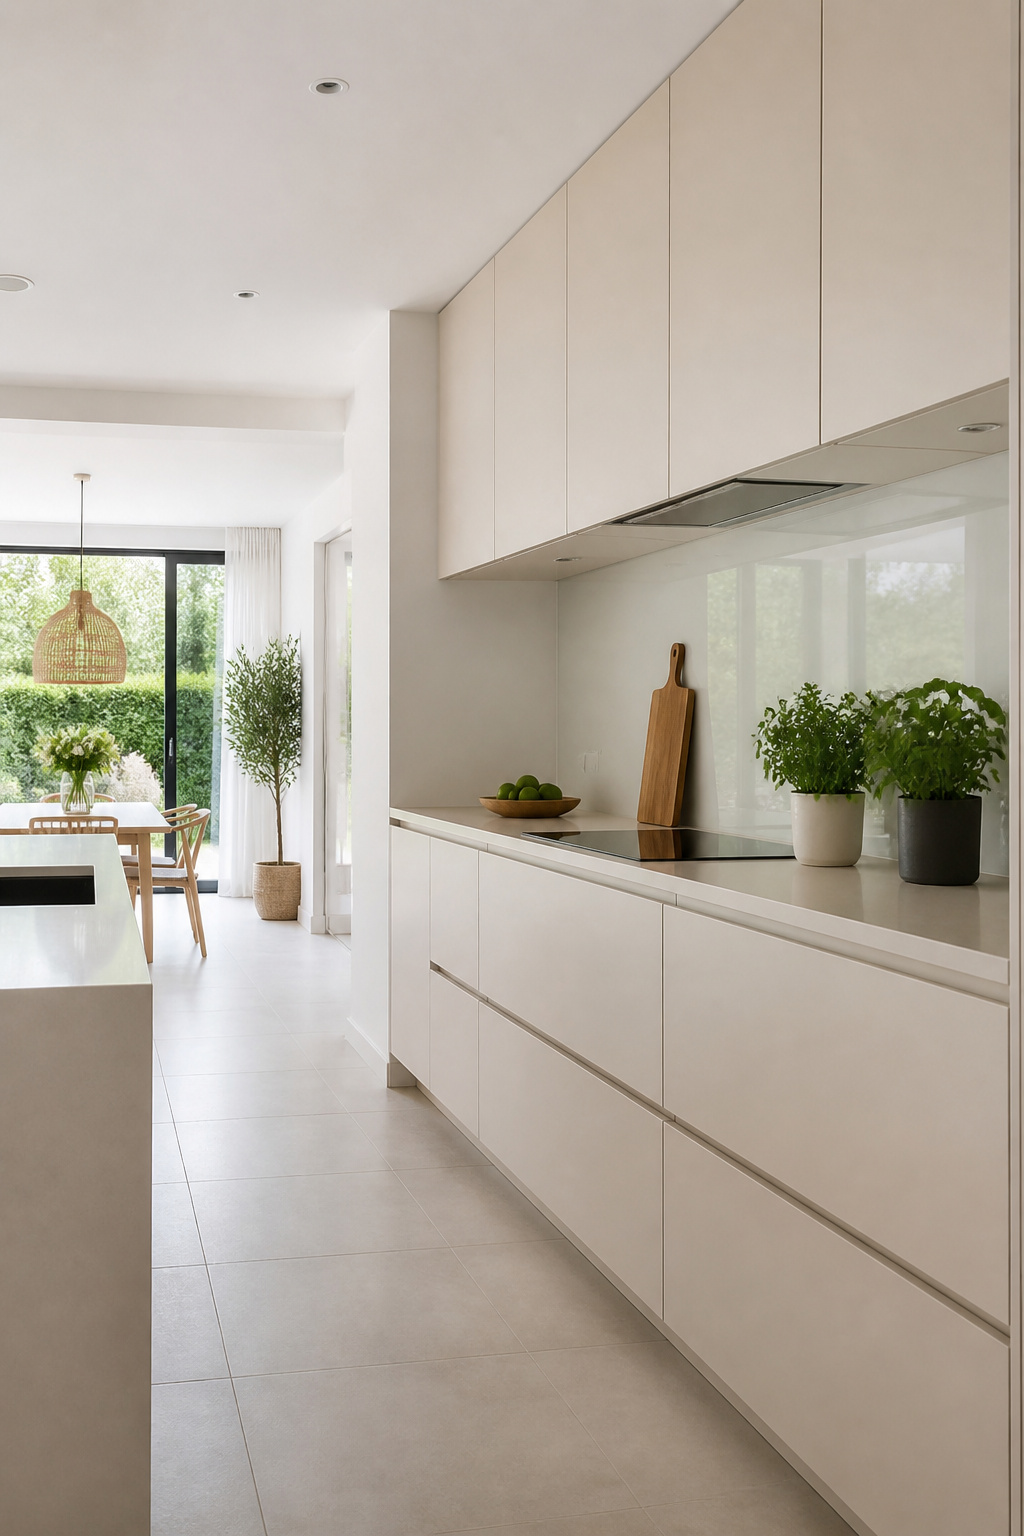
Handleless cabinets read as architecture rather than furniture, which is exactly why they work for renters and first-home owners who want the look without a full gut renovation. The flat slab door with an edge pull or integrated channel grip is the fastest-growing hardware choice for this style, and push-to-open tech has improved enough that you can now skip visible hardware on both wall and base cabinets entirely. The honest caveat: handleless works best on drawers and full-height doors. Small upper doors with edge pulls can be awkward for shorter household members, so mixing a handleless base run with slim bar pulls up top keeps everyone comfortable.
Where this look fails is in a working kitchen that sees real use. The minimalist read depends on clutter staying off every surface, so you need the latest drawer systems inside to compensate for what you cannot leave out. Panel-ready appliances extend the same trick, but budget for the matching panels as their own line item and order them with the cabinets from the same finish batch. An almost-matching panel defeats the whole point. Given the cost, ask yourself whether you will still like this flush, flat-fronted look in ten years. You can repaint walls or swap a backsplash on a weekend; cabinetry is not a change you make twice.
15. Choose a Native Material
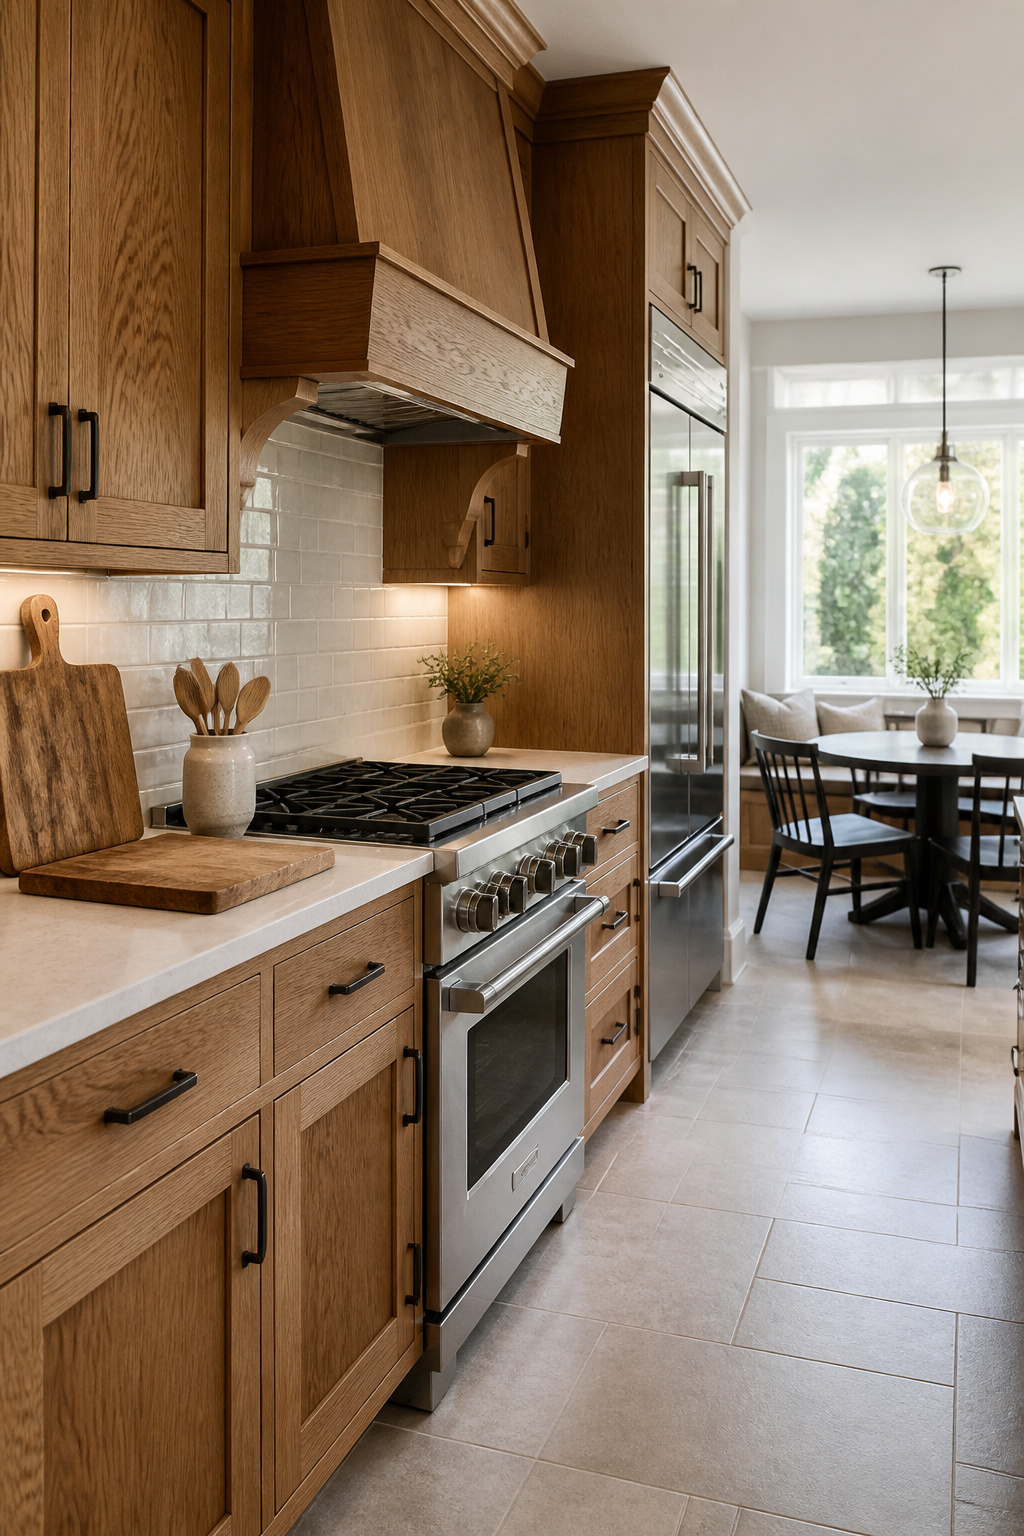
Solid wood and stainless steel are the two materials that will outlast everything else in your kitchen, though they ask for different kinds of attention. Solid wood expands and contracts with the seasons, so a well-built cabinet is constructed to let it move without warping the frame. That movement is not a flaw; it is what lets a wood kitchen age for decades instead of cracking in place. Oak and walnut carry the grain most people picture, but painted finishes hide the species entirely and open a wider range of looks.
Stainless steel does not move, and it does not need sealing against moisture the way wood does. For outdoor kitchens, it resists corrosion outright, while wood cabinets need decay-resistant species like teak or cedar plus a regular coat of sealant to survive the same conditions. Inside, the tradeoff is warmth against wipeability. Wood shows dents and scratches as character; steel shows them as shine loss, though both can be refinished by someone who knows the material.
16. Mix It Up
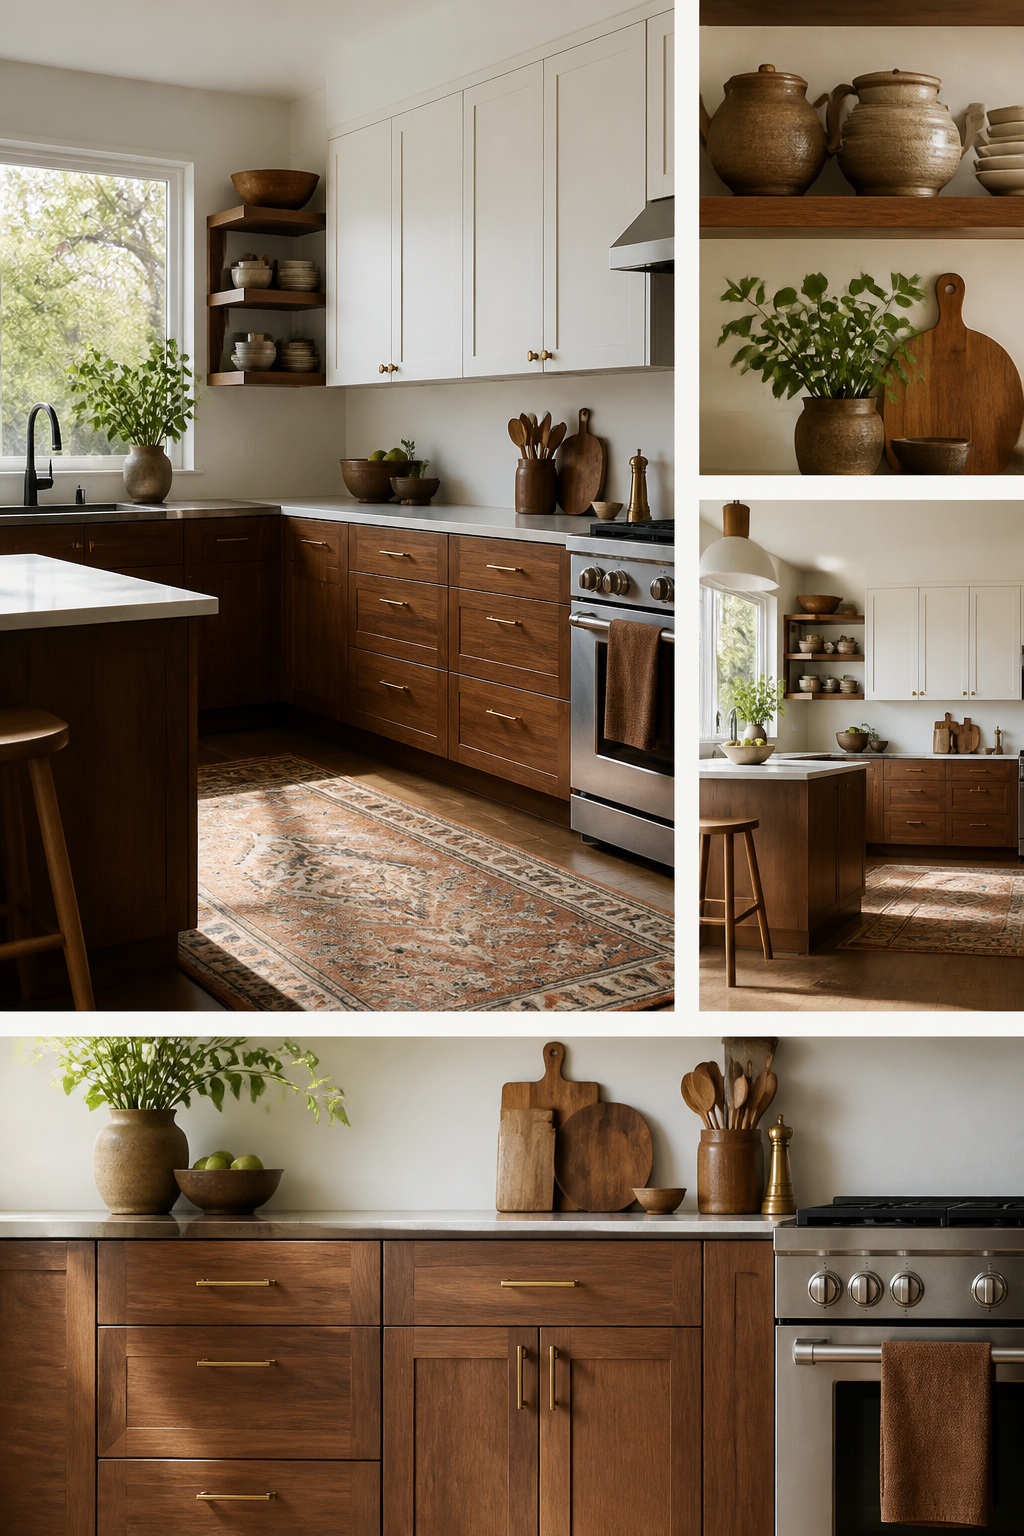
Mixing cabinet styles only works when you can name the rule that holds it together. A kitchen with mid-century lowers in a mid to dark wood and flat-panel uppers painted to match the wall reads intentional; the same kitchen with orange-toned wood and no repeating shape reads like a clearance sale. The difference is whether one element carries through: the hardware finish, the rail height, or a consistent reveal around every door.
The safe play is one era of wood, one painted finish, and one metal. You can break that rule, but break it once, not three times. A friend tried oak base cabinets, walnut uppers, and a stainless island. Each choice made sense in isolation. Together they fought for attention, and the room felt smaller for it.
Glass-fronted doors or open shelving mixed with solid cabinets can open a wall visually, though you will trade away hidden storage. Brick backsplashes or patterned tile behind open shelves give the eye somewhere to rest, which matters more than most people expect. Without that resting place, mixed materials just look busy.
17. Choose a High-Gloss Paint
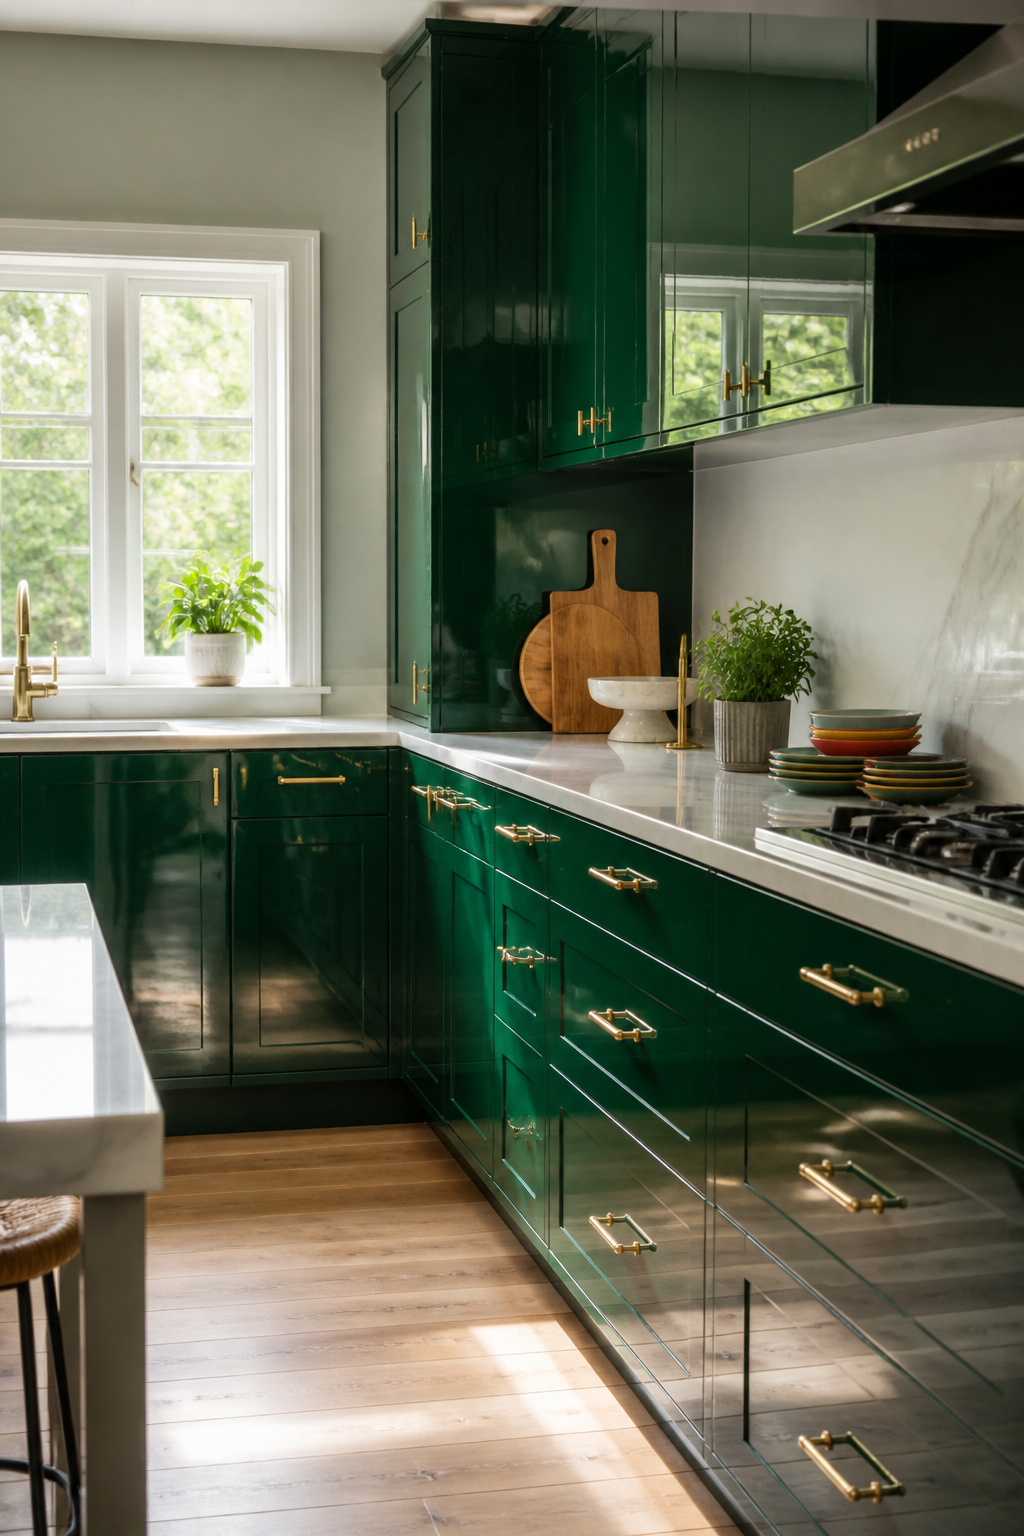
High-gloss paint bounces light around a windowless galley or north-facing kitchen in a way matte never will, and that reflection is the whole reason to consider it. The finish reads as depth and saturation rather than flat color, which is why a designer might spend six weeks building up too many coats to count for a lacquered onyx pantry. That labor is the catch: every brush mark shows, and there is no shortcut to the mirror-like surface. For cabinets you will open daily, the same light that makes the room feel larger will also spotlight every fingerprint and grease splatter. Satin or matte forgives more and needs less frequent attention; high-gloss demands a wipe-down habit but gives back the brightest, most enclosed space. If your kitchen is small and dim, the trade is usually worth it. If you already have good natural light, you are paying in upkeep for an effect you do not need.
18. Paint Them Pink
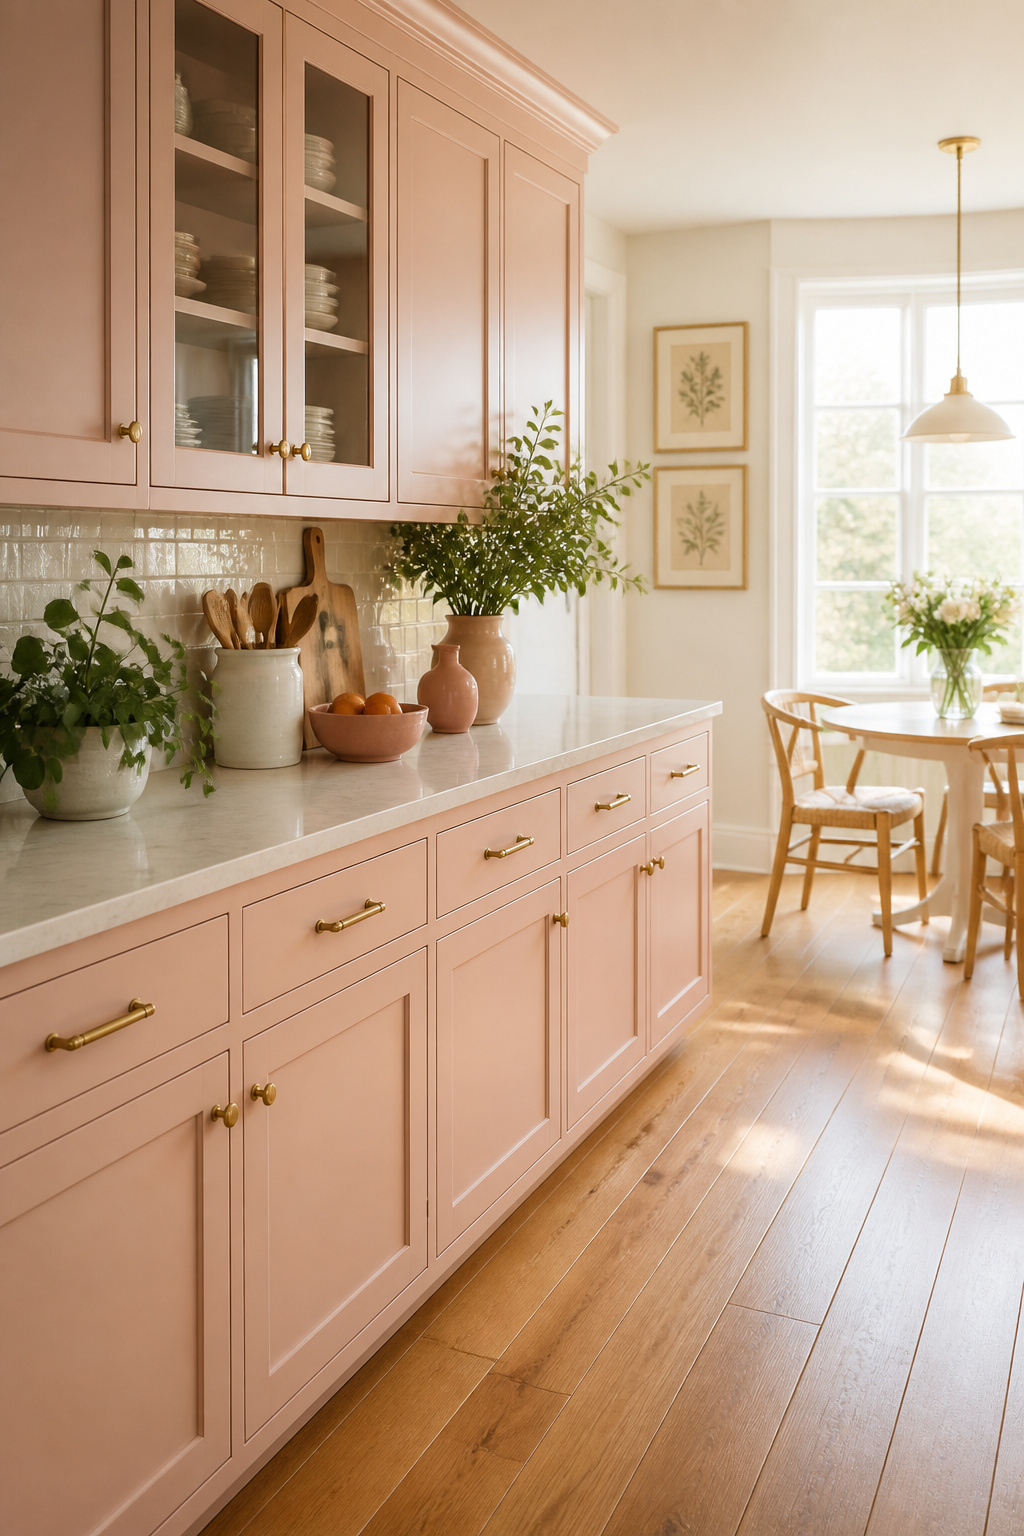
Pink cabinets work when you treat the undertone as a decision as real as the color itself. Blush with a warm, peachy base reads as a neutral against honey oak floors and brass hardware; it picks up the yellow in both and settles in without a fight. Cooler rose tones, the ones that lean lilac or blue, need more care. They can turn sour against those same warm floors, and against chrome they read dated in a way blush does not.
If you are nervous about the commitment, paint a butler’s pantry or the back wall of an island first. That Nashville kitchen with the terra-cotta pink started exactly that way, as a single room for an artist client, and the color grew from there because it worked with what was already in the house. Benjamin Moore pairs Odessa Pink with Brandy Cream, or Head Over Heels with Lychee, for exactly this reason: the neutral keeps the pink from floating untethered.
A hand-painted finish is the safety net here. You can repaint in five years when your taste shifts, or when the pink you loved in 2026 feels like a period piece. A sprayed factory finish locks you in.
19. Hide Away Appliances
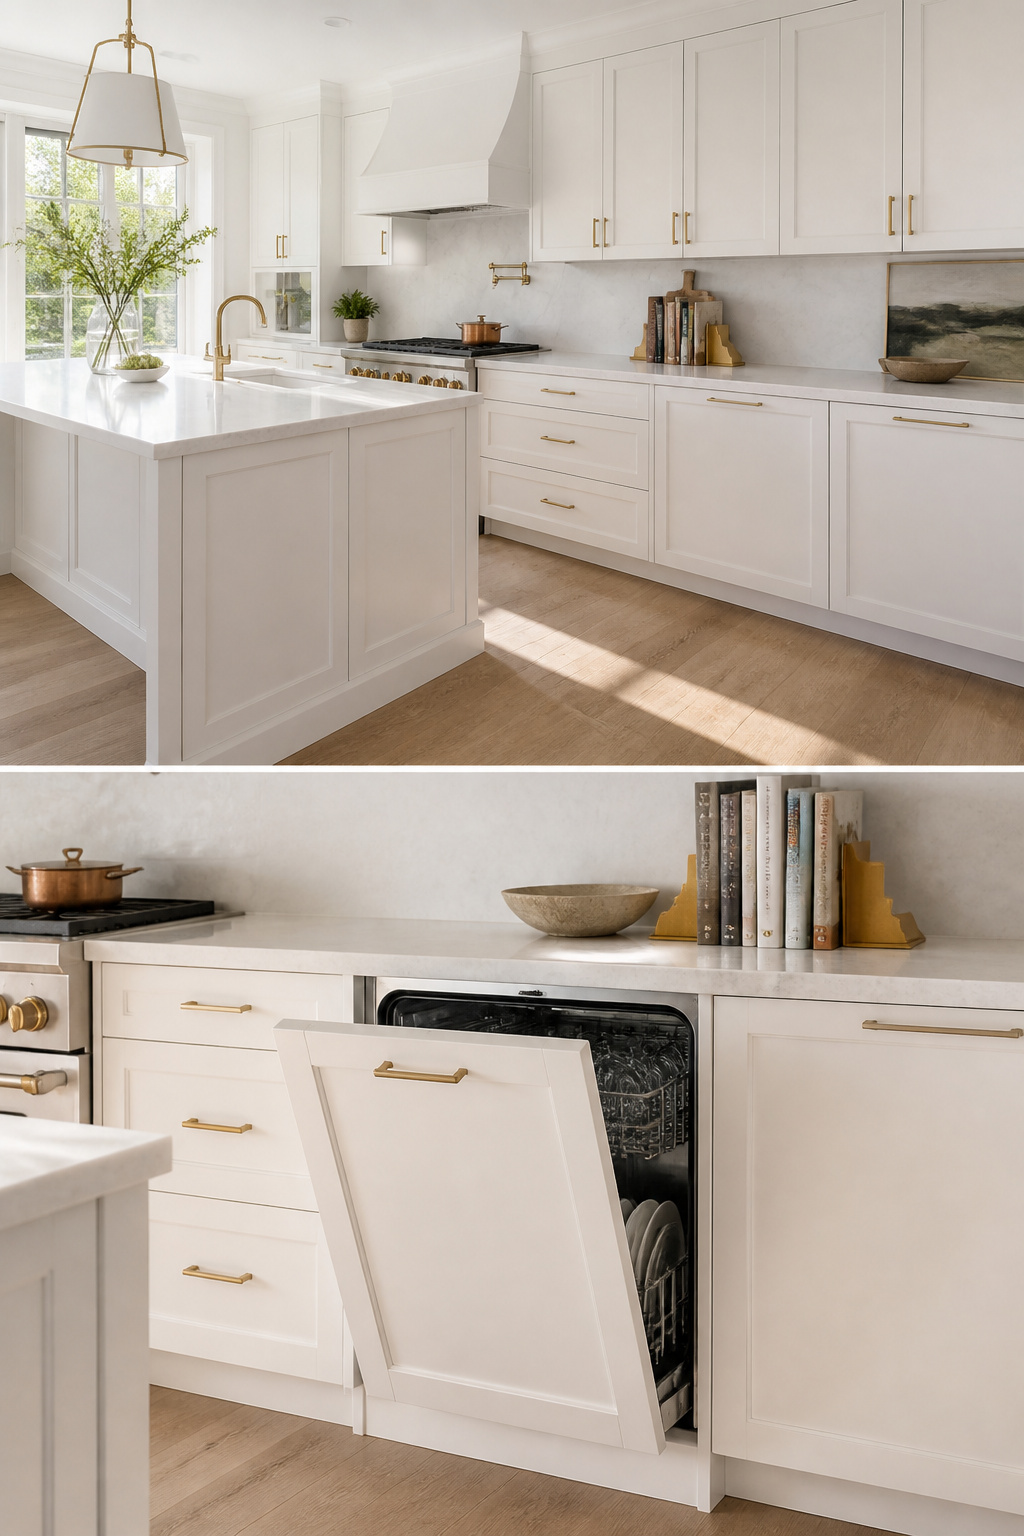
Integrating your dishwasher or refrigerator behind a matching cabinet panel is the fastest way to make a kitchen look intentional in an open plan, but panel-ready appliances cost more than standard ones and the matching panels are a separate line item on the cabinet quote. You need to order them with the kitchen so they come from the same finish batch; an almost-matching panel defeats the whole trick. For a standard 10-by-10 kitchen, the jump to true frameless handleless cabinetry with integrated appliances runs $6,500–$9,000 in cabinets alone, before the $1,500–$4,000 installation. That price band already assumes you are buying into a system designed for this, not retrofitting a standard box. If your appliance is not built panel-ready, skip it. The custom panel route exists, but the fit and hinge math get expensive fast, and for a weekend-timeline budget the numbers rarely work out.
Freestanding Flexibility
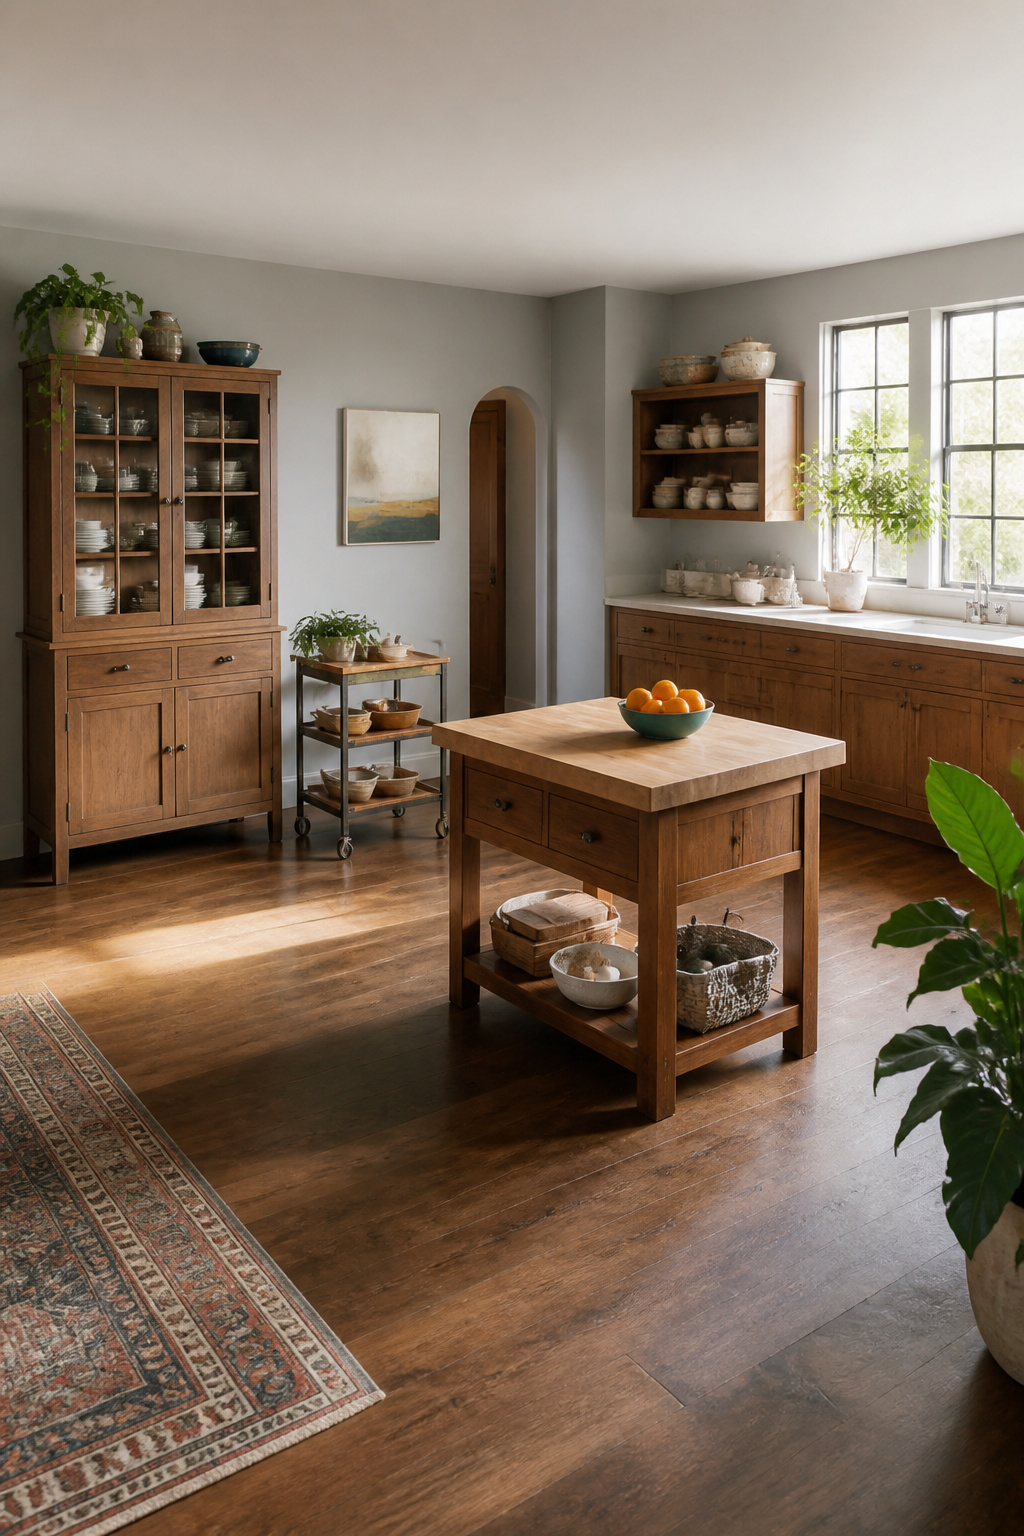
Freestanding cabinets strip the commitment out of a kitchen refresh. You bolt nothing to the wall, fill no nail holes later, and haul the whole setup with you when the lease ends or the starter home sells.
A 42-inch clearance on every side separates a useful island from a traffic jam. In tighter rooms, skip the island entirely and run a peninsula along one wall. You keep the prep surface and storage without the floor-space hunger.
Hunt for pieces that read as furniture: a butcher-block worktable with a lower shelf, a shallow hutch for plate storage, a rolling cart that tucks under a counter overhang. Arrange them in an L-shape around your main work zone and you get the same landing counter a built-in kitchen would give you, typically about 8 feet of run. The look stays looser than fitted cabinets, which matters in older rentals where landlords flinch at anything that touches original trim.
The tradeoff is visible gaps. You will not get that seamless bank-of-units look, and crumbs fall where the floor shows. Buy a long-handled dustpan and call it fair.
Shaker Cabinets and Resale
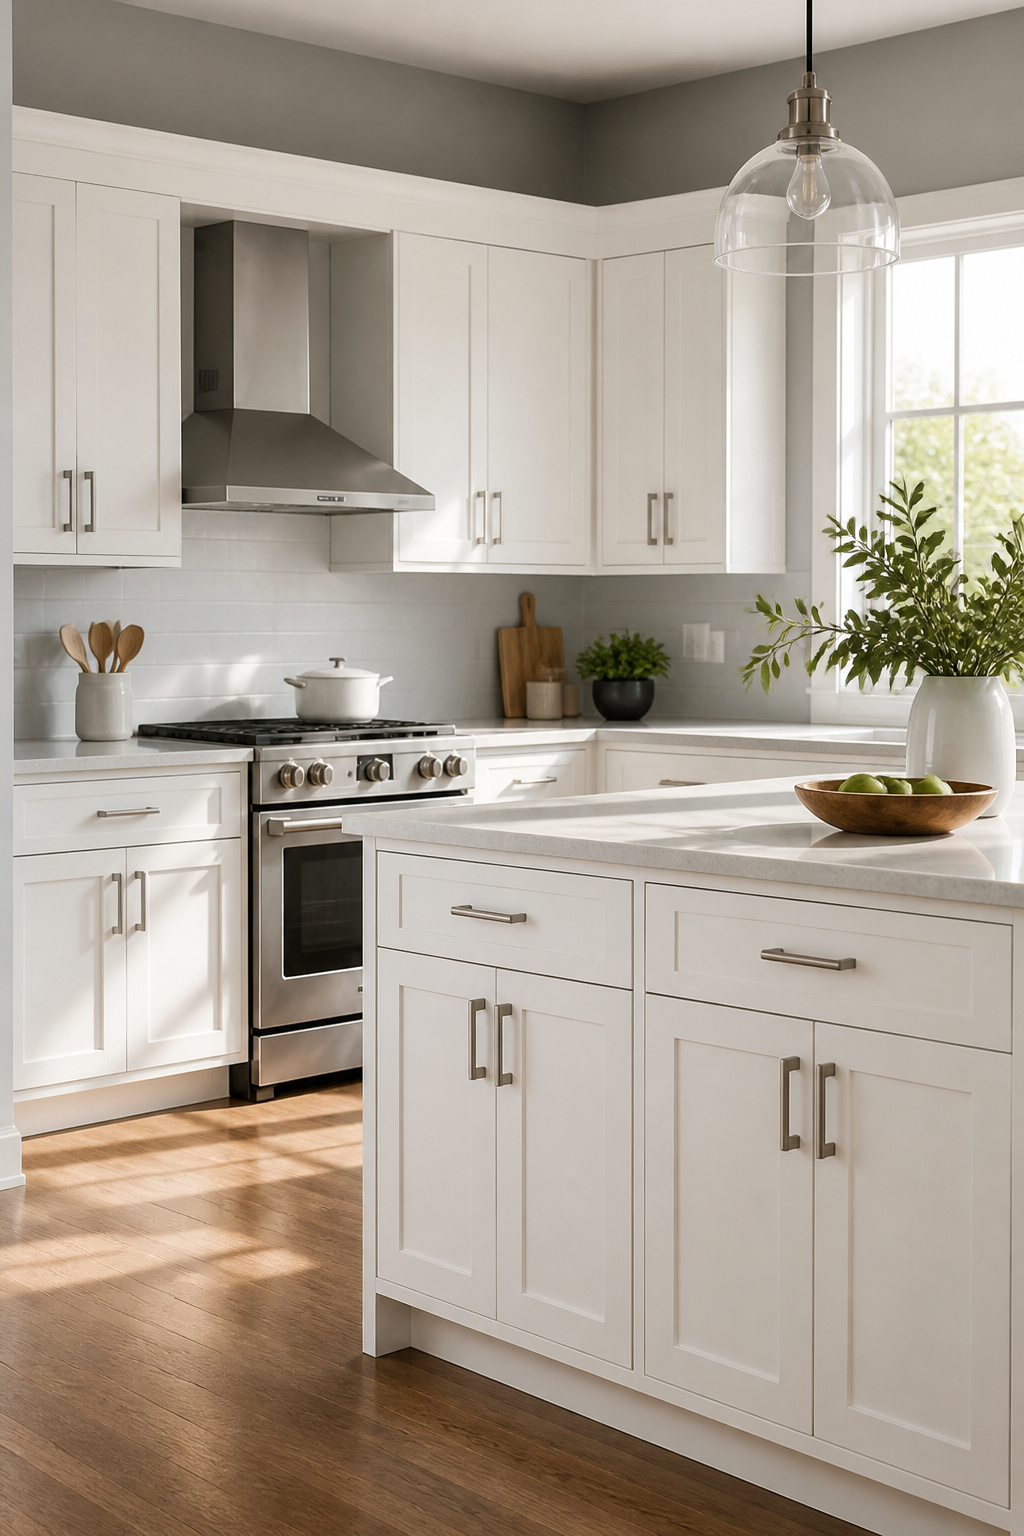
White shaker cabinets still read move-in ready to the widest pool of buyers, which is why they protect resale value better than nearly anything else you can choose. A crisp white like Fabuwood’s Allure Galaxy in Frost anchors more kitchen designs than any other door style, with 10×10 kitchens starting around $4,000. White has temperature, though, and the choice between a crisp white versus a softer warm white like Dove changes how the room photographs and feels in morning versus afternoon light. Choose the safe shaker route when you plan to sell within five years or when your home’s architecture is already doing the visual work. Deviate when you know you will stay long enough for your own preferences to outweigh resale math, or when the surrounding neighborhood rewards personality over blank-slate appeal. In either case, spend the money you save on a neutral cabinet on storage upgrades instead; ceiling-height uppers add more value than the showy finishes buyers forget by the second walkthrough.
Hardware That Elevates
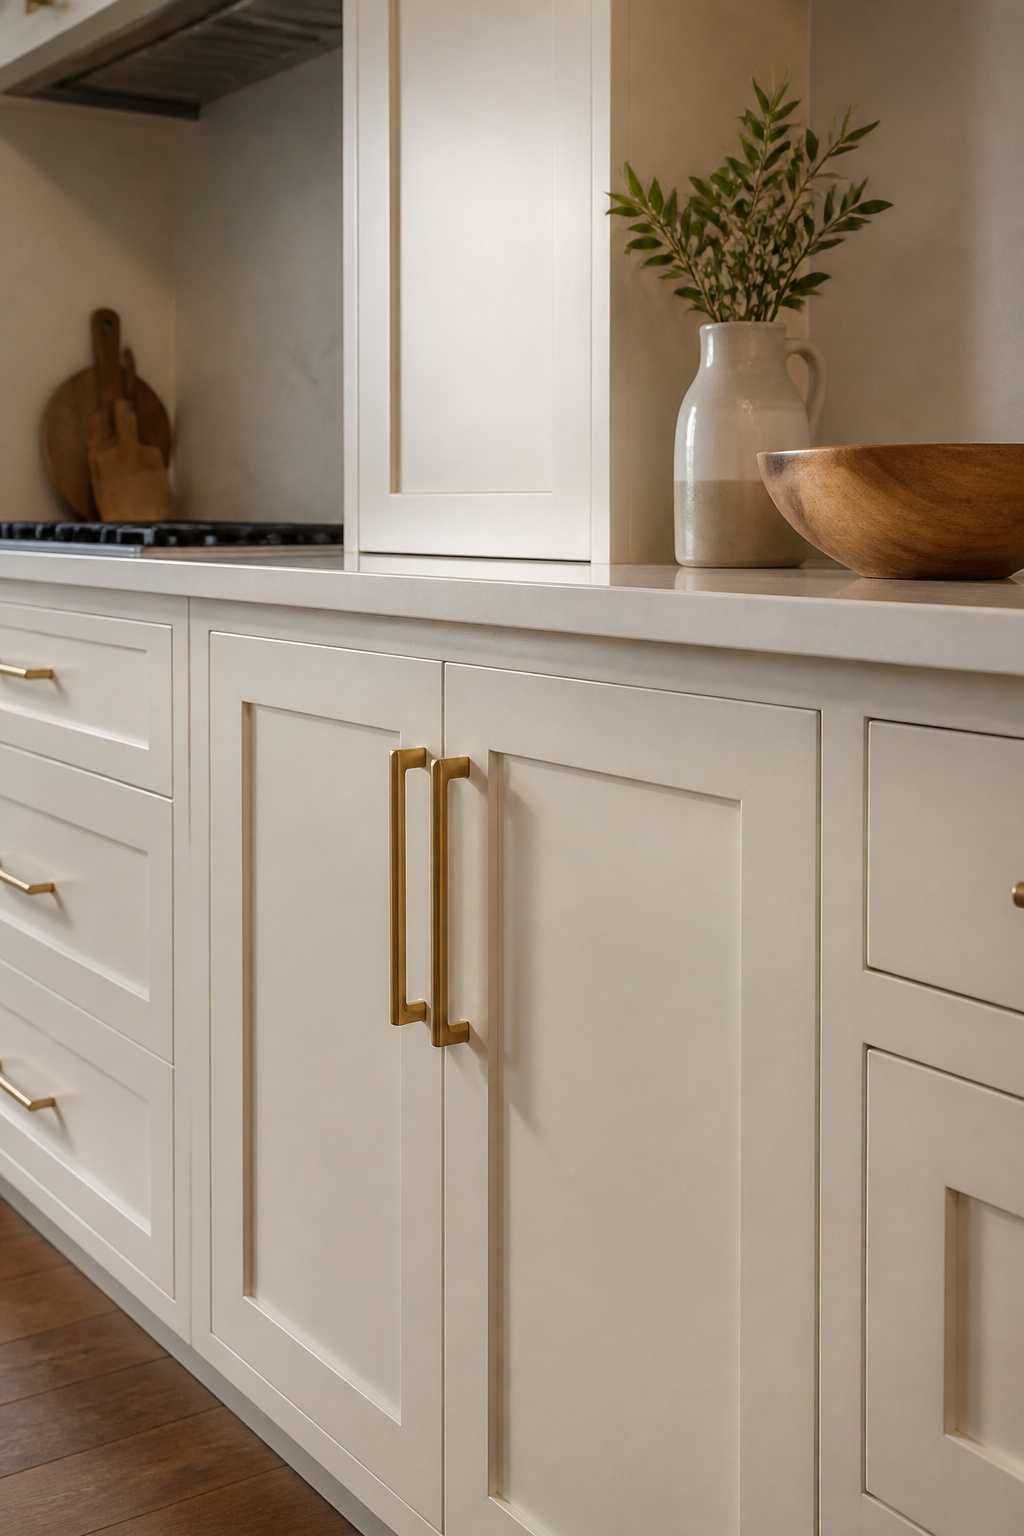
Cabinet hardware is the fastest way to change how a kitchen feels without touching a brush. A basic Shaker door with a 5–8 inch bar pull on doors and 10–16 inches on wide drawers reads as intentional, not builder-grade, because the proportion does the work.
Brushed and unlacquered brass have gone mainstream, and they are the lowest-risk upgrade here: you can swap everything in an afternoon. Mixing metals is now the norm, not the exception.
Mixing metals is apparently on the rise… If you want a masterclass in mixing metals in your kitchen cabinet idea, look no further.
For the reader, this means you can pair brass knobs on doors with black pulls on drawers and not second-guess it.
What spending more actually gets you is weight, machining, and a finish that wears in rather than off. Budget hardware often has visible seams on the back of pulls and screws that strip after one adjustment. The difference shows up in the hand more than the eye: a solid pull centers itself when you let go, and the threads grip cleanly after five swaps. Small, elegant knobs do look lost on wide drawer fronts, and long, chunky appliance pulls can overpower a small space, so match the hardware size to the surface it sits on.
Wood, Steel, and Engineered Options
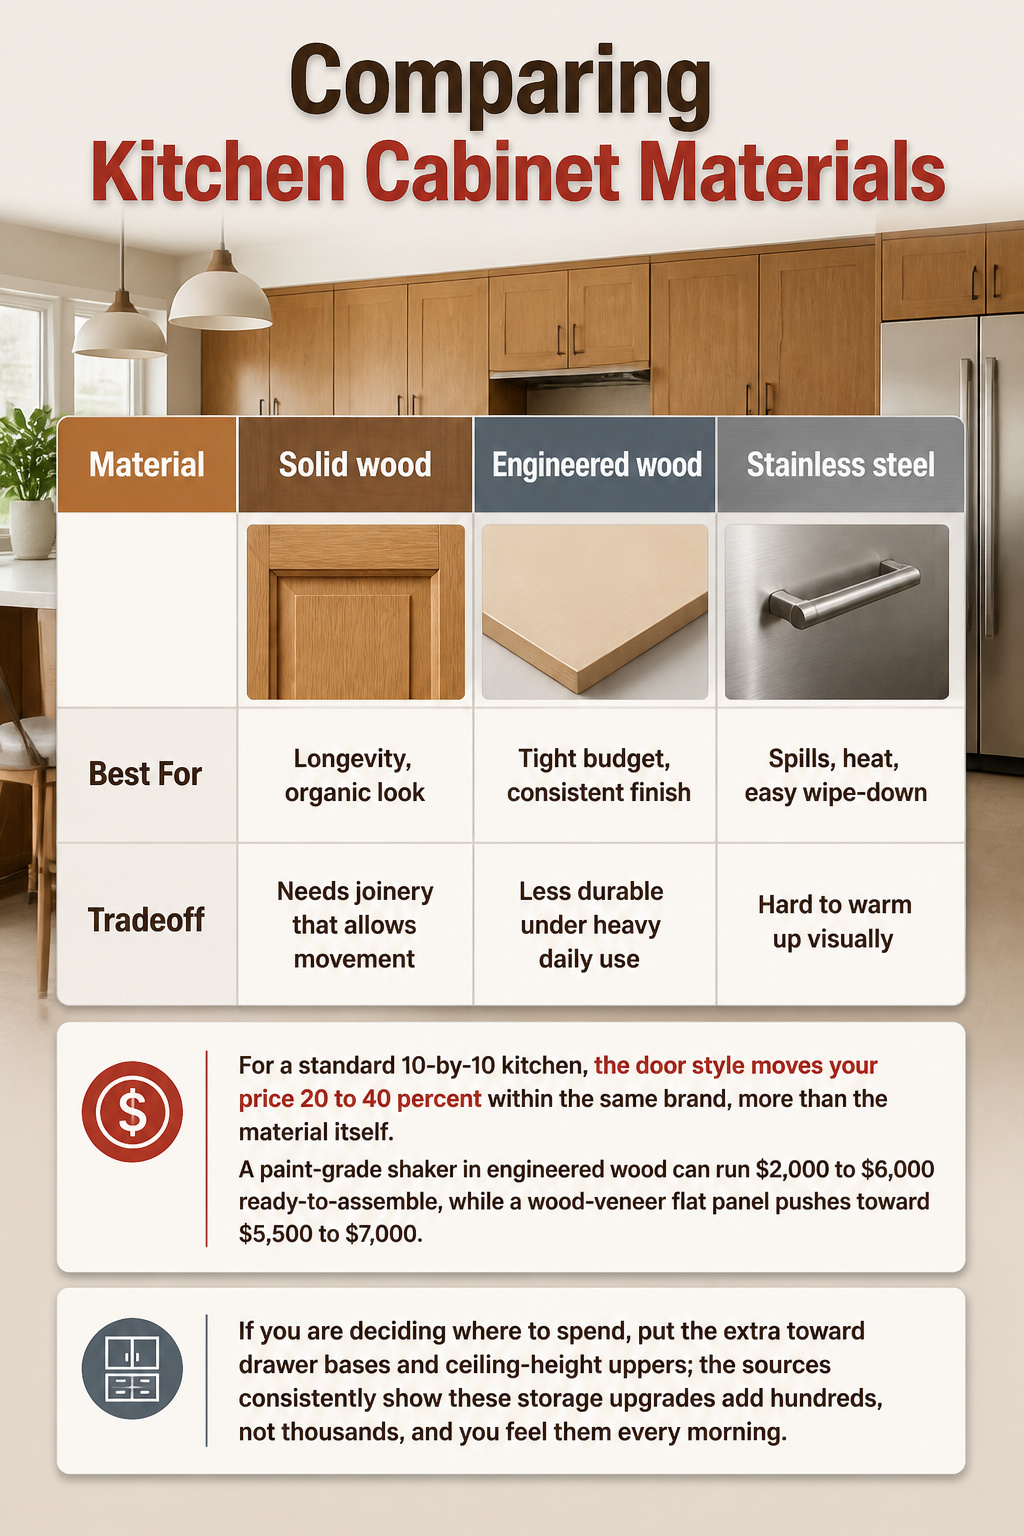
Solid wood cabinets give you a kitchen that ages well, with grain patterns that are unique to each door, but the material expands and contracts with humidity, so construction quality matters more than the species name. Oak and walnut are the usual choices, or you can paint over the grain for a different look entirely. Engineered wood, made from pressed fibers and resins, costs less and resists warping and moisture well enough for moderate use, though it will not outlast solid wood. Stainless steel handles heat and spills without much fuss, but it reads commercial unless you soften it with other materials.
| Material | Best For | Tradeoff |
|---|---|---|
| Solid wood | Longevity, organic look | Needs joinery that allows movement |
| Engineered wood | Tight budget, consistent finish | Less durable under heavy daily use |
| Stainless steel | Spills, heat, easy wipe-down | Hard to warm up visually |
For a standard 10-by-10 kitchen, the door style moves your price 20 to 40 percent within the same brand, more than the material itself. A paint-grade shaker in engineered wood can run $2,000 to $6,000 ready-to-assemble, while a wood-veneer flat panel pushes toward $5,500 to $7,000. If you are deciding where to spend, put the extra toward drawer bases and ceiling-height uppers; the sources consistently show these storage upgrades add hundreds, not thousands, and you feel them every morning.
Pull-Out Shelves and Vertical Tricks
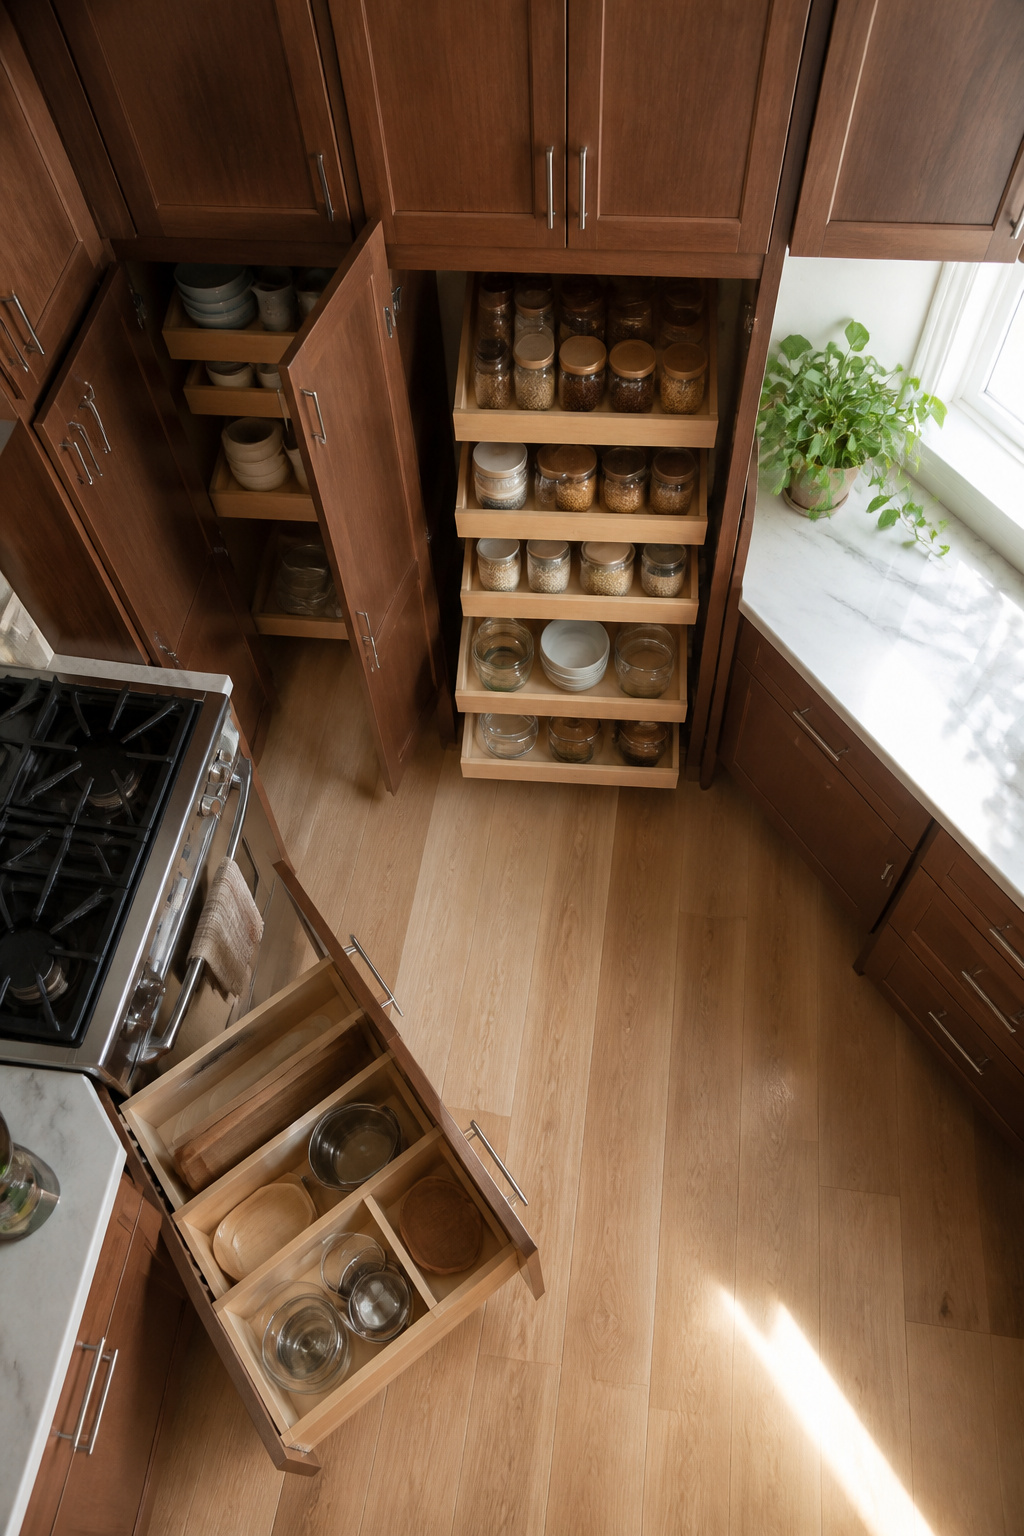
Pull-out shelves change how a cabinet works more than anything you can do to the door. A retrofit kit runs about $30–$60 per shelf and installs with a drill, four screws, and a free afternoon. The catch is depth: most stock cabinets are 24 inches deep, and a full-extension slide needs every bit of that to clear the frame. Measure the opening, not the box, or you will end up with a shelf that stops six inches short of the back wall.
Ceiling-height uppers give you the same vertical gain as a gut renovation without touching the footprint. A quality plywood cabinet prepped for glass starts around $150, and the local shop cuts the pane for another $15–$40. The question is whether you retrofit or replace. Existing uppers can usually accept a new crown-molding buildup to fake the height, but true floor-to-ceiling needs new boxes; the old ones rarely line up with ceiling lines that were never level to begin with. Two ways to play this: run the crown and paint it to match for the look, or pull the uppers and order new ones if you need the storage. The crown wins on a weekend budget. New boxes win if you are already replacing counters and need the continuity to look intentional, not patched.
Frequently Asked Questions
What are the best kitchen cabinet colors that are timeless?
White and off-white remain the safest long-term bets, though warm neutrals like khaki and mushroom are gaining ground fast. In 2026, natural wood tones actually edged out white by a single percentage point in Houzz data, 29 to 28. Light grays, soft greens, navy blue, and even black also hold up well across decades if you want something beyond the classics.
What color kitchen cabinets are low maintenance?
Dark colors hide daily grime best: forest green, charcoal gray, dark brown, and black all collect less visible dirt than lighter shades. The tradeoff is that wear itself becomes harder to spot until it is suddenly obvious, so a scrubbable satin or semi-gloss finish on a quality paint like Benjamin Moore’s Advance line matters more than the exact hue you pick.
How can I maximize storage in a small kitchen?
Trade one wall of standard uppers for a single 24-inch-deep floor-to-ceiling pantry cabinet; it holds about as much as three wall cabinets while losing visual bulk. Mix the formats inside it, pair it with open shelving for daily dishes elsewhere, and keep closed lowers for clutter you do not want to see. One full-height run is usually enough; a second turns the room into a corridor of doors.
What are the most popular colors for kitchen cabinets?
Natural wood tones and white are effectively tied at the top in 2026, with wood at 29% and white at 28% among Houzz renovators. For two-tone kitchens, wood-toned lowers or islands lead contrast choices at 37%, well ahead of blue at 19% and green at 14%. The old white-over-navy formula has shifted to light painted uppers over wood-grain or deep-toned lowers.
Are two-tone kitchens still in style?
Yes, but the formula has matured. Wood-toned lowers or islands now lead contrast choices at 37% among Houzz renovators, with blue trailing at 19% and green at 14%. The current version pairs light painted uppers with wood-grain or deep-toned lowers, which grounds the room without the hard graphic contrast of the earlier white-over-navy era. Keep the wall color quiet and let the cabinets carry the tension.